Company Attributes
The Company Attributes feature lets administrators extend the company profile with custom fields. This is useful for capturing extra business information — such as industry, tax registration, or any organization-specific detail — that goes beyond the default company fields.
Custom attributes can optionally be shown on the storefront company registration form and are displayed on the company profile.
Navigate to Admin Panel → B2B → Company Attributes.
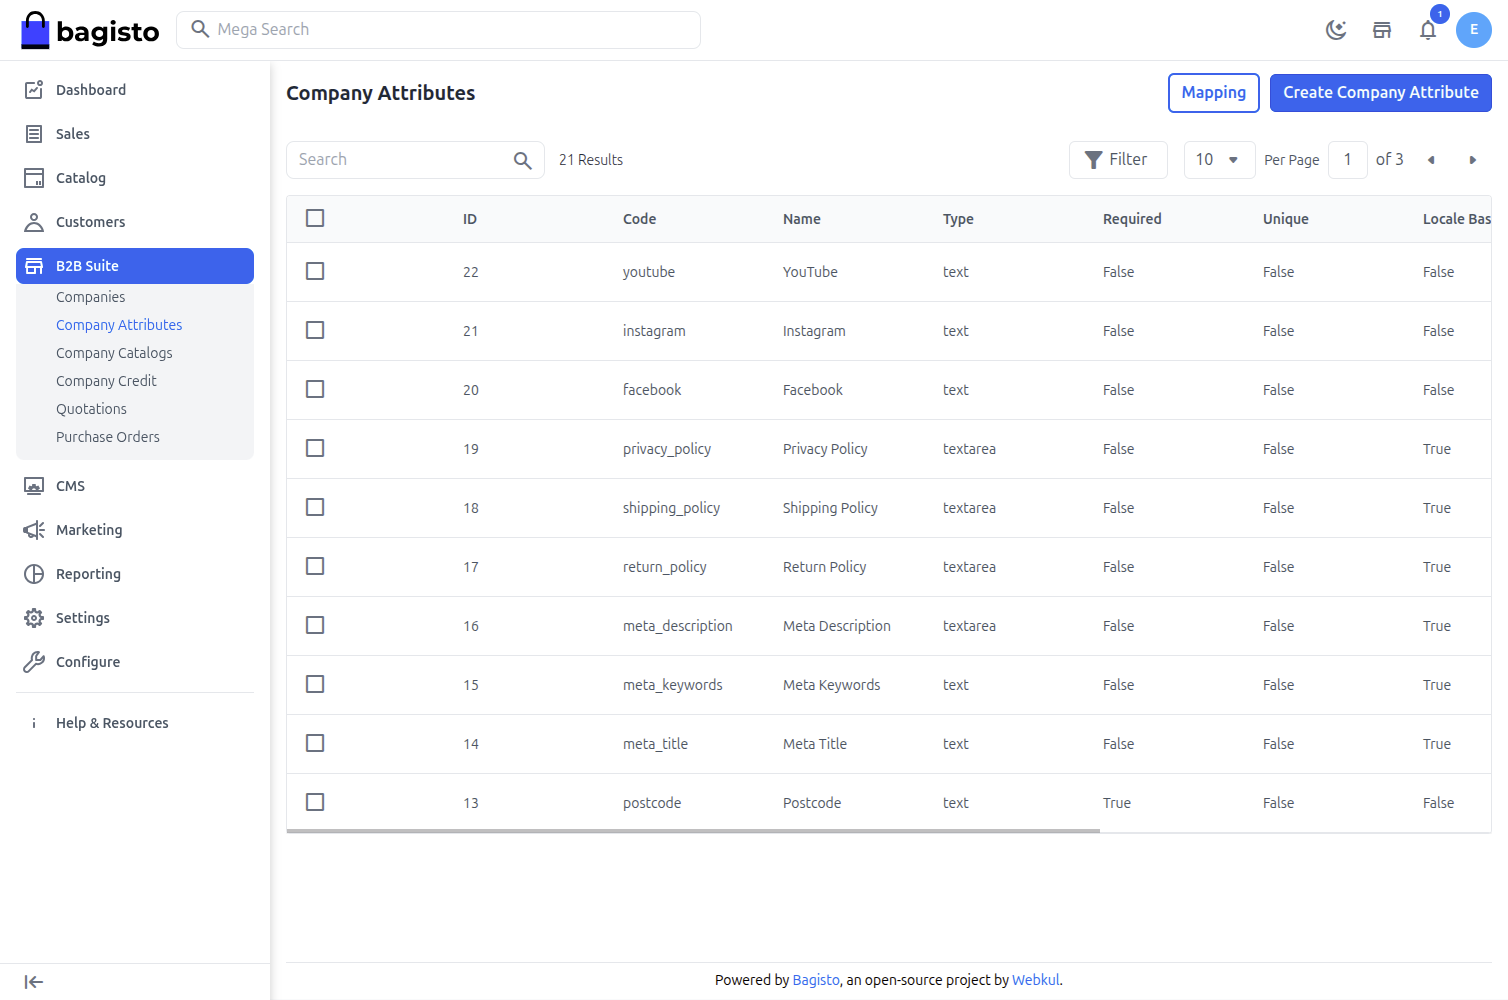
Company Attributes List
This page lists all custom company attributes along with their code, type and key properties (Required, Unique, Channel Based, Locale Based).
From here you can Create Company Attribute, Edit or Delete existing attributes, and open the Mapping screen to organize attributes into groups.
Create a Company Attribute
Step: 1 Click Create Company Attribute to open the attribute form.
Step: 2 Fill in the attribute details under the General section.
1) Label – The display name shown to admins and customers.
2) Attribute Code – A unique machine-readable code for the attribute.
3) Attribute Type – The input type. Supported types include Text, Textarea, Price, Boolean, Select, Multiselect, Date, Datetime, Email, Checkbox, File and Image.
4) Default Value – An optional value used when none is provided.

Step: 3 Configure the attribute options under the Configuration section.
1) Is Required – Make the field mandatory.
2) Is Unique – Require the value to be unique across companies.
3) Visible on Signup Page – Show the field on the storefront company registration form.
4) Value Per Channel / Value Per Locale – Allow the value to differ per channel or per locale.
5) Input Validation – Apply validation rules such as Numeric, Email, Decimal, URL or a custom Regex.
Note: For Select and Multiselect types, use Add Attribute Options to define the available options.
Step: 4 Click Save Company Attribute to create the attribute.
Attribute Mapping
The Mapping screen controls how attributes are grouped and arranged on the company create/edit form.
Step: 1 From the Company Attributes list, click Mapping.
Step: 2 Create groups with Add Group, then drag unassigned attributes into the groups or columns to arrange the layout.
Step: 3 Click Save Mapping to apply the changes.

Note: Custom attributes appear in the Custom Attributes section of the admin company form and (when enabled) on the storefront registration form and company profile.