Channels
A channel is a storefront. Each channel has its own web address, theme, root category, languages, currencies, logo and home page SEO, and you manage every channel from the same admin panel. Use channels to run separate stores for different brands, regions or markets on one Bagisto installation.
Every store starts with one channel, Default. You can edit it and add more channels.
Before you start
A channel uses records that you create elsewhere, so set these up first:
- The locales and currencies the channel offers.
- The inventory sources the channel sells stock from. Only active sources can be selected.
- The root category whose subcategories form the storefront menu. Only top-level categories can be selected. See Categories.
Your channels
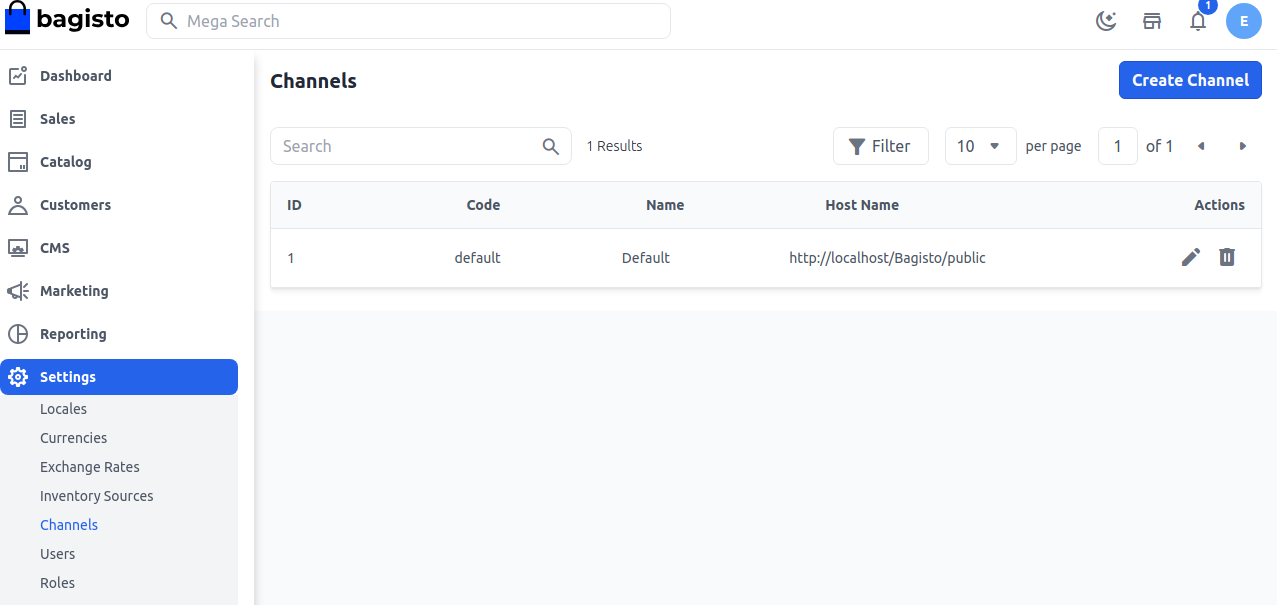
Go to Settings >> Channels to see every channel with its ID, Code, Name and Host Name. Search by code, name or hostname, or use Filter to narrow the list.
Create a channel
Go to Settings >> Channels.
Click Create Channel.
In General, enter the Code and Name, and optionally a Description.
Under Inventory Sources, select the sources this channel sells stock from.
Choose the Root Category.
Enter the Hostname.
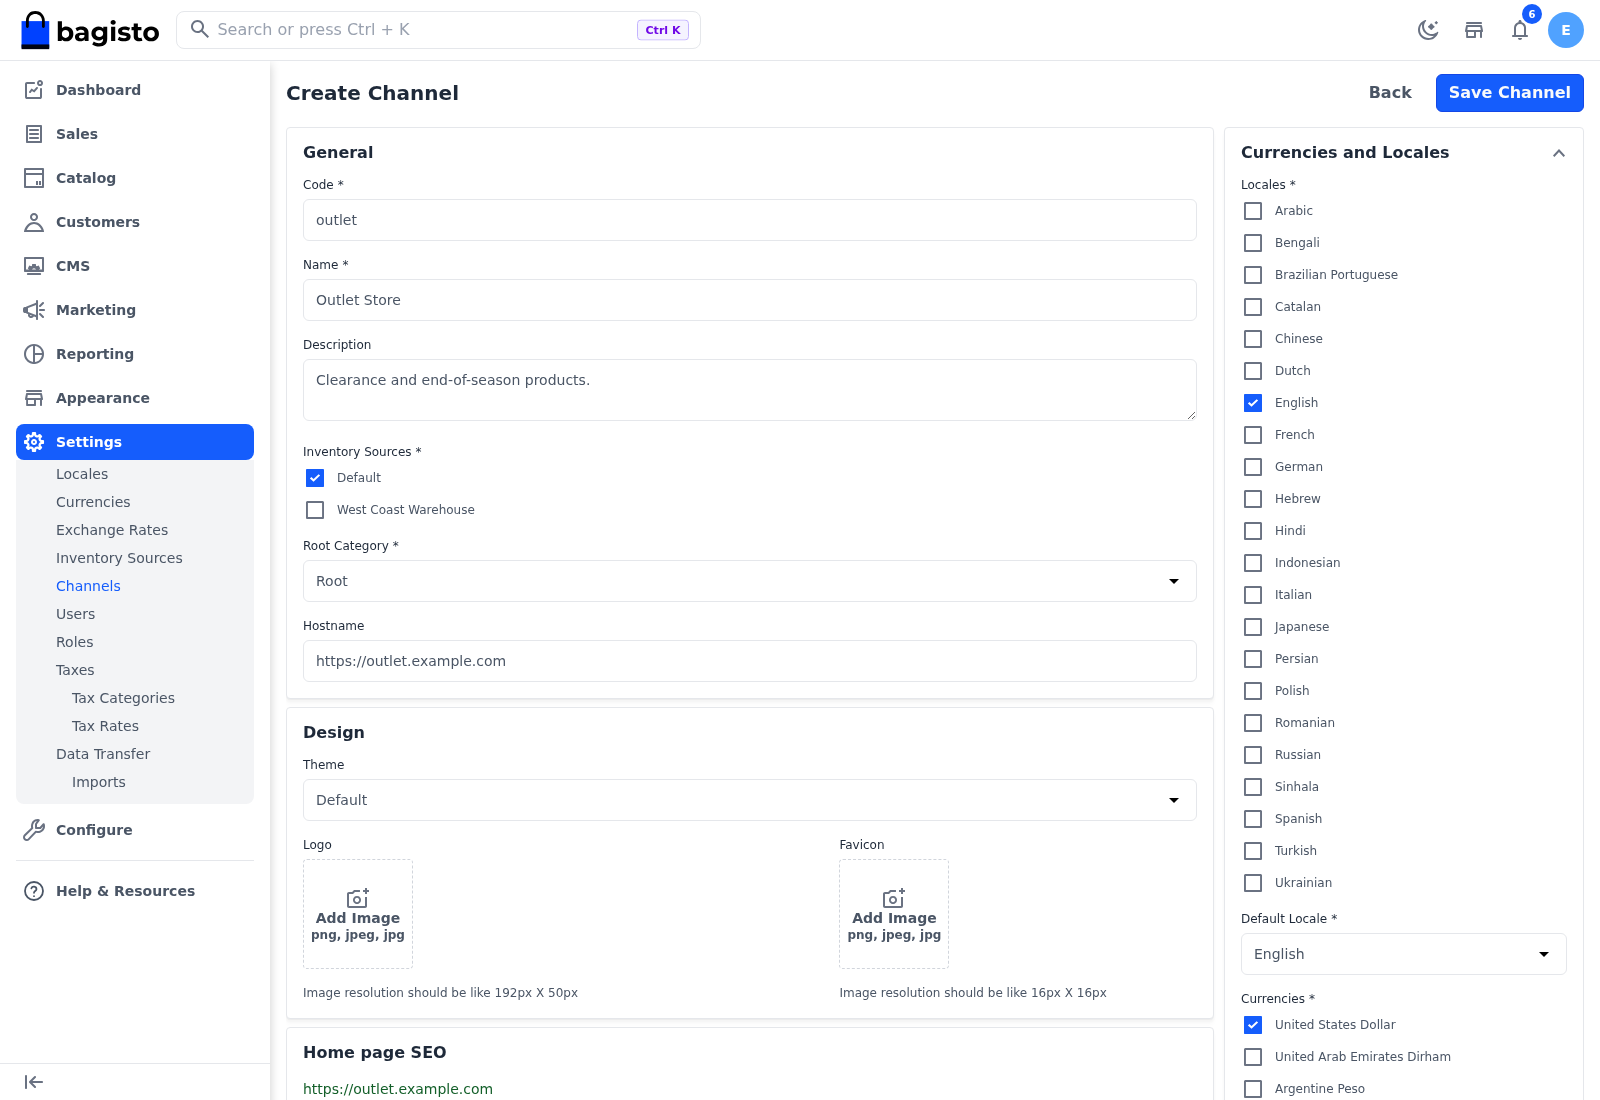
In the right-hand Currencies and Locales panel, select the Locales and choose the Default Locale.
Select the Currencies and choose the Default Currency.
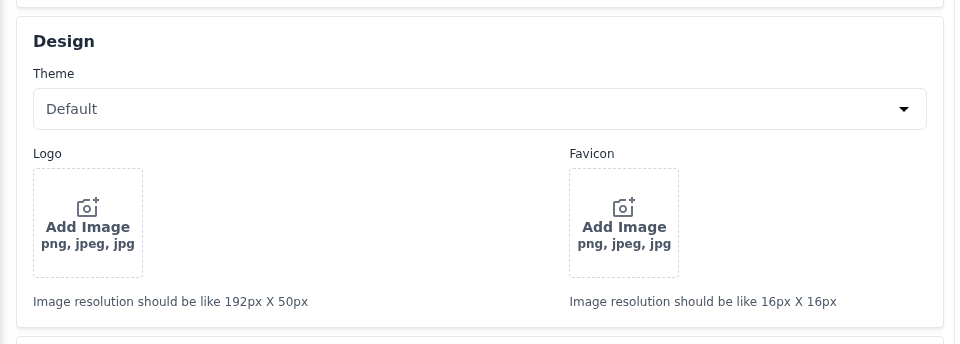
In Design, choose the Theme, and upload a Logo and a Favicon.
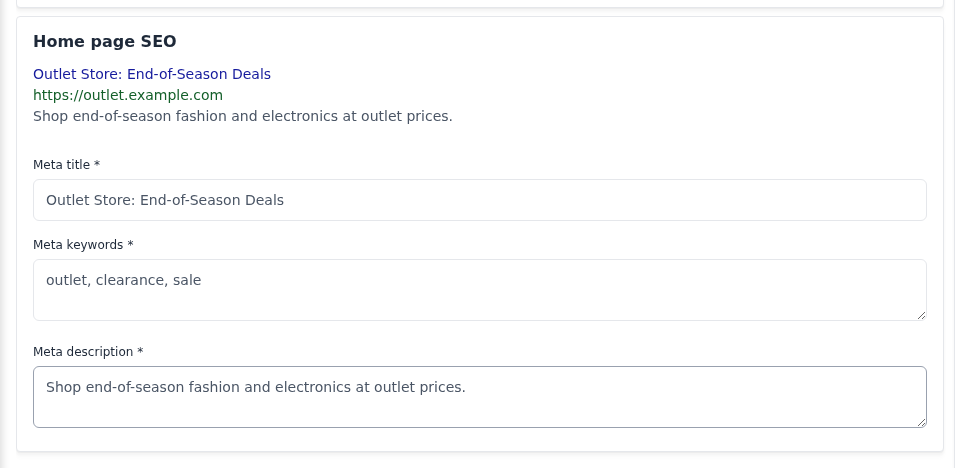
In Home page SEO, enter the Meta title, Meta keywords and Meta description.
Optionally, set up maintenance mode in the right-hand Settings panel.
Click Save Channel.
You return to Channels, where the message Channel created successfully. appears and the new channel is listed.
After you save
- When a visitor opens the channel's Hostname, Bagisto shows that channel's storefront. If an address doesn't match any channel, the first channel in the list is shown.
- The storefront menu shows the subcategories of the channel's Root Category.
- A product appears on the channel's storefront only when the channel is selected in the product's Channels section.
- Many settings under Configure can differ per channel. When your store has more than one channel, choose the channel at the top of the configuration page.
Channel fields
General
| Field | What to enter |
|---|---|
| Code | A unique code for the channel, such as outlet. Use at least two characters: start with a letter, then letters, numbers or underscores. You can't change the code later. |
| Name | The channel's name, such as Outlet Store. |
| Description | Optional notes about the channel. |
| Inventory Sources | The inventory sources this channel sells stock from. Select at least one. Only active sources are listed. |
| Root Category | The category whose subcategories form the storefront menu. Only top-level categories are listed. |
| Hostname | The address of the storefront, such as https://outlet.example.com, with no slash at the end. Two channels can't share a hostname, and the domain must point to your Bagisto server. |
Currencies and Locales
| Field | What to enter |
|---|---|
| Locales | The languages shoppers can choose. Select at least one. |
| Default Locale | The language the storefront opens in. Choose one of the selected locales, or the channel isn't saved. |
| Currencies | The currencies shoppers can choose. Select at least one. |
| Default Currency | The currency prices are shown in until the shopper chooses another. Choose one of the selected currencies. This isn't your store's base currency, which product prices are entered in. See Currencies. |
Design
| Field | What to enter |
|---|---|
| Theme | The storefront theme. You choose it here only when you create the channel. After that, the edit page shows the current theme with a link to Appearance >> Themes, where you change it. See Themes & Sections. |
| Logo | The logo shown in the storefront header. Use a BMP, JPEG, JPG, PNG or WEBP image. A size of 192 × 50 px is recommended. |
| Favicon | The small icon shown in the browser tab. Use an ICO, BMP, JPEG, JPG, PNG or WEBP image. A size of 16 × 16 px is recommended. |
Home page SEO
The preview at the top of the section shows how the home page may appear in search results, and updates as you type. All three fields are required.
| Field | What to enter |
|---|---|
| Meta title | The title of the home page in search results. |
| Meta keywords | Keywords for the home page. |
| Meta description | The short summary shown under the title in search results. |
Maintenance mode
Maintenance mode shows visitors a maintenance page instead of the channel's storefront while you work on it. The admin panel keeps working.
Go to Settings >> Channels.
Click the edit icon of the channel.
In Maintenance Mode, enter the Message visitors should see.
Optionally, in Allowed IPs, enter the IP addresses that can still browse the storefront, such as your office's, so you can check your changes. Separate several addresses with commas.
Switch Status on.
Click Save Channel.
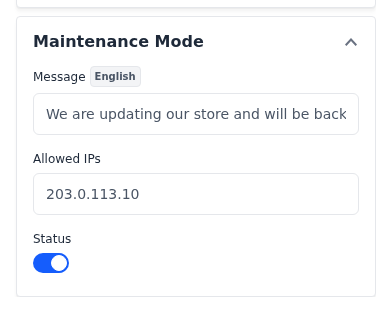
Visitors now see a 503 Service Unavailable page with your message and a Go To Home button. If Message is empty, a standard message says the store is temporarily down for maintenance.
- Enter each allowed address in full, such as
203.0.113.10. Address ranges don't work. - Being signed in to the admin panel doesn't let you see the storefront. Add your own IP address to Allowed IPs instead.
- To bring the storefront back, switch Status off and save the channel.
- When you create a channel, the same fields are in the Settings section.
Several channels
After you save a channel, open the storefront of every other channel you put in maintenance and check that it still shows the maintenance page.
Edit a channel
- Go to Settings >> Channels.
- Click the edit icon of the channel.
- If your store has more than one locale, choose the language at the top of the page. Name, Description, the home page SEO fields and the maintenance Message are saved per language.
- Make your changes.
- Click Save Channel.
The message Update Channel Successfully appears. The Code can't be changed, and the theme is changed under Appearance >> Themes.
Delete a channel
- Go to Settings >> Channels.
- Click the delete icon of the channel.
- Click Agree to confirm.
The message Channel deleted successfully. appears.
- The store's Default channel can't be deleted.
- A channel that has EU withdrawal requests can't be deleted. Channel Delete Failed appears instead.
- Deleting a channel also deletes its theme sections, newsletter subscriptions and search terms, and the carts and wishlists shoppers had on it. It's removed from products, CMS pages, promotions and sitemaps.
- Orders and customers from the channel are kept.