
Payment Methods
Payment methods are the ways shoppers can pay at checkout. Bagisto comes with nine, and each has its own section under Configure >> Sales >> Payment Methods, in the order below.
| Method | How shoppers pay | What you need |
|---|---|---|
| Stripe | By card, on Stripe's payment page | Stripe secret and publishable keys |
| Razorpay | In a Razorpay payment window | Razorpay client ID and secret, and INR as your base currency |
| PayU | On PayU's payment page | PayU merchant key and salt, and INR as your base currency |
| PhonePe | On PhonePe's payment page | PhonePe client ID, client secret and merchant ID, and INR as your base currency |
| PayPal | With PayPal's buttons on the checkout page | The client ID and secret of a PayPal app |
| PayPal Standard | On PayPal's website | The email address of a PayPal business account |
| PayGlocal | On PayGlocal's payment page | A PayGlocal merchant ID, key IDs and key files |
| Cash On Delivery | In cash when the order arrives | Nothing extra. It's offered only for carts of shippable products. |
| Money Transfer | By bank transfer or cheque | The name and address payments are sent to |
Switch off the methods you haven't set up
In a new store, Status is on for all nine methods. Stripe, Razorpay, PayU, PhonePe and PayGlocal come with placeholder keys, so they appear at checkout and fail when a shopper tries to pay. Before you take orders, switch off every method you haven't set up with your own credentials.
Offer a payment method
- Go to Configure >> Sales >> Payment Methods.
- If your store has more than one channel or language, choose them at the top of the screen.
- In the method's section, switch Status on. The method's other settings appear.
- Enter the Title shoppers see at checkout.
- Optionally, enter a Description.
- Optionally, click Add Image under Logo and choose the logo.
- Enter the settings of that method, described in its section below.
- Enter the Sort Order.
- Click Save Configuration.
To stop offering a method, switch its Status off and save. At least one payment method has to stay on: saving with all of them switched off shows Enable at least one payment method.
Settings every method has
| Setting | What it does |
|---|---|
| Status | Offers the method at checkout. The other settings appear only while it's on. |
| Title | The name of the method at checkout. Required while Status is on. |
| Description | A short line shown under the title at checkout. |
| Logo | The logo on the method's card at checkout. Without one, Bagisto shows its built-in logo for the method. A size of 55 × 45 pixels is recommended. |
| Sort Order | The position of the method at checkout. Methods with a lower number come first. Required while Status is on. |
At checkout, shoppers see each method you offer as a card with its title and description, in sort order.
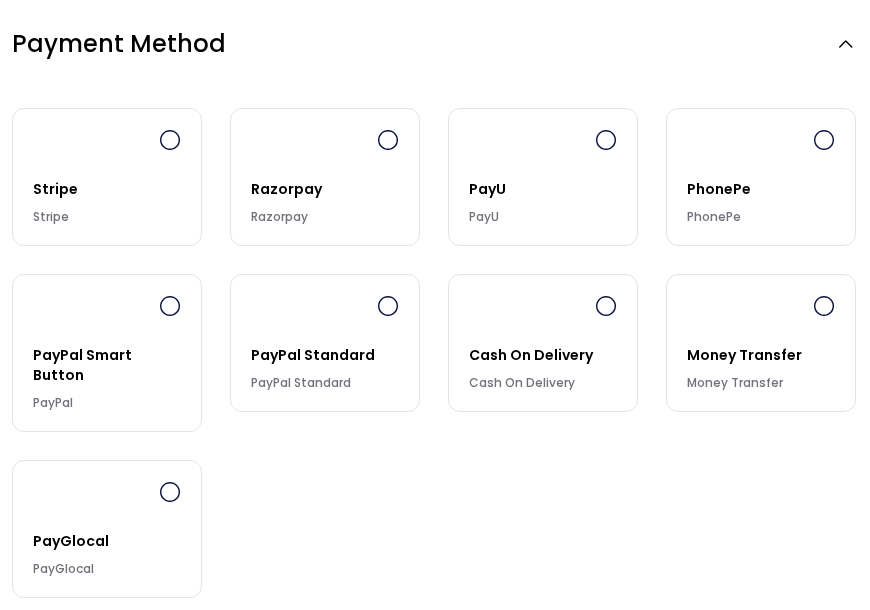
All settings are per channel. Title, Description and the Cash On Delivery Instructions are also per language.
Sandbox mode
Every method except Cash On Delivery and Money Transfer has a Sandbox switch, and it's on in a new store. While it's on, payments go to the gateway's test environment, so no real money is taken. Stripe and Razorpay have separate fields for test keys, which are used while Sandbox is on. The other gateways use the same credential fields in both modes, so enter the test credentials the gateway gives you while you test, and your live credentials when you switch Sandbox off.
What happens when a shopper pays online
With Stripe, Razorpay, PayU, PhonePe, PayPal and PayGlocal, the order is created once the gateway confirms the payment. It's invoiced automatically and set to Processing, or to Completed when nothing in it needs shipping. If the shopper cancels or the payment fails, they return to the cart. With PayPal, a shopper who closes the PayPal window stays on the checkout page and can try again. PayPal Standard works differently; see PayPal Standard.
Stripe
Stripe takes card payments. After clicking Place Order, shoppers pay on Stripe's secure payment page and return to the store.
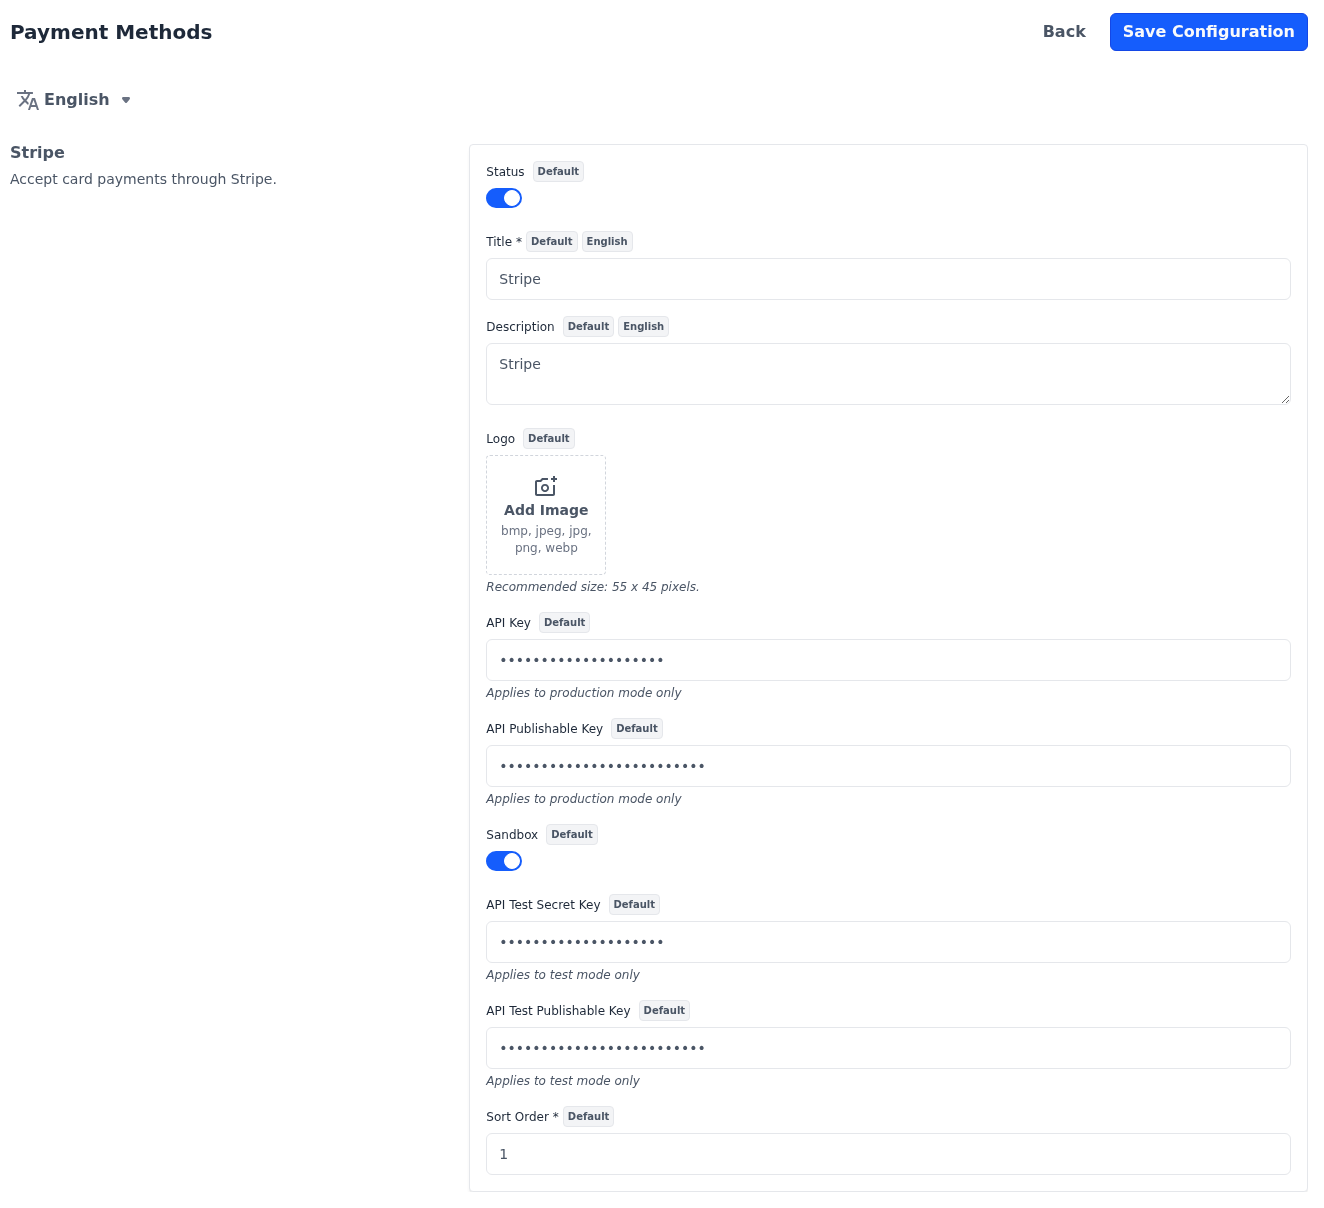
| Setting | What it does |
|---|---|
| API Key | The live secret key from your Stripe account, used while Sandbox is off. |
| API Publishable Key | The live publishable key from your Stripe account, used while Sandbox is off. |
| Sandbox | Uses the test keys below, so no real payments are taken. |
| API Test Secret Key | The test secret key from your Stripe account, used while Sandbox is on. |
| API Test Publishable Key | The test publishable key from your Stripe account, used while Sandbox is on. |
Stripe appears at checkout only while both keys for the current mode have a value.
Razorpay
Razorpay takes payments in Indian rupees. After clicking Place Order, shoppers pay in a Razorpay payment window. If your store's base currency isn't INR, switch Razorpay off: it still shows at checkout, but the order can't be placed with it.
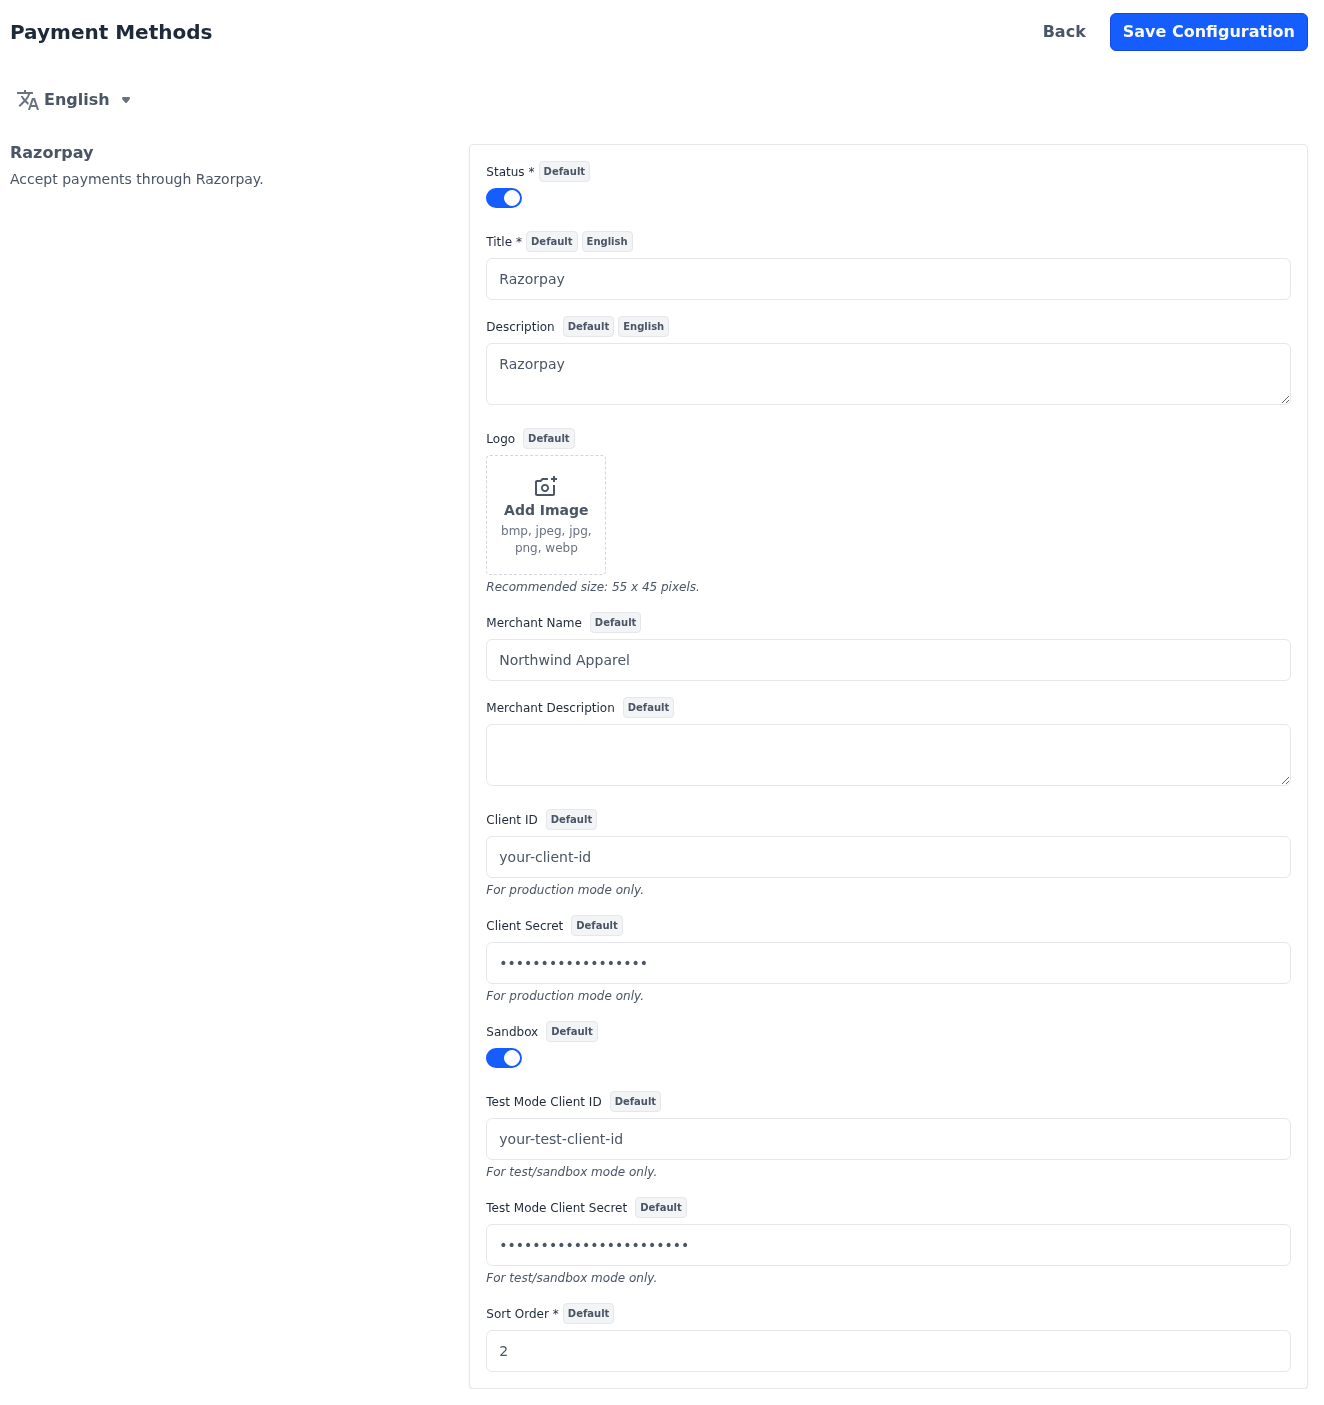
| Setting | What it does |
|---|---|
| Merchant Name | Your business name, shown in the Razorpay payment window. Up to 200 characters. |
| Merchant Description | A short description shown in the payment window. Up to 200 characters. |
| Client ID and Client Secret | Your live API keys from Razorpay, used while Sandbox is off. |
| Sandbox | Uses the test keys below, so no real payments are taken. |
| Test Mode Client ID and Test Mode Client Secret | Your test API keys from Razorpay, used while Sandbox is on. |
Razorpay appears at checkout only while the client ID and secret for the current mode have a value: the test pair while Sandbox is on, the live pair while it's off.
PayU
PayU takes payments in Indian rupees. After clicking Place Order, shoppers are taken to PayU to pay. If your store's base currency isn't INR, switch PayU off: it still shows at checkout, but the order can't be placed with it.
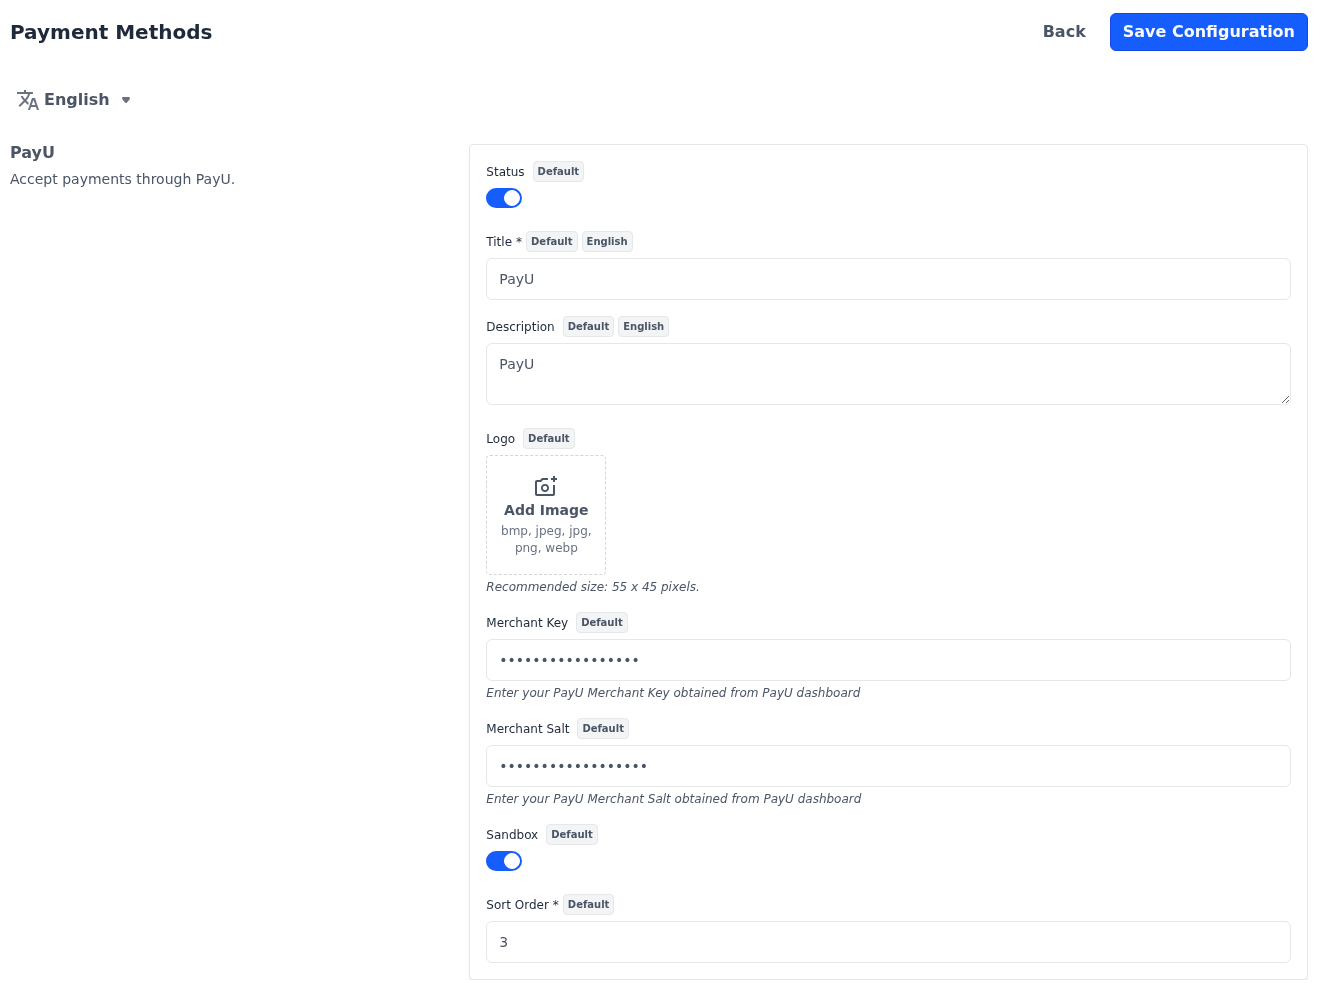
| Setting | What it does |
|---|---|
| Merchant Key | The merchant key from your PayU dashboard. |
| Merchant Salt | The merchant salt from your PayU dashboard. |
| Sandbox | Sends payments to PayU's test environment. |
PayU appears at checkout only while Merchant Key and Merchant Salt have a value.
PhonePe
PhonePe takes payments in Indian rupees. After clicking Place Order, shoppers are taken to PhonePe to pay. If your store's base currency isn't INR, switch PhonePe off: it still shows at checkout, but the order can't be placed with it.
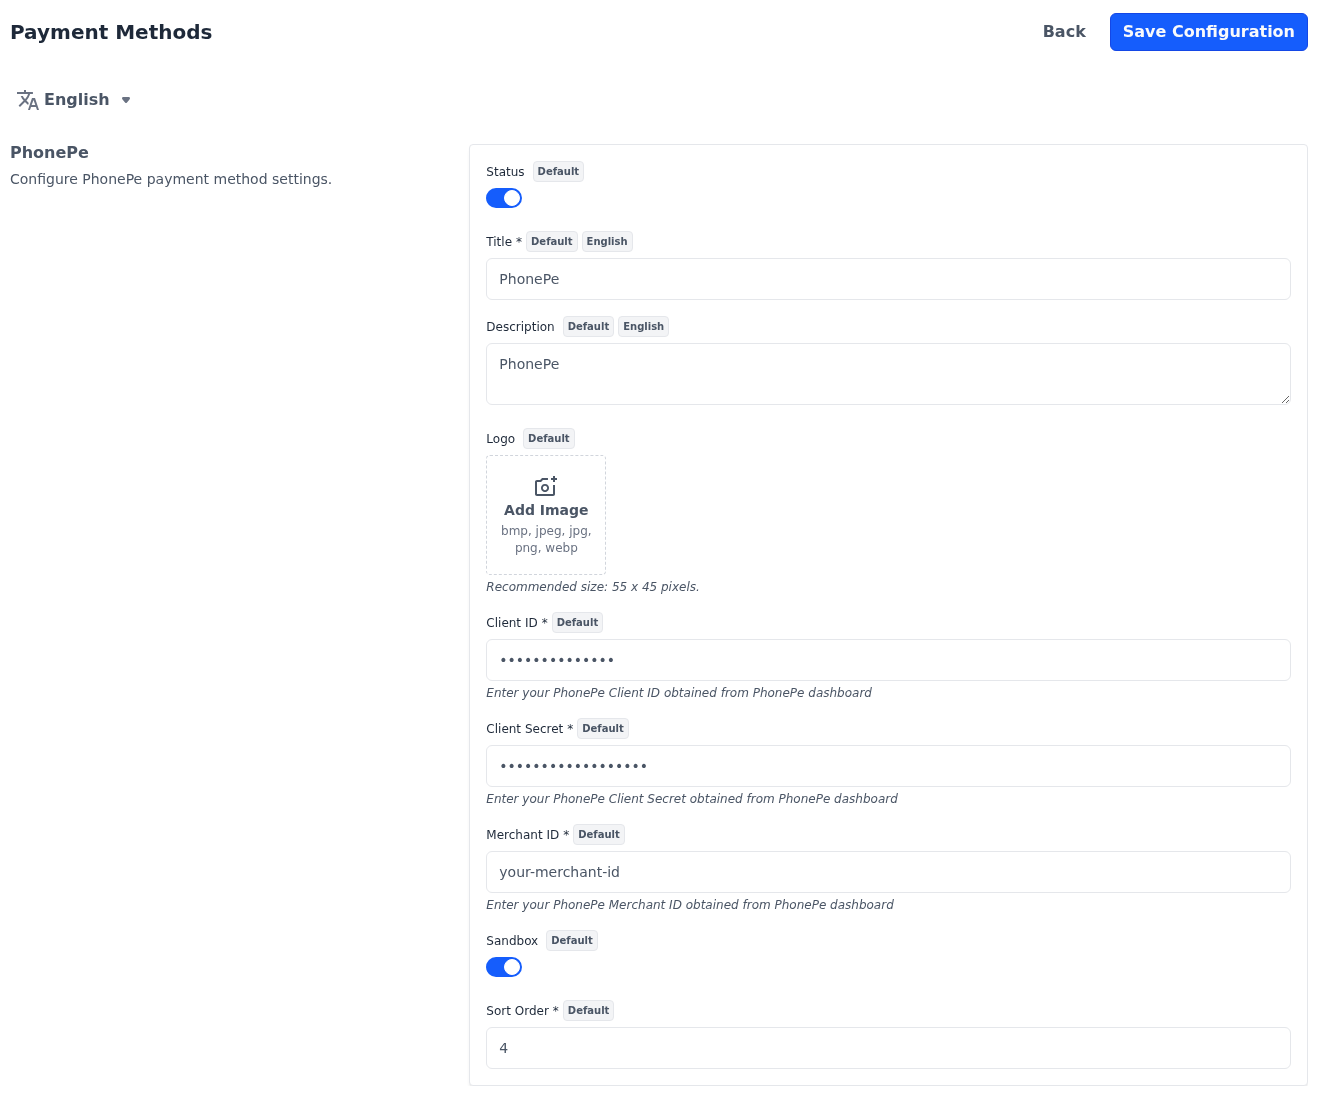
| Setting | What it does |
|---|---|
| Client ID | The client ID from your PhonePe dashboard. Required while Status is on. |
| Client Secret | The client secret from your PhonePe dashboard. Required while Status is on. |
| Merchant ID | The merchant ID from your PhonePe dashboard. Required while Status is on. |
| Sandbox | Sends payments to PhonePe's test environment. |
PayPal
PayPal shows PayPal's own payment buttons on the checkout page in place of Place Order, so shoppers can pay without leaving the store. Which ways to pay the buttons offer, such as a PayPal account or a card, is decided by PayPal.
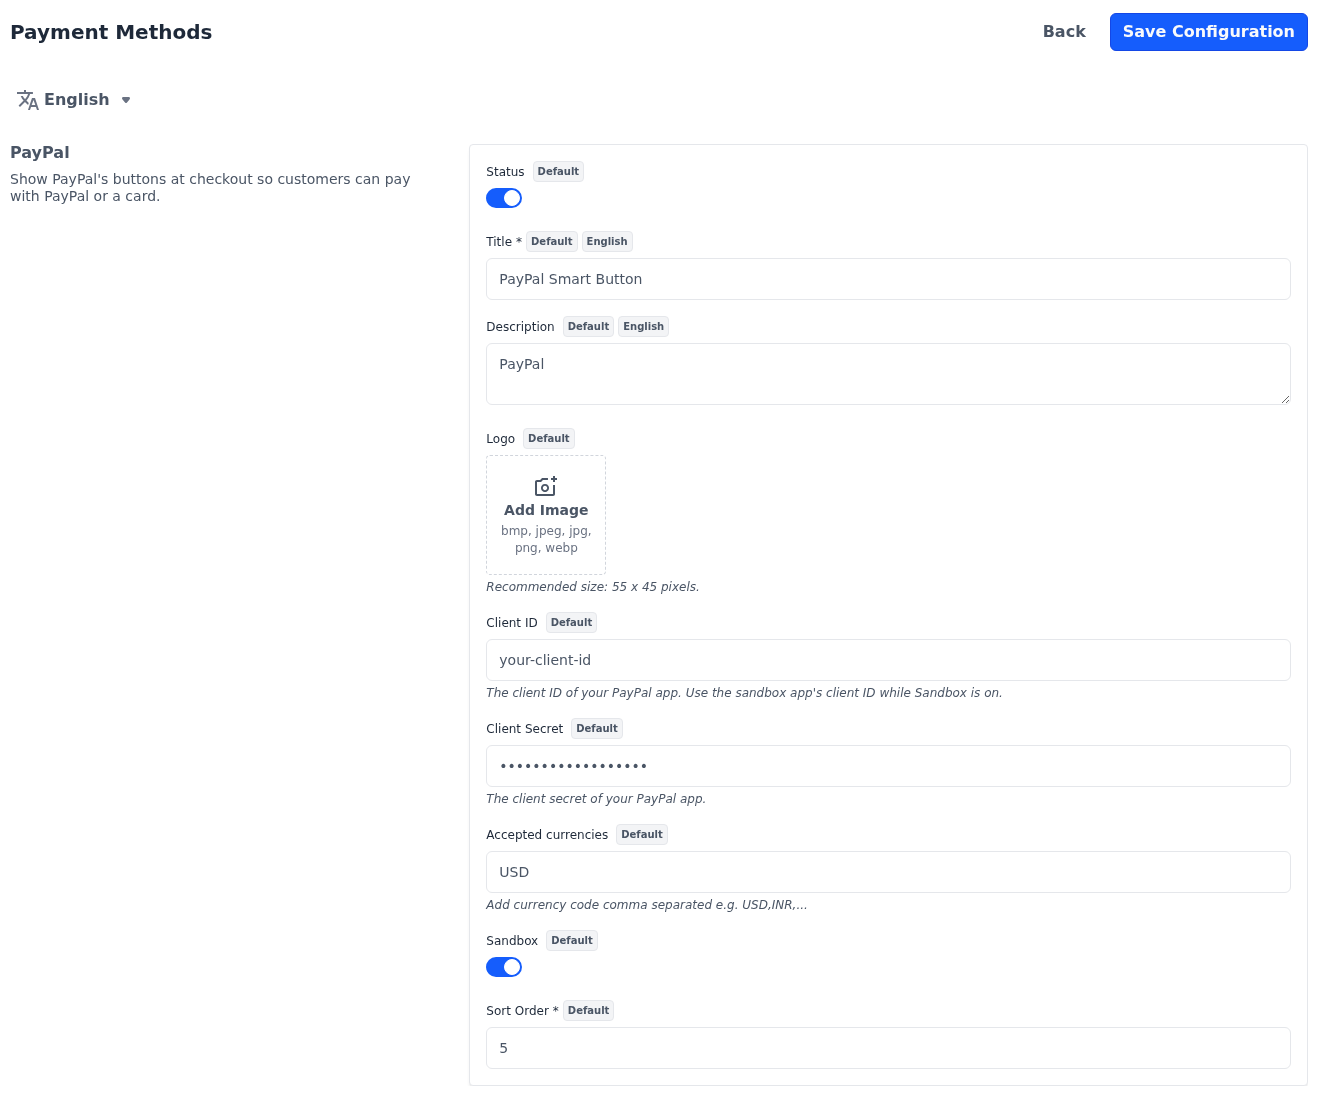
| Setting | What it does |
|---|---|
| Client ID | The client ID of your PayPal app. While Sandbox is on, use the client ID of your sandbox app. |
| Client Secret | The client secret of your PayPal app. |
| Accepted currencies | The currency codes your PayPal account accepts, separated by commas, such as USD,EUR. List every currency your shoppers can pay in. |
| Sandbox | Sends payments to PayPal's sandbox, so no real payments are taken. |
PayPal Standard
PayPal Standard sends shoppers to PayPal's website to pay, and brings them back to the store afterwards. The order is created as Pending when the shopper returns. It's invoiced and moves to Processing once PayPal confirms to the store a payment that matches the order total.
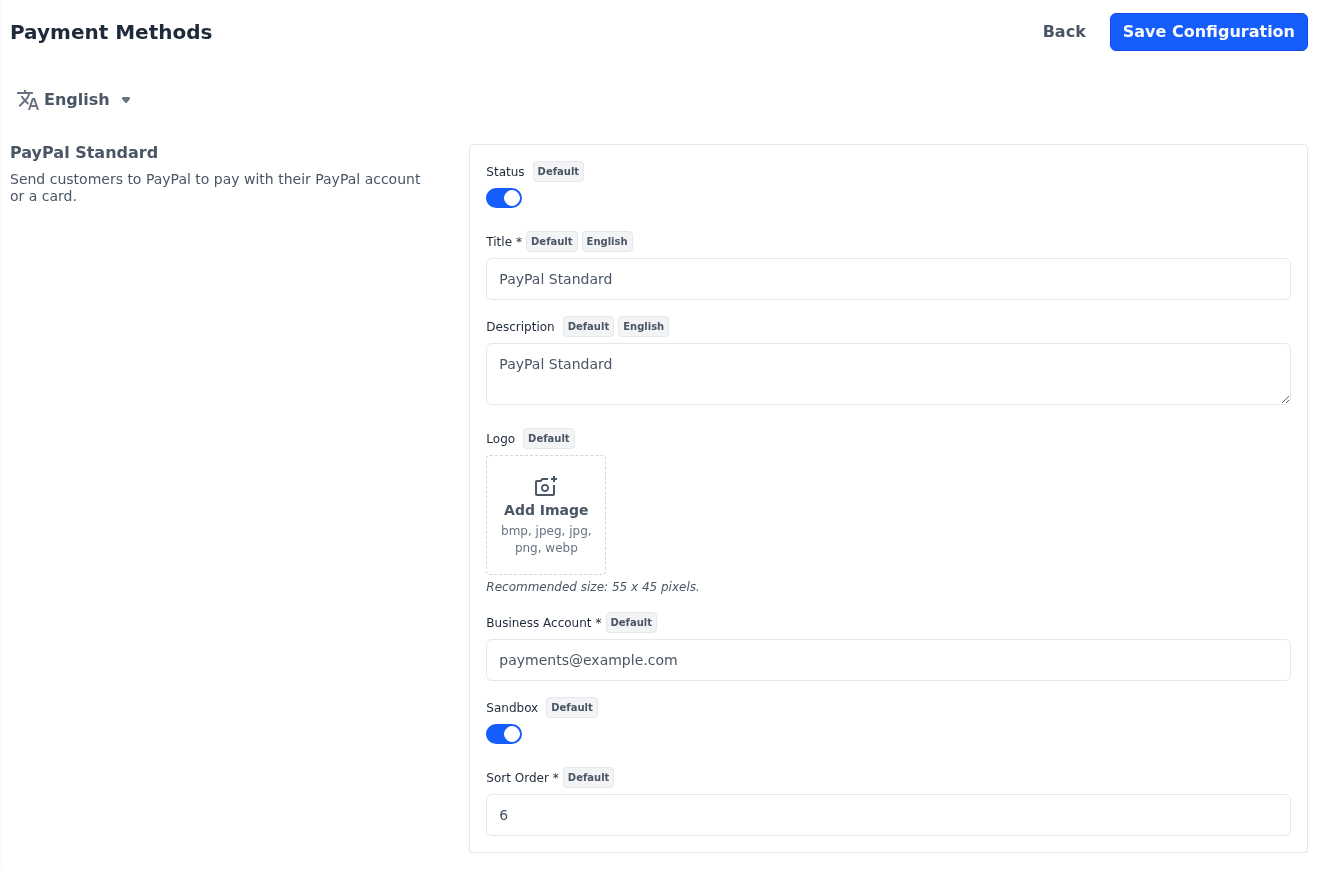
| Setting | What it does |
|---|---|
| Business Account | The email address of your PayPal business account. Required while Status is on. |
| Sandbox | Sends payments to PayPal's sandbox, so no real payments are taken. |
PayGlocal
PayGlocal takes cross-border payments. After clicking Place Order, shoppers pay on PayGlocal's payment page and return to the store. The link in the section's description takes you to PayGlocal to sign up and get your credentials.
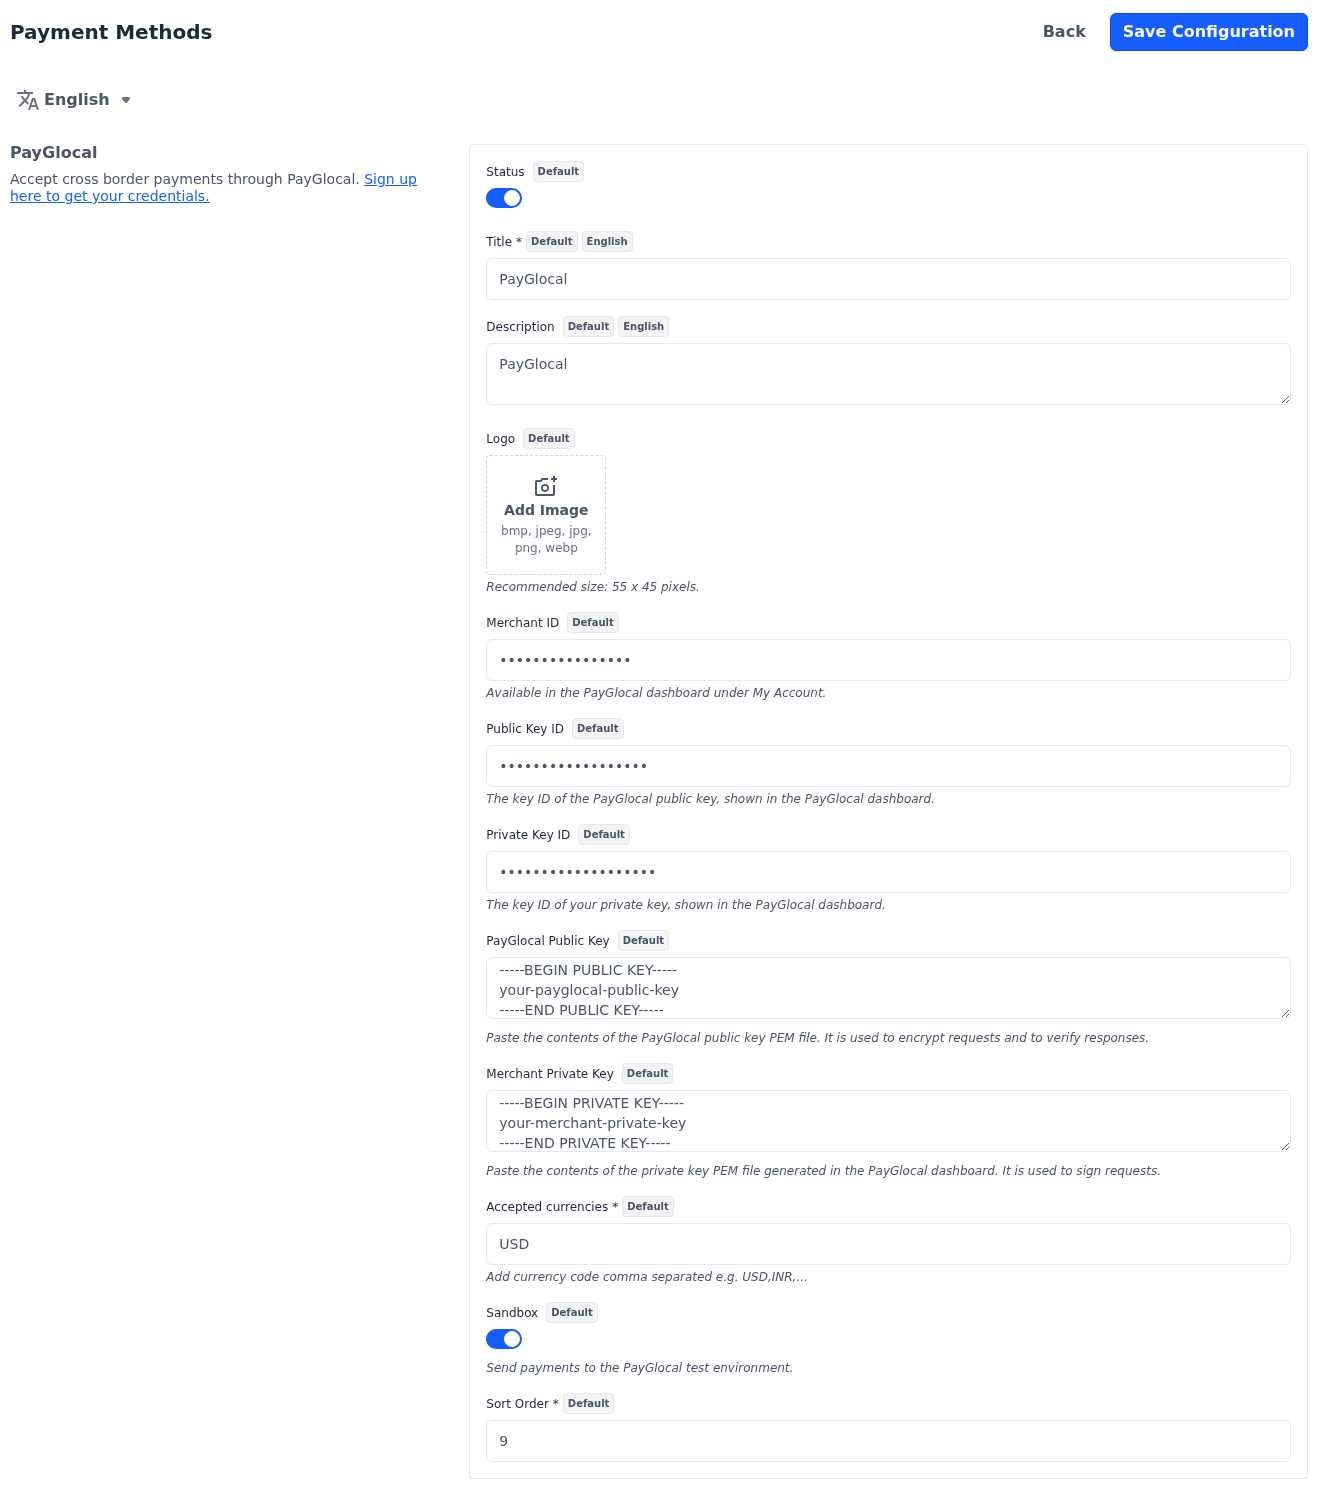
| Setting | What it does |
|---|---|
| Merchant ID | Your merchant ID, found under My Account in the PayGlocal dashboard. |
| Public Key ID | The ID of the PayGlocal public key, shown in the PayGlocal dashboard. |
| Private Key ID | The ID of your private key, shown in the PayGlocal dashboard. |
| PayGlocal Public Key | The contents of the PayGlocal public key file. |
| Merchant Private Key | The contents of the private key file you generated in the PayGlocal dashboard. |
| Accepted currencies | The currency codes your PayGlocal account accepts, separated by commas, such as USD,INR. Include your store's base currency. Required while Status is on. |
| Sandbox | Sends payments to PayGlocal's test environment. |
PayGlocal appears at checkout only while the Merchant ID, both key IDs and both keys have a value. The keys aren't checked when you save, so test a payment in sandbox mode before you go live.
Cash On Delivery
Cash On Delivery lets shoppers pay in cash when the order arrives. It's offered only when every product in the cart is shipped, so it doesn't appear for carts with virtual, downloadable or booking products.
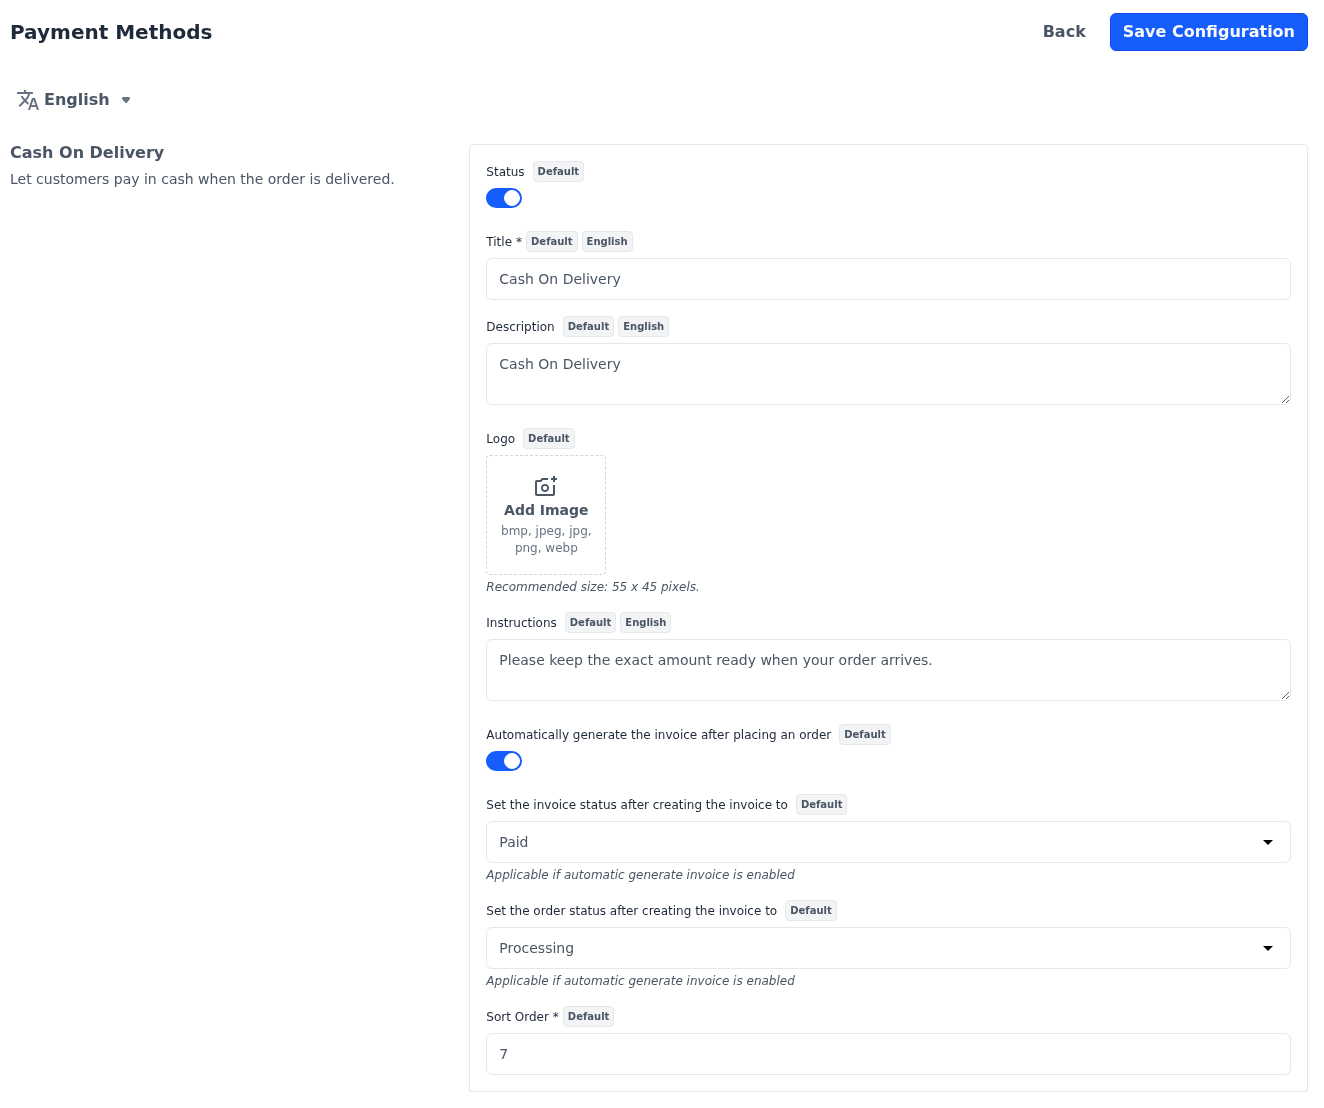
| Setting | What it does |
|---|---|
| Instructions | Instructions for the customer, such as having the exact amount ready. They are included in the order emails and on the invoice PDF. |
| Automatically generate the invoice after placing an order | Creates the invoice as soon as the order is placed. |
| Set the invoice status after creating the invoice to | Pending or Paid. Used only while the switch above is on. |
| Set the order status after creating the invoice to | Pending, Pending Payment or Processing. Used only while the switch above is on. |
Money Transfer
Money Transfer lets shoppers pay by bank transfer or cheque.
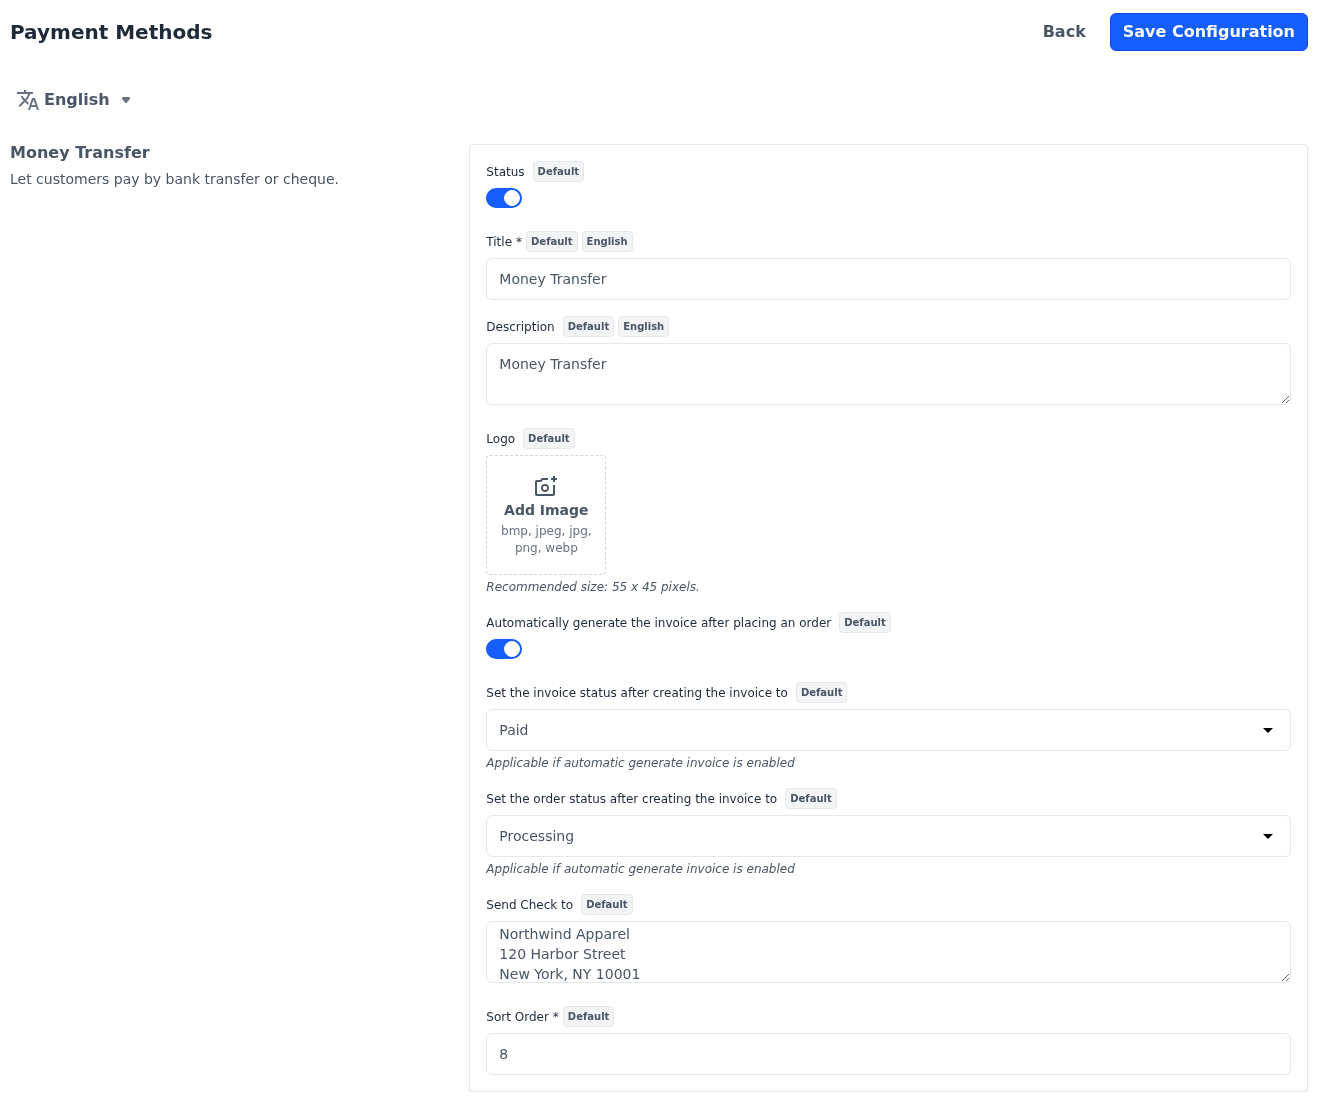
| Setting | What it does |
|---|---|
| Automatically generate the invoice after placing an order | Creates the invoice as soon as the order is placed. |
| Set the invoice status after creating the invoice to | Pending or Paid. Used only while the switch above is on. |
| Set the order status after creating the invoice to | Pending, Pending Payment or Processing. Used only while the switch above is on. |
| Send Check to | The name and address customers send their payment to. It's included in the order emails and on the invoice PDF. |
For orders you take yourself in the admin panel, see Create Order. To create an invoice later, see Create Invoice. What each invoice status means is described in Invoice status, and payments for pending invoices are recorded in Transactions.