
Categories
Categories organize your catalog. They make up the storefront menu, and each category has a page where shoppers browse and filter its products. Categories form a tree: each channel has a root category, and the categories under it are the ones that channel's storefront shows.
The categories list
Go to Catalog >> Categories.
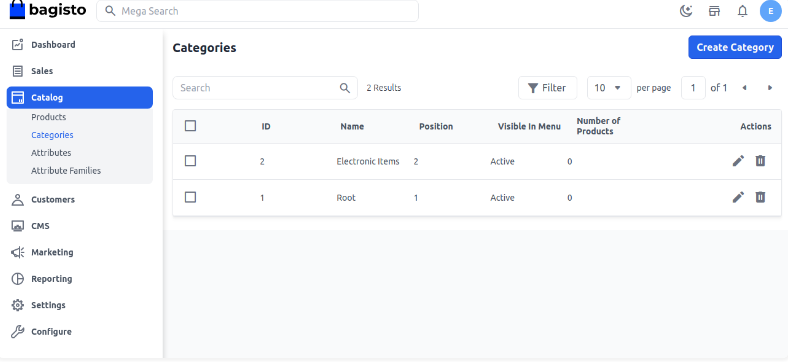
Each row shows the category's ID, Name, Parent Category, Position and Visible In Menu, which reads Active or Inactive. Names are shown in the admin panel's language, and a category without a name in that language isn't listed.
- Search: type in the search box to find categories by their name or their parent's name.
- Filter: click Filter to filter by any column. Parent Category offers a list of the categories that have subcategories, and Visible In Menu offers Active and Inactive.
- Sort: click a column in the header row.
- Edit (the pencil) opens the category, and Delete (the bin) deletes it. See Delete a category.
Change several categories at once
- Go to Catalog >> Categories.
- Tick the categories.
- Open Select Action.
- Choose Delete, or point to Update Status and choose Active or Inactive.
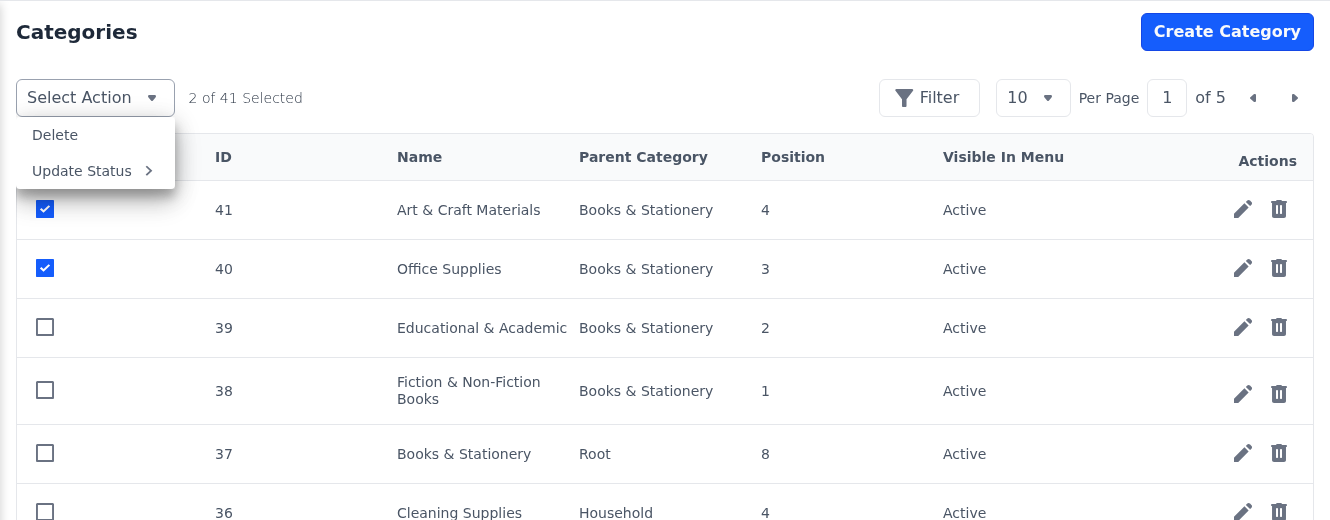
Update Status switches Visible In Menu on or off for every ticked category.
If the ticked categories include a root category, deleting stops there and The Root category can not be deleted. appears. Categories deleted before it stay deleted.
Root categories and the storefront menu
Every store starts with a root category called Root. A root category holds the categories of a storefront, and it isn't shown in the menu itself.
- Each channel has a Root Category, chosen under Settings >> Channels. See Channels.
- A channel's storefront menu shows the subcategories of its root category that are visible in the menu, with their own subcategories under them.
- Position sets the order of categories in the menu, lowest first.
- A category's page opens only in the channels whose root category it sits under.
- To create a root category for a new channel, create a category without a parent.
Whether the storefront header lists the categories in a menu or in a sidebar is set in Design.
Create a category
Go to Catalog >> Categories.
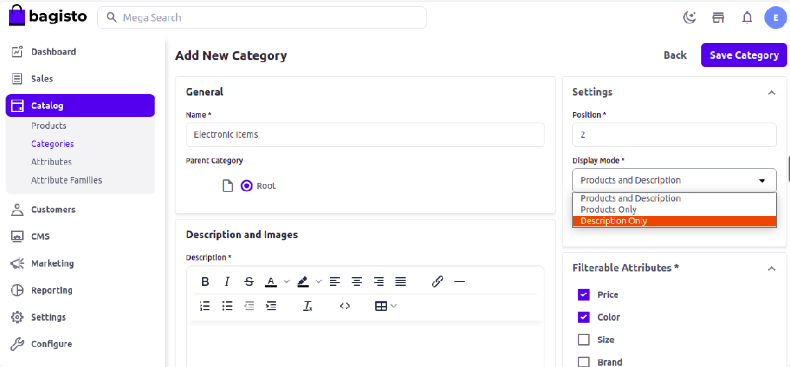
Click Create Category. The Add New Category page opens.
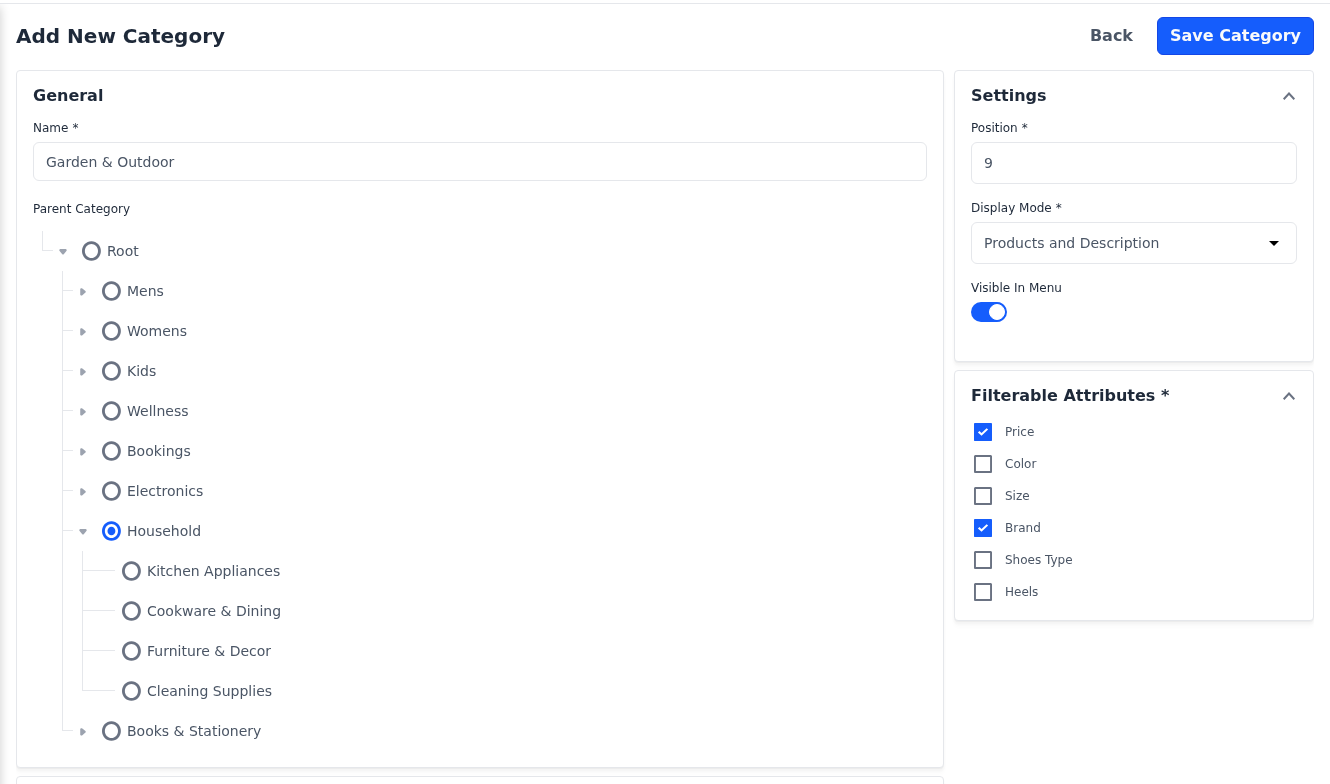
In General, enter the Name. The Slug is filled in from the name as you type.
Under Parent Category, click the category the new one sits under, such as your channel's root category for a top-level menu item.
In Settings, enter the Position.
Choose the Display Mode.
Switch Visible In Menu on.
In Filterable Attributes, tick the filters shoppers can use on the category page.
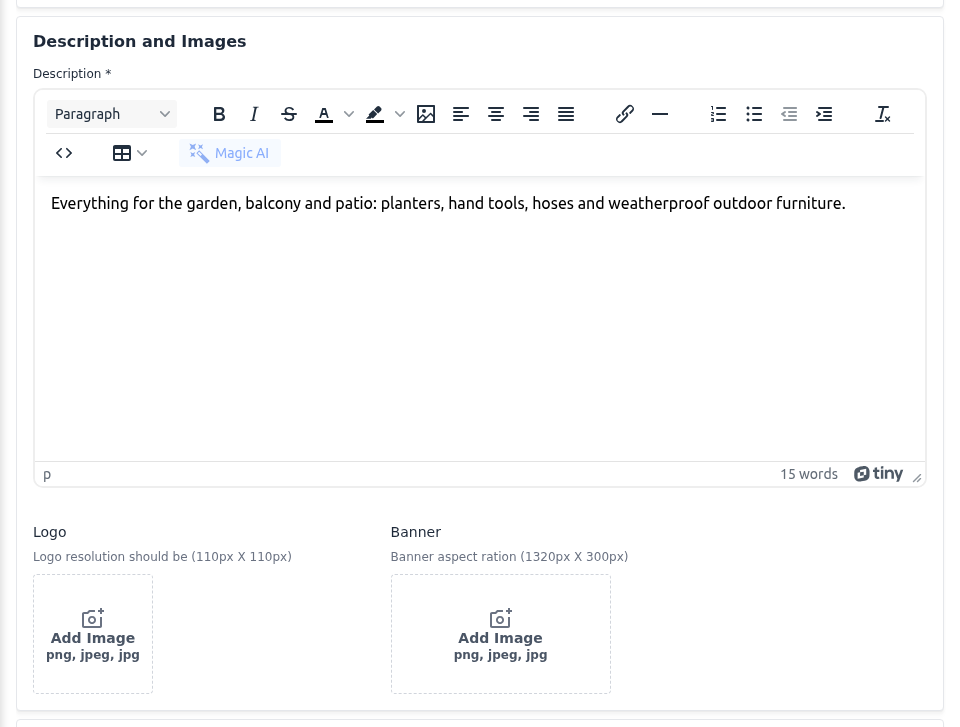
In Description and Images, enter the Description.
Under Logo and Banner, click Add Image to upload the images.
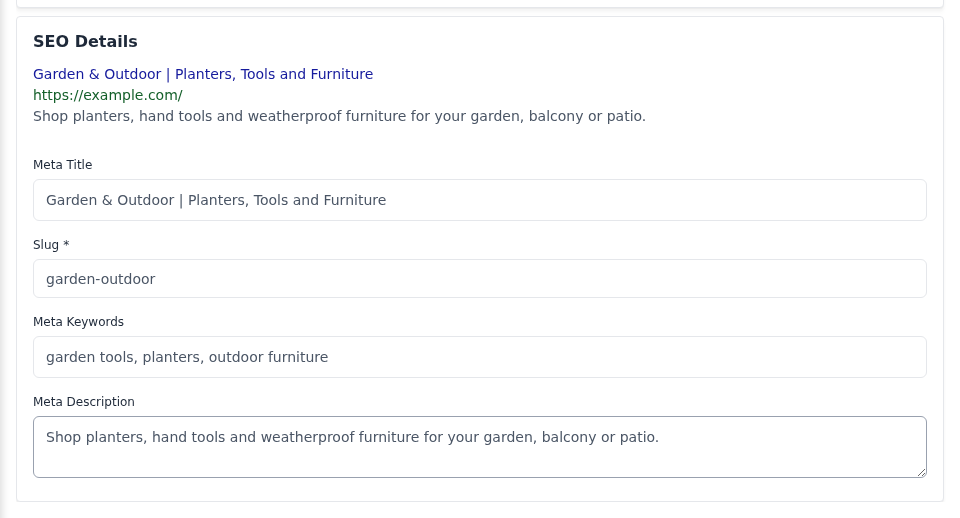
Fill in the SEO Details. See SEO Details.
Click Save Category. The category is created and the categories list opens.
The name, description and SEO details you enter are used for every language until you translate them. See Edit or translate a category. To put products in the category, tick it in the Categories section of the product edit screen. See Products.
General
- Name: the name shoppers see in the menu and on the category page.
- Parent Category: the category this one sits under. Click the arrow next to a category to show or hide its subcategories. Don't choose a parent to create a root category.
Settings
- Position: the category's place among the categories next to it in the menu, lowest first. Enter a whole number.
- Display Mode: what the category page shows.
- Visible In Menu: shows the category in the storefront menu. See Hide a category from the menu.
| Display Mode | The category page shows |
|---|---|
| Products and Description | The description, then the products with their filters. This is the default. |
| Products Only | The products with their filters, without the description. |
| Description Only | The description, without products. |
The banner shows at the top of the page in every mode. The Description is required unless the mode is Products Only.
Filterable Attributes
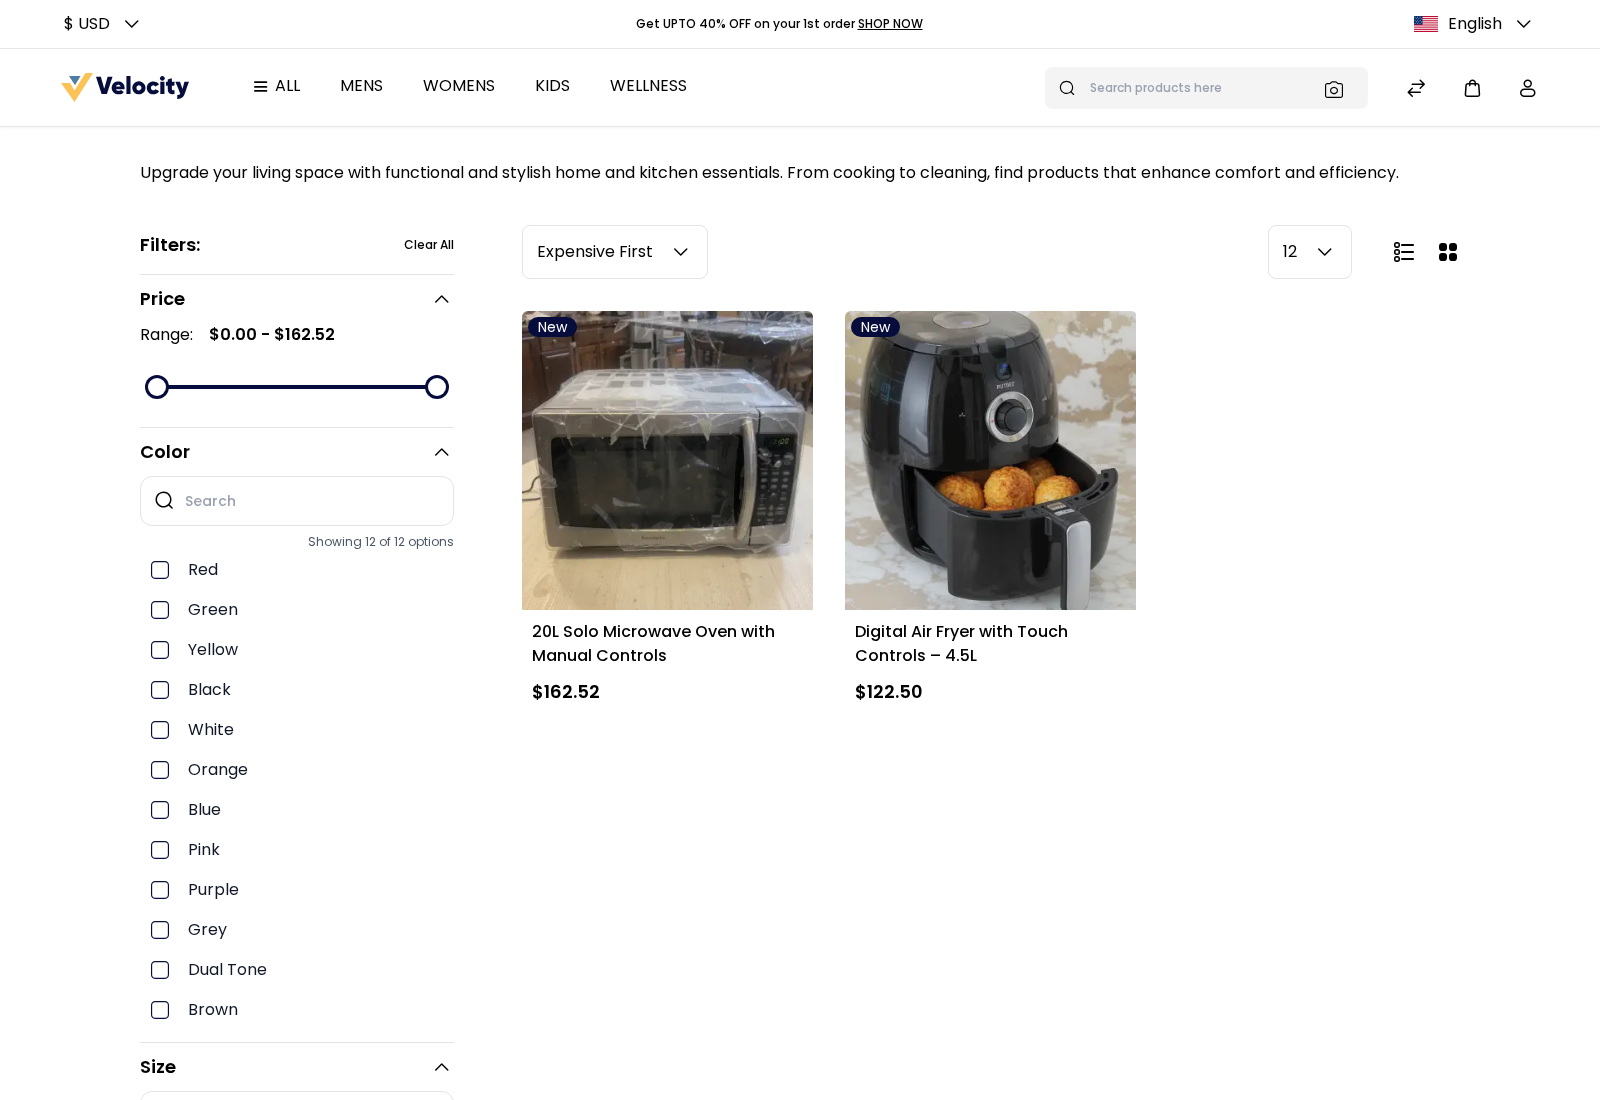
The list shows every attribute with Use in Layered Navigation switched on, such as Price, Color, Size and Brand. Tick at least one. The ticked attributes become the filters on the category page: Price shows as a range slider, and the others as checkboxes. To add an attribute to the list, switch on Use in Layered Navigation in its configuration.
Description and Images
- Description: the text at the top of the category page, written in a text editor.
- Logo: the category's small image. A resolution of 110 × 110 pixels is recommended.
- Banner: the wide image at the top of the category page. A size of 1320 × 300 pixels is recommended.
Upload images in PNG, JPEG, JPG, BMP or WEBP format. To add alt text or rename an image's file, point to the uploaded image and click the pencil icon.
Generative AI (Magic AI)
When Generative AI (Magic AI) is set up:
- the Magic AI button in the Description editor writes the description for you. It stays greyed out until text generation is switched on. See Generate Text Content.
- a Magic AI button next to Add Image under Logo and Banner creates the image from a description. It appears when image generation is switched on and no image has been uploaded yet. See Generate Product Images.
SEO Details
The preview at the top shows how the category could appear in search results, and it updates as you type.
| Field | What it does |
|---|---|
| Meta Title | The title in search results and the browser tab. When it's empty, the category name is used. |
| Slug | The last part of the category page's address, such as garden-outdoor. It's filled in from the name. Use letters, numbers and hyphens. It must differ from every other category's slug and every product's URL key, and categories can't be used. |
| Meta Keywords | Words and phrases the category should be found by. |
| Meta Description | The summary in search results. When it's empty, the start of the description is used. |
Edit or translate a category
- Go to Catalog >> Categories.
- Click Edit on the category's row. The Edit Category page opens.
- Choose the language in the language selector below the title.
- Change the fields.
- Click Save Category.
The language selector appears when your store has more than one language. These fields are saved separately for each language: Name, Description, Meta Title, Slug, Meta Keywords, Meta Description, and the alt text of the logo and banner. The other fields, such as Select Parent Category, the images, Position, Display Mode, Visible In Menu and Filterable Attributes, are the same in every language.
There's no channel selector: categories are shared by all channels, and each channel shows the categories under its root category. Under Select Parent Category, the tree leaves out the category itself and its subcategories.
Renaming changes the address
When you change the Name, the Slug is rewritten from the new name, which changes the address of the category page in that language. Bagisto adds a URL rewrite that sends visitors from the old address to the new one. To keep the old address, type the old slug back before you save.
Hide a category from the menu
Switch Visible In Menu off to take a category and its subcategories out of the storefront menu. The category page still opens from a direct link or a bookmark. While it's off, the category isn't offered in the Categories section of the product edit screen.
Delete a category
- Go to Catalog >> Categories.
- Click Delete on the category's row.
- Confirm the deletion.
Subcategories are deleted too
Deleting a category also deletes all of its subcategories, and it can't be undone. The products in them aren't deleted, but they're no longer in those categories.
The Root category that comes with your store can't be deleted, and neither can a category chosen as a channel's Root Category: The Root category can not be deleted. appears. To delete a channel's root category, choose another root category for the channel first.