Customer Settings
The Settings screen of the Customer group decides how customer accounts are created and signed in to, which social accounts customers can sign in with, and whether the wishlist and the newsletter are offered. What customers see on the storefront is described in Customer Account.
Create new account options
- Go to Configure >> Customer >> Settings.
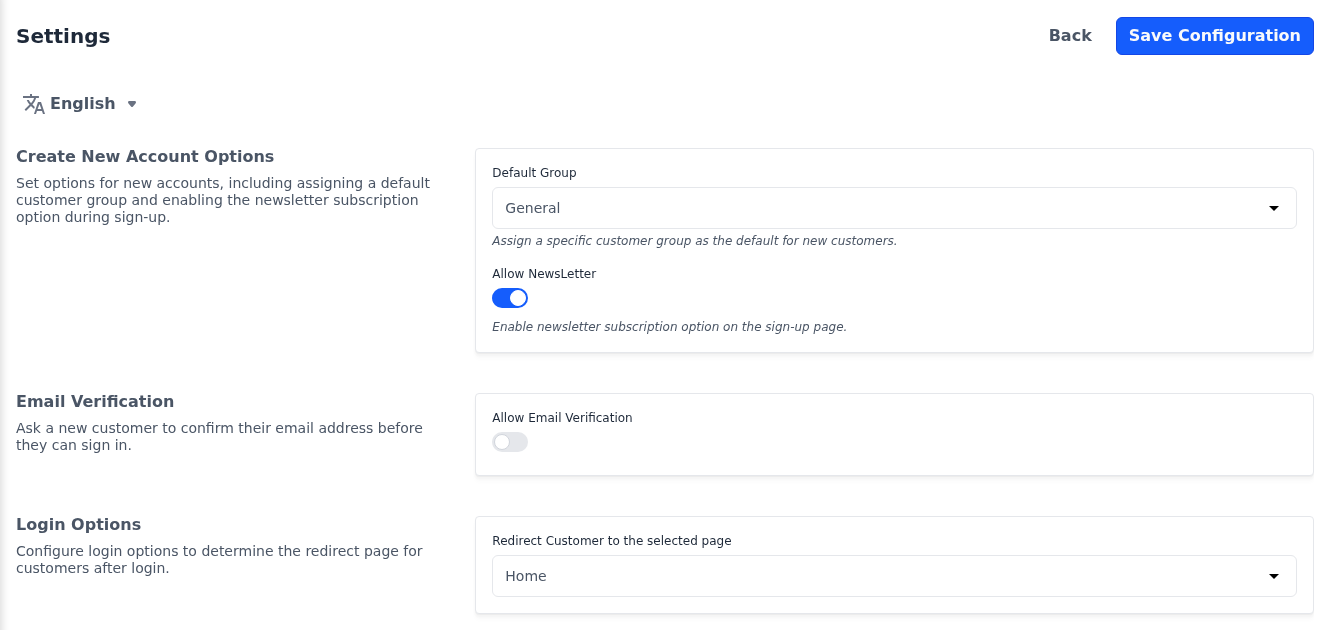
- In Create New Account Options, choose the Default Group for customers who create an account with the storefront's sign-up form: General (the default), Guest or Wholesale.
- Switch Allow NewsLetter on or off. While it's on, the sign-up form shows a Subscribe to newsletter checkbox. It is on by default.
- Click Save Configuration.
Both settings apply to every channel. Customer groups are described in Customer Groups, and the sign-up form in Customer Account.
Email verification
While Allow Email Verification is on, a new customer receives an email with a verification link and can't sign in until they open it. Until then, signing in shows Verify your email account first. It is off by default and applies to every channel.
- Go to Configure >> Customer >> Settings.
- In Email Verification, switch Allow Email Verification on or off.
- Click Save Configuration.
With verification on, the welcome email set under Notifications is sent after the customer verifies their address, instead of straight after they sign up.
Login options
- Go to Configure >> Customer >> Settings.
- In Login Options, choose where Redirect Customer to the selected page sends customers after they sign in: Home (the default) or Account, their account profile.
- Click Save Configuration.
A customer who was asked to sign in on the way to another page returns to that page instead. Signing in is described in Customer Account.
Social login
Social login lets customers sign in with their Facebook, X (Twitter), Google, LinkedIn or GitHub account. The button of each provider you switch on appears under the storefront's sign-in and sign-up forms. The first time a customer signs in with a provider, the store creates their account, or links it to an existing account with the same email address. It then opens their account profile, or the page they were on when they were asked to sign in.
Before you start, create an app in the developer console of each provider you want to offer, and copy its client ID and client secret.
- Go to Configure >> Customer >> Settings.
- In Social Login, switch on the provider, such as Enable Google. Its Client ID, Client Secret and Redirect URL appear.
- Enter the Client ID and Client Secret of your app.
- Check the Redirect URL. Keep the path and change only the domain to your storefront's, such as
https://www.example.com/customer/social-login/google/callback. - Add the same Redirect URL to your app in the provider's developer console.
- Click Save Configuration.
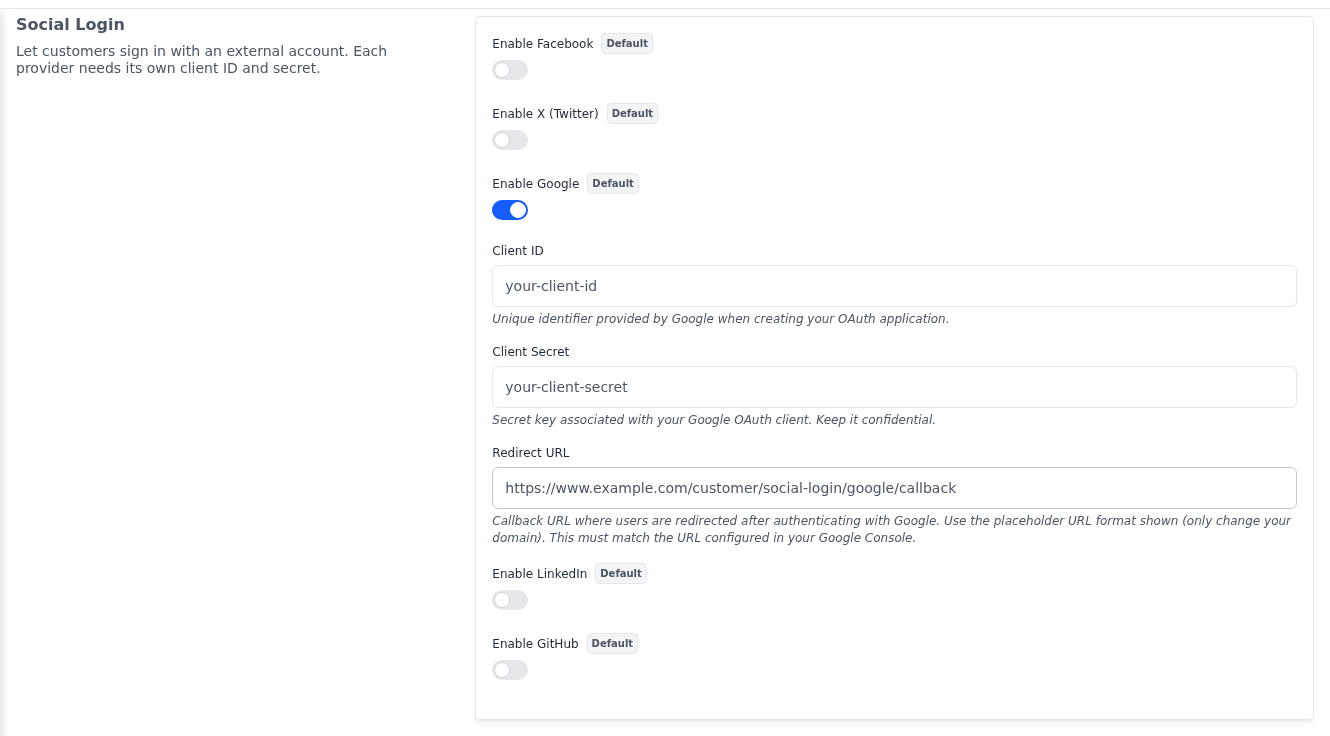
Each provider has these four settings:
| Setting | What it does |
|---|---|
| Enable Facebook, Enable X (Twitter), Enable Google, Enable LinkedIn, Enable GitHub | Shows the provider's button on the sign-in and sign-up forms. Saved per channel, so choose the channel at the top of the screen first when your store has more than one. |
| Client ID | The identifier of your app in the provider's developer console. Applies to every channel. |
| Client Secret | The secret of that app. Keep it private. Applies to every channel. |
| Redirect URL | Where the provider sends the customer back after they sign in. It must match the URL saved in your app exactly. Applies to every channel. |
The Redirect URL path is different for each provider:
- Facebook:
/customer/social-login/facebook/callback - X (Twitter):
/customer/social-login/twitter/callback - Google:
/customer/social-login/google/callback - LinkedIn:
/customer/social-login/linkedin-openid/callback - GitHub:
/customer/social-login/github/callback
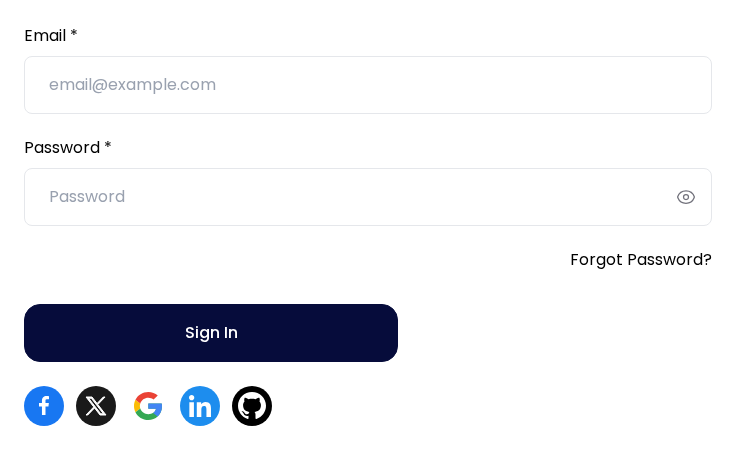
A new store shows all five buttons
A new installation switches on all five providers for the default channel. Their buttons appear on the storefront before you enter any keys, and signing in with them fails until you do, so switch off the providers you don't offer.
Wishlist
Allow Wishlist option lets shoppers save products to a wishlist. While it's off, the wishlist buttons on product cards and product pages, the wishlist icon in the header and the Wishlist page of the customer account are hidden. It is on by default and applies to every channel.
- Go to Configure >> Customer >> Settings.
- In Wishlist, switch Allow Wishlist option on or off.
- Click Save Configuration.

The customer's wishlist page is described in Customer Account.
Newsletter subscription
Allow Newsletter Subscription shows the newsletter subscription form in the storefront footer. It is on by default and applies to every channel. The checkbox on the sign-up form is set separately, by Allow NewsLetter under Create New Account Options.
- Go to Configure >> Customer >> Settings.
- In Newsletter Subscription, switch Allow Newsletter Subscription on or off.
- Click Save Configuration.
The customers who subscribe are listed under Newsletter Subscriptions.