Role Based Permissions
The Role-Based Permissions feature allows companies to create custom roles and define what each user can access within the organization.
This helps ensure that each user only has access to the features relevant to their responsibilities.
Steps to Create a Role
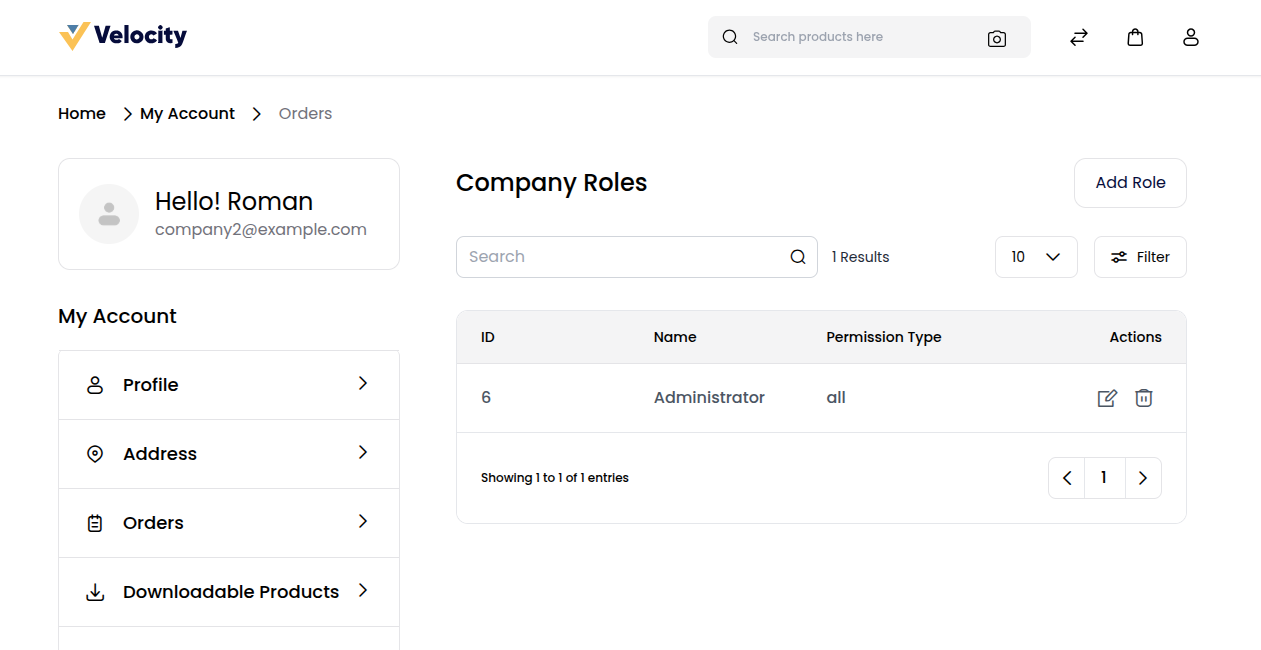
Step: 1 Go to My Account → Profile → Roles from the company storefront.
The Company Roles page will appear, showing all existing roles with options to search, filter, or manage them.
As shown in the image below, you can view the list of existing roles, such as “Administrator”.
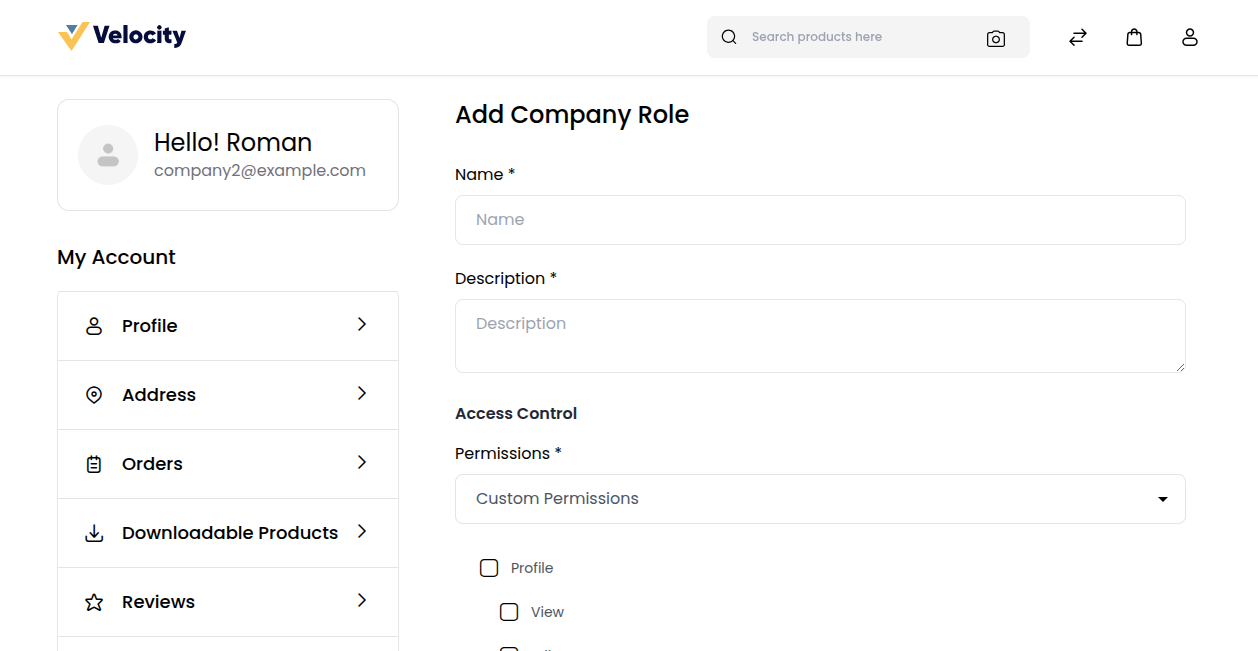
Step: 2 Click on Add Role to open the Add Company Role form.
Step: 3 Fill in the following details:
A) Name – Enter the name of the role (e.g., Administrator, Manager, Purchaser).
B) Description – Add a short description to specify the purpose of the role.
Step: 4 Under Access Control, choose the level of access you want to assign:
A) All Permissions – Grants complete access to all available company features.
B) Custom Permissions – Allows you to manually select specific permissions for the role based on your company’s needs.
Step: 5 Once you have configured the access control settings, click Save Role to create the new role. As shown in the image below,
Note:
You can edit or delete existing roles anytime from the same page.
Once a role is created, it can be assigned to users while adding or editing a company user.
Company User Management
The Company User Management feature allows companies to add and manage multiple users under their account.
Each user can have a defined role and access level, helping businesses maintain proper control within their organization.
Steps to Add a New Company User
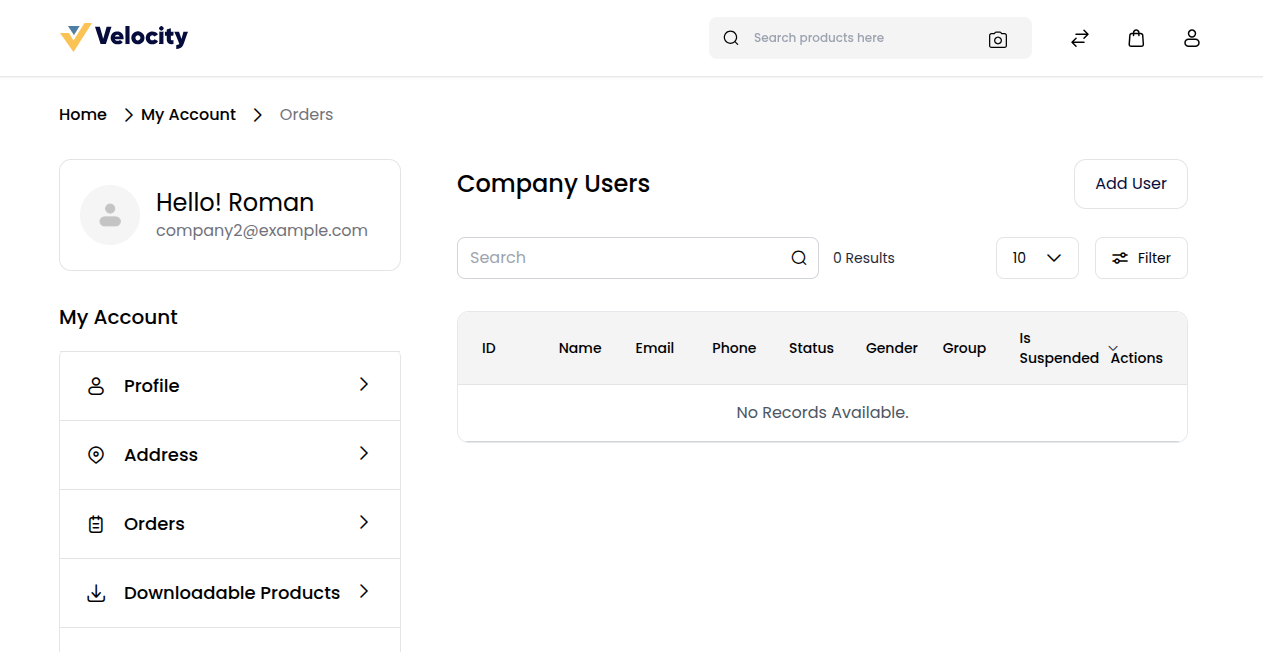
Step: 1 Go to My Account →Profile → Users from the company storefront.
Step: 2 The Company Users page will appear, showing all existing users with options to search, filter, or manage them.
As shown in the image below, the list will appear empty initially if no users are created.
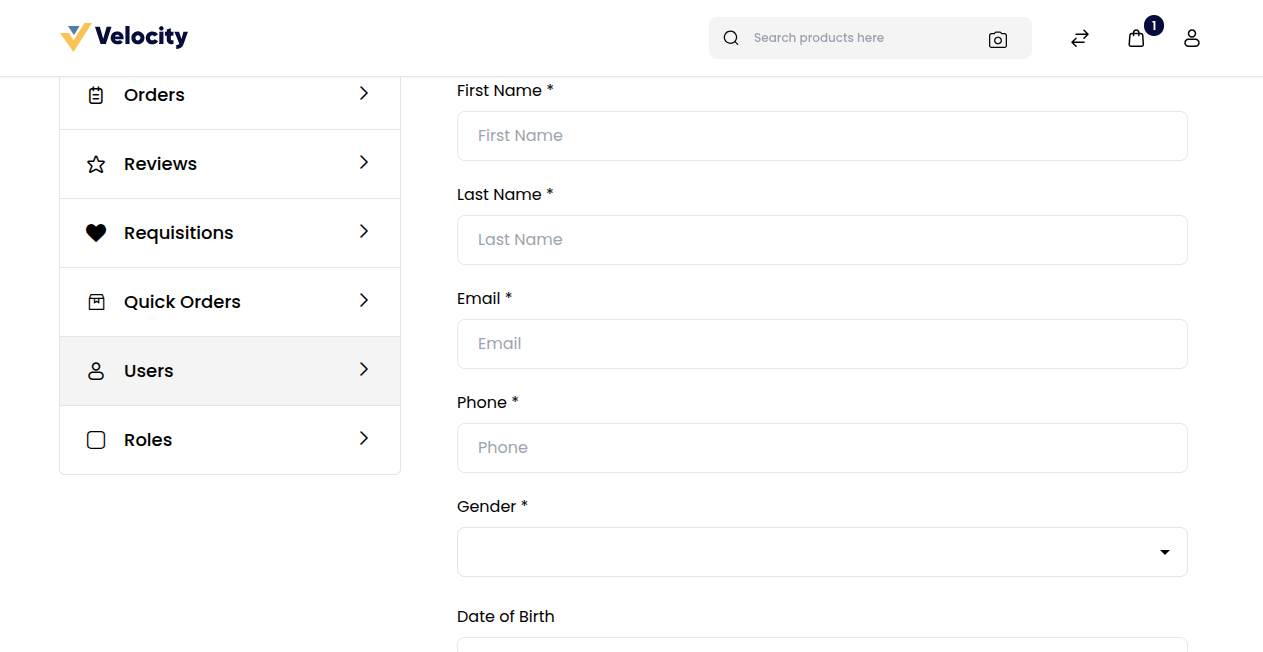
Step: 3 Click on Add User to open the Add Company User form.
Step: 4 Fill in the following details:
A) First Name – Enter the user’s first name.
B) Last Name – Enter the user’s last name.
C) Email – Enter a valid email address.
D) Phone – Provide the user’s contact number.
E) Gender – Select the user’s gender.
F) Date of Birth – Enter the user’s date of birth.
G) Role – Choose the appropriate role from the list of created roles.
H) Status – Set the user’s account as Active or Inactive.
I) Is Suspended – If enabled, the user can log in but cannot proceed to checkout. A message will display: “Your account has been suspended.”
Step: 5 Optionally, upload a Profile Image or Video for the user.
Step: 6 After filling in all required information, click Save User to add the new company user. As shown in the image below.
Note:
Company administrators can edit, suspend, or delete users at any time.
Access to features depends on the role permissions assigned to each user.