
Content
The Content screen holds the promotional line at the top of the storefront, the copyright line in its footer, the speculation rules that make storefront pages open faster, and your own CSS and JavaScript.
Header offer title
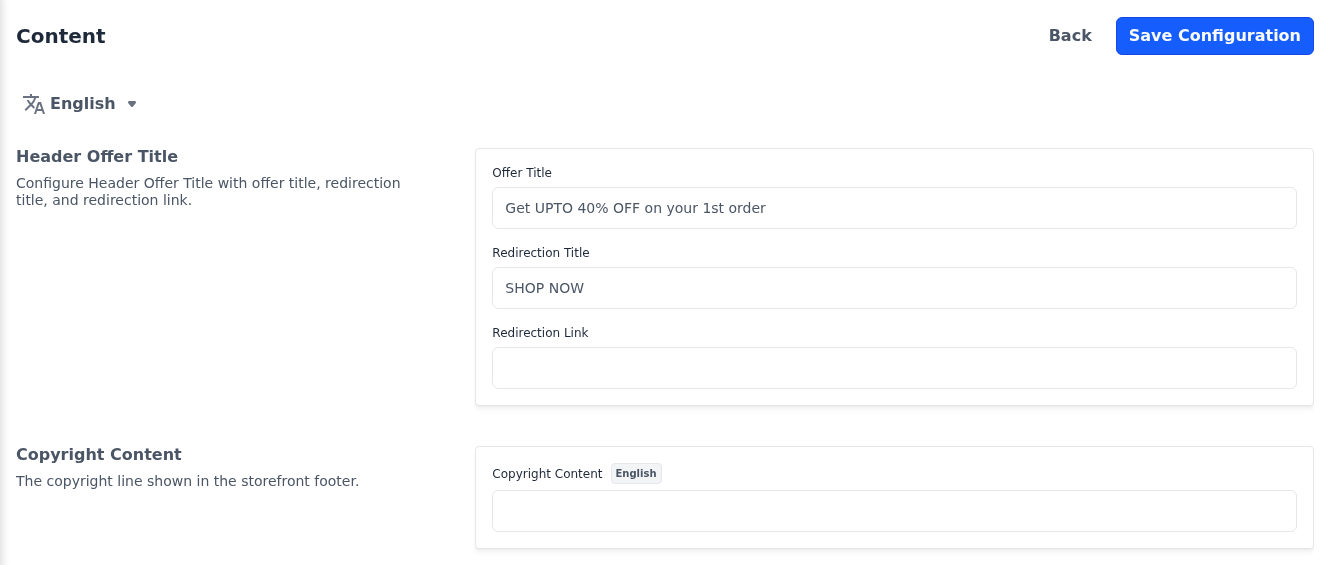
The header offer is a short promotional line with a link, shown in the top bar of the storefront header on desktop screens. It applies to every channel and language.
- Go to Configure >> General >> Content.
- In Header Offer Title, enter the Offer Title, up to 100 characters. The default is
Get UPTO 40% OFF on your 1st order. - Enter the Redirection Title, the link text shown after the offer, up to 25 characters. The default is
SHOP NOW. - Enter the Redirection Link, the page the link opens, such as
/womens. If you leave it empty, the link opens the home page. - Click Save Configuration.

Copyright content
The copyright line is shown at the bottom of the storefront footer. It is saved per language, so choose the language at the top of the screen before you enter it, and repeat for each language your storefront offers.
- Go to Configure >> General >> Content.
- In Copyright Content, enter the text, such as
© 2026 Example Store. All rights reserved. - Click Save Configuration.
While the field is empty, the footer shows Bagisto's default line, which names Webkul Software, so enter your own line for every language. The text can include HTML, such as a link to your terms page.

Speculation rules
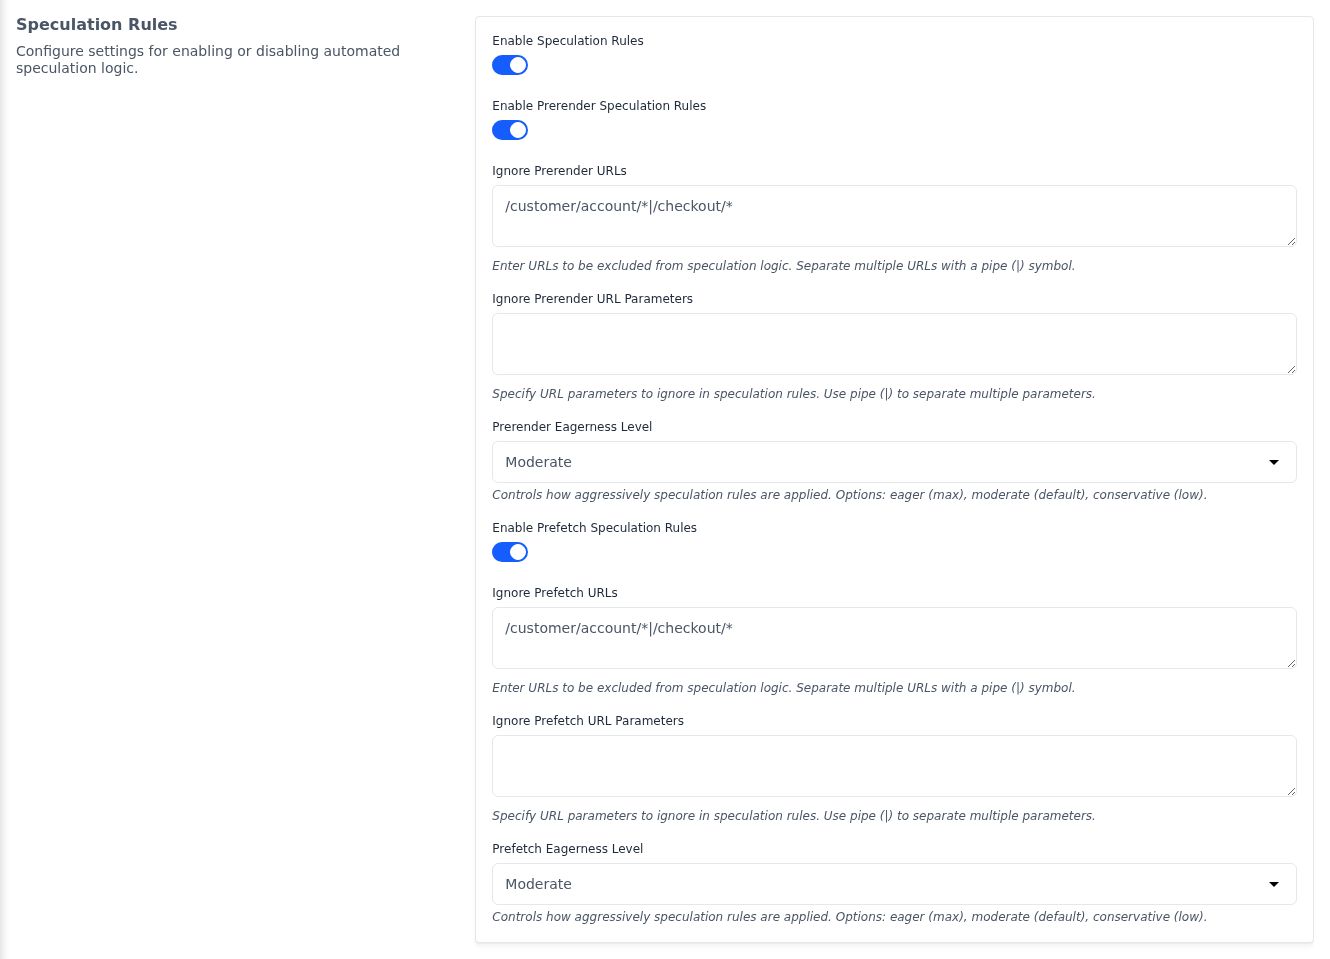
Speculation rules tell a shopper's browser which storefront pages it may load before the shopper opens them, so the next page appears almost at once. The rules are added to storefront pages only, and browsers that don't support them ignore them. All nine settings apply to the whole store.
- Go to Configure >> General >> Content.
- In Speculation Rules, switch Enable Speculation Rules on.
- Switch on Enable Prerender Speculation Rules, Enable Prefetch Speculation Rules, or both. The settings for each appear below its switch.
- Change the settings described in the table.
- Click Save Configuration.
| Setting | What it does |
|---|---|
| Enable Speculation Rules | Adds the rules to storefront pages. While it's off, the settings below have no effect. Off by default. |
| Enable Prerender Speculation Rules | Lets the browser load and display likely next pages in the background, so they open instantly. Uses more resources than prefetching. Off by default. |
| Ignore Prerender URLs | Pages that are never prerendered, separated by a pipe symbol. A * matches any text. |
| Ignore Prerender URL Parameters | Query parameters, such as utm_source, that keep a link from being prerendered. Separate several with a pipe symbol. |
| Prerender Eagerness Level | When prerendering starts: Eager starts soonest, Moderate (the default) waits until the shopper points at a link, and Conservative waits until they press it. |
| Enable Prefetch Speculation Rules | Lets the browser download likely next pages without displaying them. Off by default. |
| Ignore Prefetch URLs | Pages that are never prefetched, in the same format as Ignore Prerender URLs. |
| Ignore Prefetch URL Parameters | Query parameters that keep a link from being prefetched, in the same format as Ignore Prerender URL Parameters. |
| Prefetch Eagerness Level | When prefetching starts, with the same levels as Prerender Eagerness Level. |
Both ignore lists start as /customer/account/*|/checkout/*, which keeps the customer account and checkout pages from being loaded in advance. To keep a page out of speculation whatever parameters its links carry, add the page itself to the ignore URLs.
Custom scripts
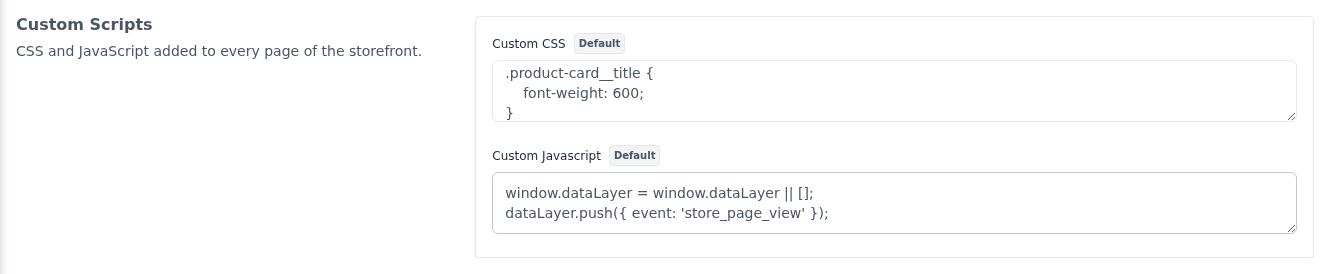
Custom scripts add your own CSS and JavaScript to every storefront page without changing the theme, for example a color change, a chat widget or an analytics snippet. Both fields are saved per channel, so choose the channel at the top of the screen first when your store has more than one.
- Go to Configure >> General >> Content.
- In Custom Scripts, enter your styles in Custom CSS, without
<style>tags. The store adds them to the head of every page. - Enter your script in Custom Javascript, without
<script>tags. The store adds it at the end of every page. - Click Save Configuration.
- Reload the storefront to check the result.
WARNING
A script with an error can stop storefront pages from working, so test changes on a staging store first if you have one. The Custom CSS is also loaded in the admin panel, and the Custom Javascript on the admin sign-in pages, so write rules and scripts that affect only the storefront's own elements.