
Product Attributes
Attributes are the fields that describe your products, such as Color, Size, Material or Brand. Each attribute has a type, a name in each language and settings that decide where it shows: as a field on the product edit screen, as a filter on category pages, on the product page and on the compare page. Brand isn't a separate feature: it's a Select attribute, and each brand is one of its options.
An attribute appears on the product edit screen once you add it to an attribute family.
The attributes list
Go to Catalog >> Attributes.
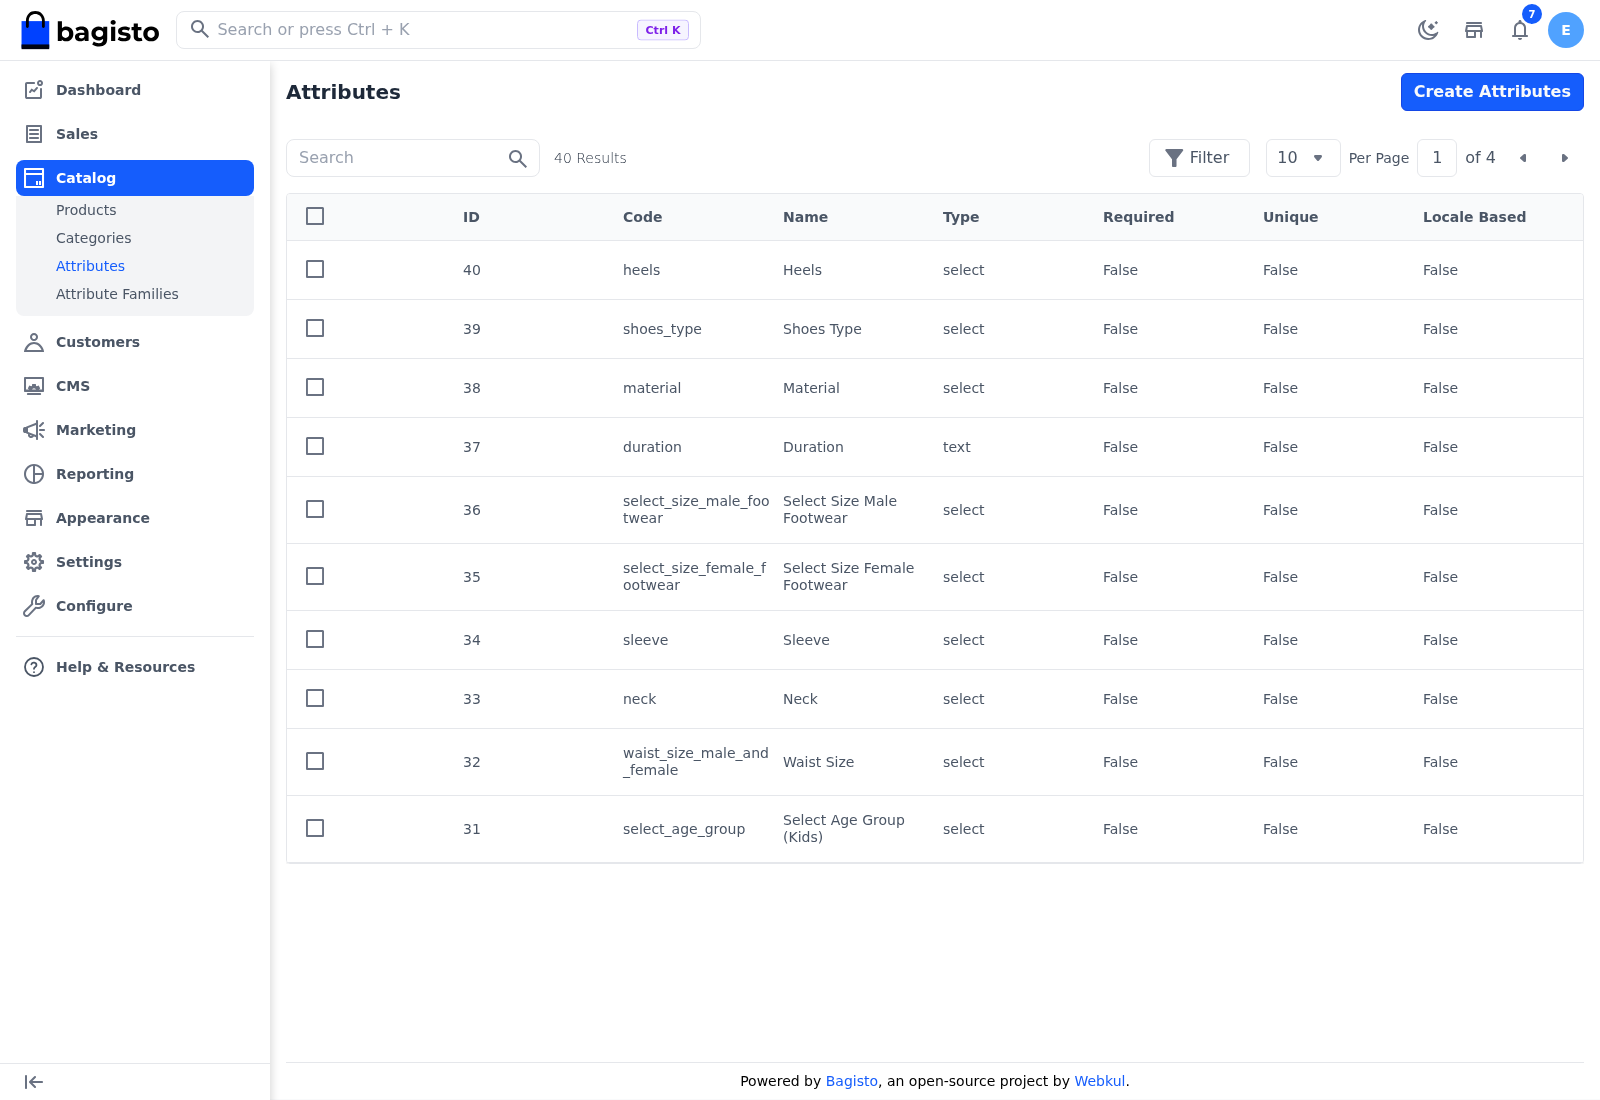
Each row shows the attribute's ID, Code, Name and Type, then True or False for Required, Unique, Locale Based and Channel Based, and the date in Created At.
- Search: type in the search box to find attributes by ID, code, name or type.
- Filter: click Filter to filter by any column. Type offers a list of the types, and Created At a date range.
- Sort: click a column in the header row.
- Edit (the pencil) opens the attribute, and Delete (the bin) deletes it.
System attributes
The attributes every store needs are system attributes, and they can't be deleted: SKU, Name, URL Key, Tax Category, New, Featured, Visible Individually, Status, Short Description, Description, Price, Special Price, Special Price From, Special Price To, Meta Title, Meta Keywords, Weight, Guest Checkout, Product Number, Manage Stock, Allow RMA and RMA Rules. Deleting one from its row shows Can not delete system Attribute, and a mass delete that includes one shows Attribute Deleted Failed and deletes nothing. You can still edit their names and settings.
Create an attribute
Go to Catalog >> Attributes.
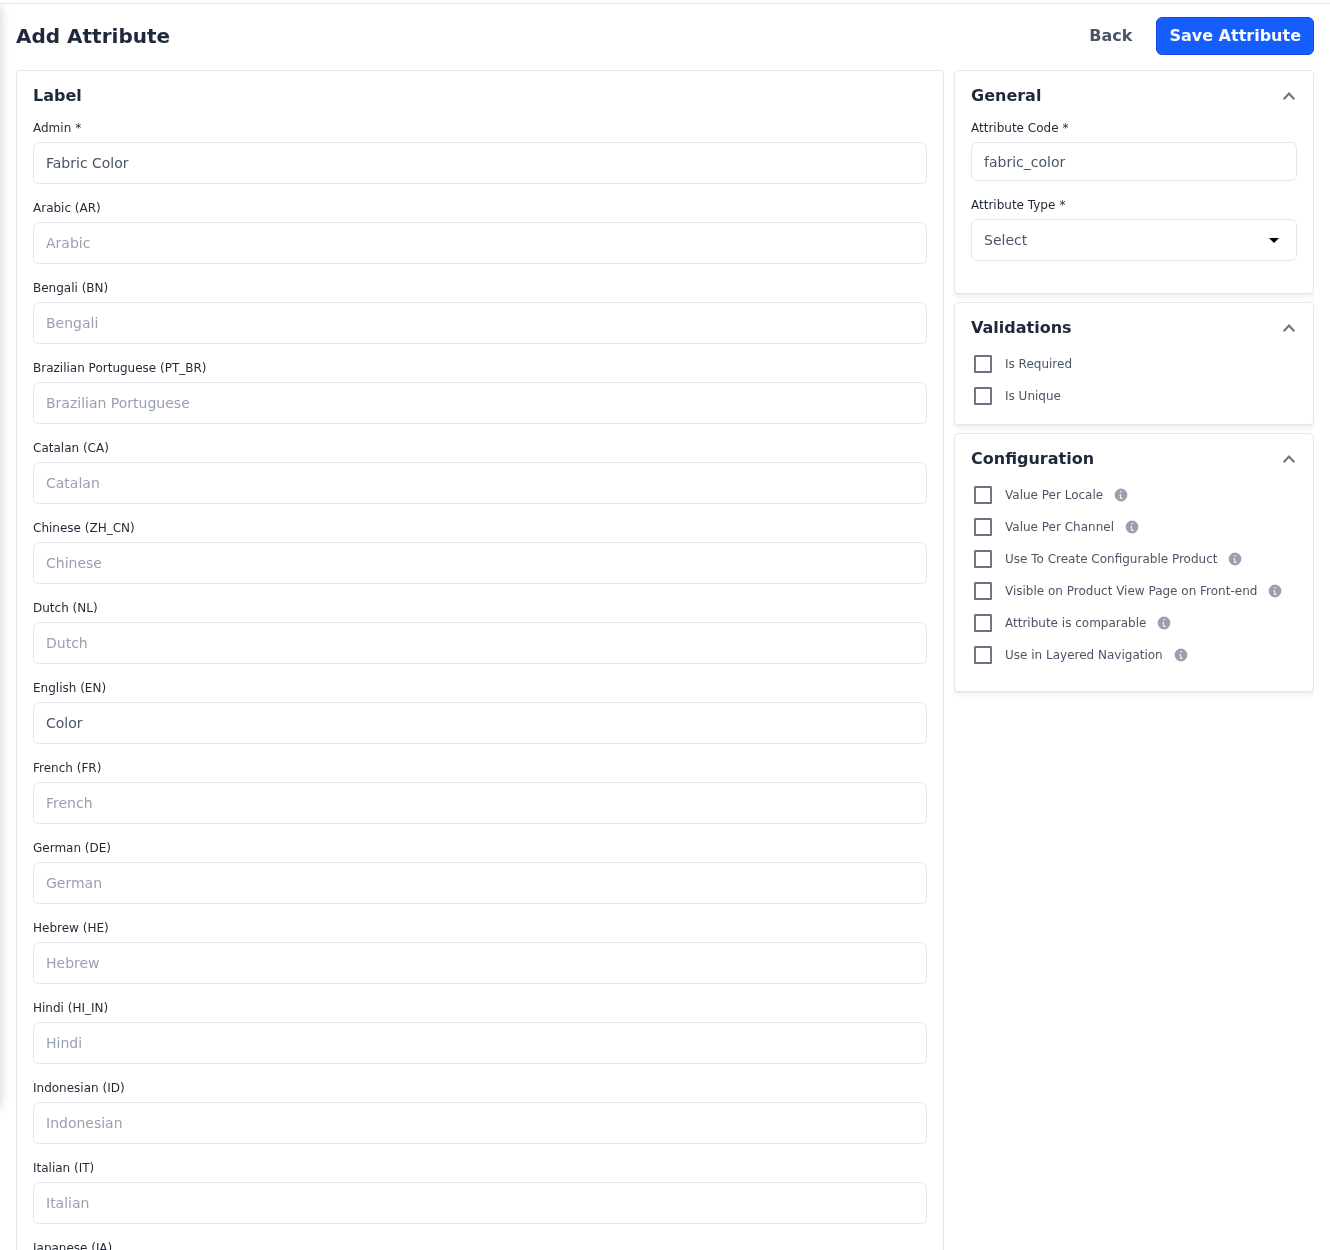
Click Create Attributes. The Add Attribute page opens.
In Label, enter the Admin name, the name you see in the admin panel.
Enter the name shoppers see in each language, such as English (EN).
In General, enter the Attribute Code. Start with a letter and use letters, numbers and underscores, such as
fabric_color.Choose the Attribute Type. The sections and settings for that type appear.
For a Checkbox, Select or Multiselect attribute, add its options. See Options.
In Validations, choose the checks the product value must pass. See Validations.
In Configuration, tick the settings you need. See Configuration.
Click Save Attribute.
To add the new attribute to products, add it to a family.
Options
The Options section appears for Checkbox, Select and Multiselect attributes. Each option is a choice, such as Red for Color or a brand name for Brand.
For a Select attribute, Input Options decides how shoppers choose between the options of a configurable product: Dropdown, Color Swatch, Image Swatch or Text Swatch. See What shoppers see.
To add an option:
In Options, click Add Row. The Add Option dialog opens.
For a Color Swatch, pick the Color. For an Image Swatch, upload the Image.
Enter the Admin name.
Enter the option's name in each language. The name in your default channel's default language is required.
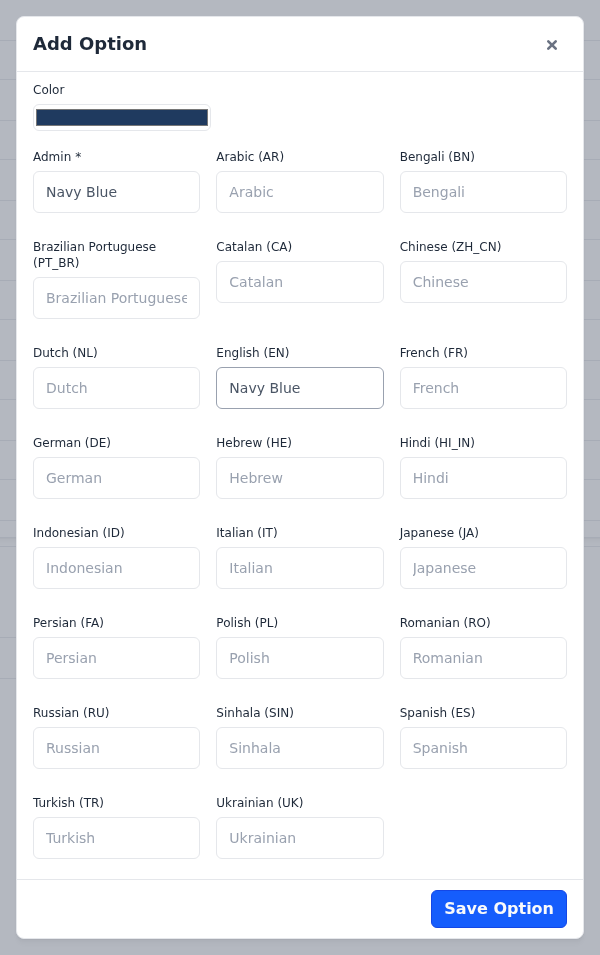
Click Save Option. The option is added to the list.
After you add the options:
- Reorder: drag an option by its handle. Shoppers see the options in this order.
- Change: click the pencil on the row.
- Remove: click the bin on the row, and confirm.
- Image swatch text: for an Image Swatch, enter the Alt Text and File Name under each image.
- Empty option: for a Select attribute, tick Create default empty option. The Add Option dialog opens with no required names. Click Save Option to add the empty option.
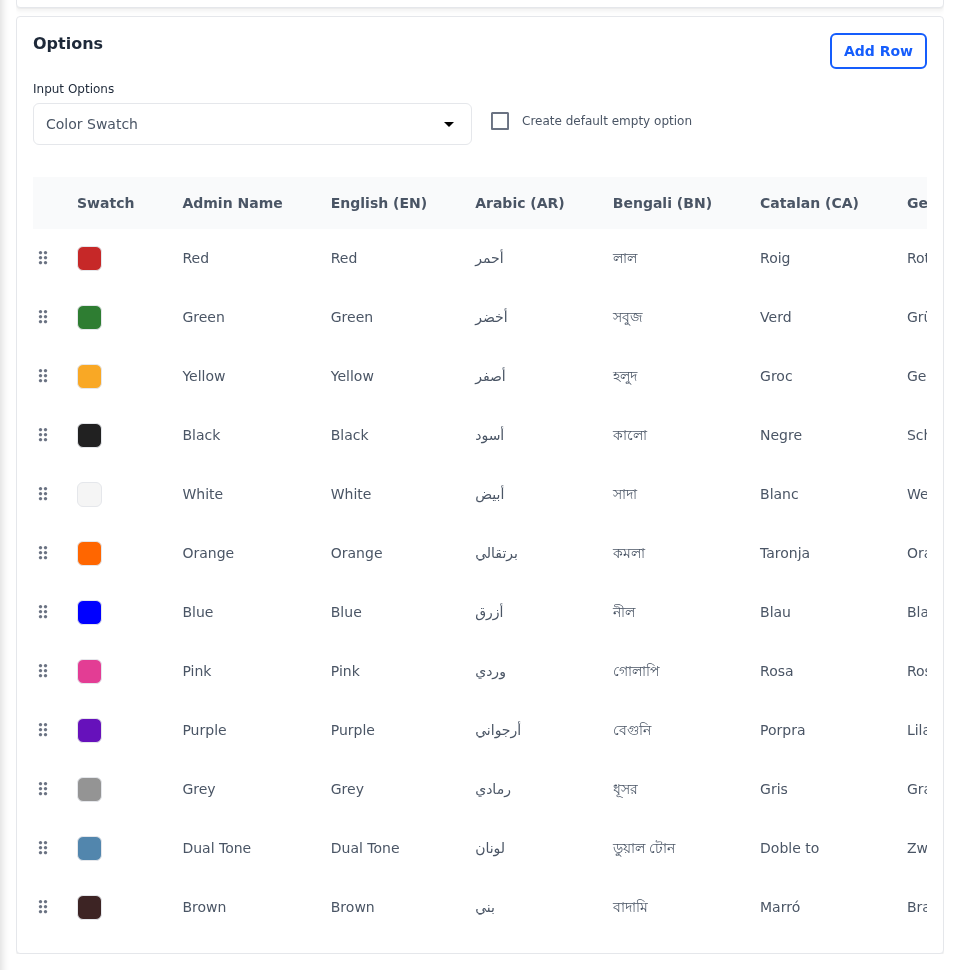
The options are saved when you click Save Attribute. After saving an attribute with color or image swatches, open it again to check that every option shows its swatch.
General
- Attribute Code: the attribute's unique code. It can't be changed later.
- Attribute Type: what you fill in on the product. See Attribute Input Types. It can't be changed later.
- Enable Wysiwyg Editor: for a Textarea attribute, shows a text editor with formatting instead of a plain text box.
- Default Value: for a Boolean attribute, the value products have until you set one. Enter
1for on or0for off.
Validations
- Input Validation: for a Text attribute, the format the value must have: Number, Email, Decimal, URL or Regex. For Regex, enter the pattern in Regex between slashes, such as
/^[A-Z]{2}-[0-9]{4}$/. - Is Required: the field is marked with an asterisk on the product edit screen, and the product can't be saved without a value.
- Is Unique: no two products can have the same value. Saving a product with a value another product already has shows that the value has already been taken.
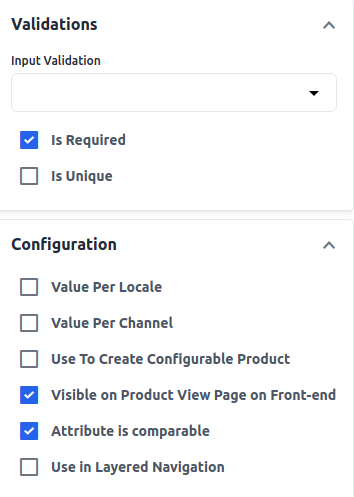
Configuration
Each setting has an information icon that explains it when you point to it.
| Setting | What it does |
|---|---|
| Value Per Locale | The product field gets a language badge and holds a separate value for each language, so you can translate it. It doesn't apply to Checkbox, Select, Multiselect and Boolean attributes: the first three translate their option names instead, and Boolean attributes show Yes or No. |
| Value Per Channel | The product field holds a separate value for each channel, and gets a channel badge when you have more than one channel. |
| Use To Create Configurable Product | For Select attributes. Configurable products can use the attribute to make their variants, such as a shirt in each Color and Size. A configurable attribute has the same value in every language and channel, so Value Per Locale and Value Per Channel are switched off when you save. |
| Visible on Product View Page on Front-end | Lists the attribute and the product's value under Additional Information on the product page. |
| Attribute is comparable | Adds the attribute as a row on the Product Compare page. Comparison is switched on in Product Settings. |
| Use in Layered Navigation | For Checkbox, Select, Multiselect, Boolean and Price attributes. Lets you choose the attribute as a filter for a category, under Filterable Attributes. Price shows as a range slider, and the other types as checkboxes. |
Edit an attribute
- Go to Catalog >> Attributes.
- Click Edit on the attribute's row. The Edit Attribute page opens.
- Change the names, options or settings.
- Click Save Attribute.
What can't be changed after saving
Some choices shape the values products already hold, so they're fixed once the attribute is saved:
- the Attribute Code and Attribute Type;
- the Input Validation and its Regex;
- Value Per Locale and Value Per Channel;
- Is Unique, once it's on.
To change one of these, create a new attribute.
Delete an attribute
- Go to Catalog >> Attributes.
- Click Delete on the attribute's row.
- Confirm the deletion.
To delete several attributes at once:
- Go to Catalog >> Attributes.
- Tick the attributes.
- Open Select Action.
- Choose Delete.
- Confirm the deletion.
Deleting an attribute removes it from every family and deletes the values products hold for it. It can't be undone. System attributes can't be deleted: when your selection includes one, Attribute Deleted Failed appears and nothing is deleted. An attribute that configurable products use for their variants can't be deleted either, and Attribute Deleted Failed appears.
Add the attribute to a family
- Go to Catalog >> Attribute Families.
- Click Edit on the family's row.
- Drag the attribute from Unassigned Attributes into a group.
- Click Save Attribute Family.
The attribute now appears as a field on the edit screen of the family's products. See Attribute Families.