
Locales
A locale is a language your storefront can be shown in. Create the locale here, then turn it on for the channels that should offer it. Shoppers can then switch the storefront to that language.
Your locales
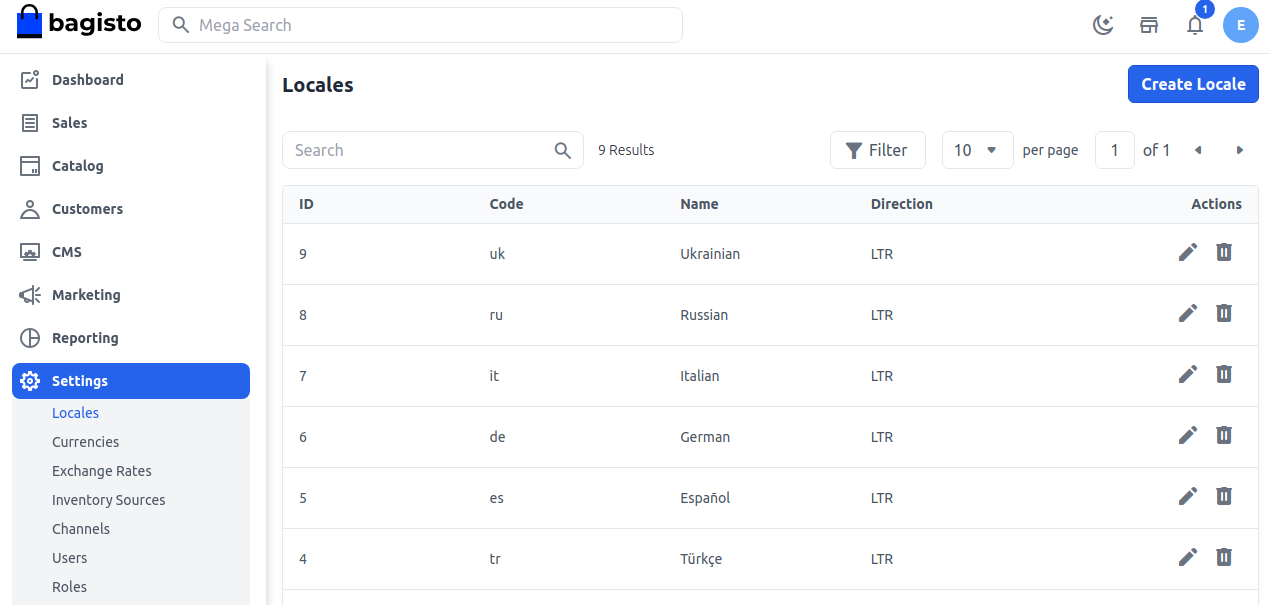
Go to Settings >> Locales to see every locale with its ID, Code, Name and Direction. Search by code, name or direction, or use Filter to show only LTR or RTL languages.
Create a locale
Go to Settings >> Locales.
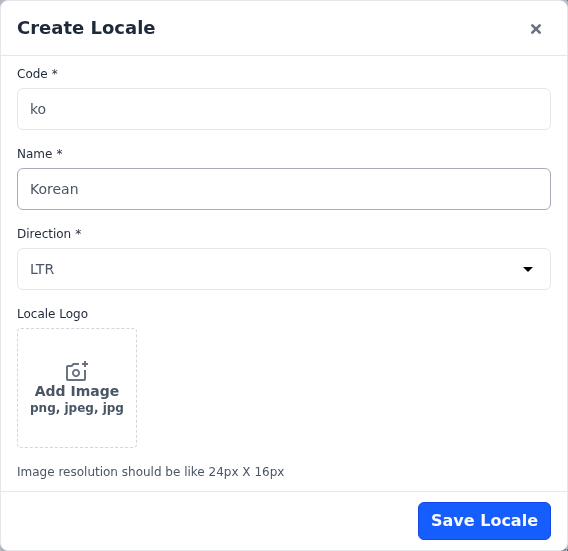
Click Create Locale. The Create Locale form opens.
Enter the Code, such as
kofor Korean.Enter the Name, such as Korean.
Choose the Direction: LTR for languages written left to right, or RTL for languages written right to left, such as Arabic.
Optionally, upload a Locale Logo, such as the flag of the language.
Click Save Locale.
The message Locale created successfully. appears and the locale is added to the list.
| Field | What to enter |
|---|---|
| Code | A unique code for the language, such as ko or pt_BR. Use at least two characters: start with a letter, then letters, numbers or underscores. You can't change the code later. |
| Name | The name of the language. |
| Direction | The direction the language is written in: LTR (left to right) or RTL (right to left). Choose one; the field is required. |
| Locale Logo | An optional image for the language, such as a flag, shown beside the language in the storefront header's language menu. Use a PNG, JPEG, JPG or WEBP image. A size of 24 × 16 px is recommended. |
Offer the locale on a channel
- Go to Settings >> Channels.
- Click the edit icon of the channel.
- In Currencies and Locales, select the locale under Locales.
- To make it the language the storefront opens in, choose it as the Default Locale.
- Click Save Channel.
Shoppers can now choose the language on that channel's storefront. See Channels for the other channel settings.
Adding a locale doesn't translate your content. Open your products, categories and CMS pages, switch to the new locale in the admin panel, and enter the translated text.
Edit or delete a locale
To edit a locale:
- Go to Settings >> Locales.
- Click the edit icon of the locale. The Edit Locales form opens.
- Change the Name, Direction or Locale Logo. The code can't be changed.
- Click Save Locale.
The message Locale updated successfully. appears.
To remove a locale:
- Go to Settings >> Locales.
- Click the delete icon of the locale.
- Click Agree to confirm.
- A store must keep at least one locale.
- A locale that a channel uses as its Default Locale can't be deleted. Choose another default locale for the channel first.
- Deleting a locale also removes it from every channel that offers it.
- Deleting a locale also deletes the category names and descriptions entered in that language.