Requisition Lists
The Requisition Lists feature allows companies to save multiple products for future or bulk purchases, making repeat ordering faster and more organized.
Go to My Account → Profile → Requisitions from the company storefront.
My Requisition Lists Page
This page displays all the existing requisition lists created under the company account.
It provides a quick view of each list’s details and available actions. As shown in the image below.
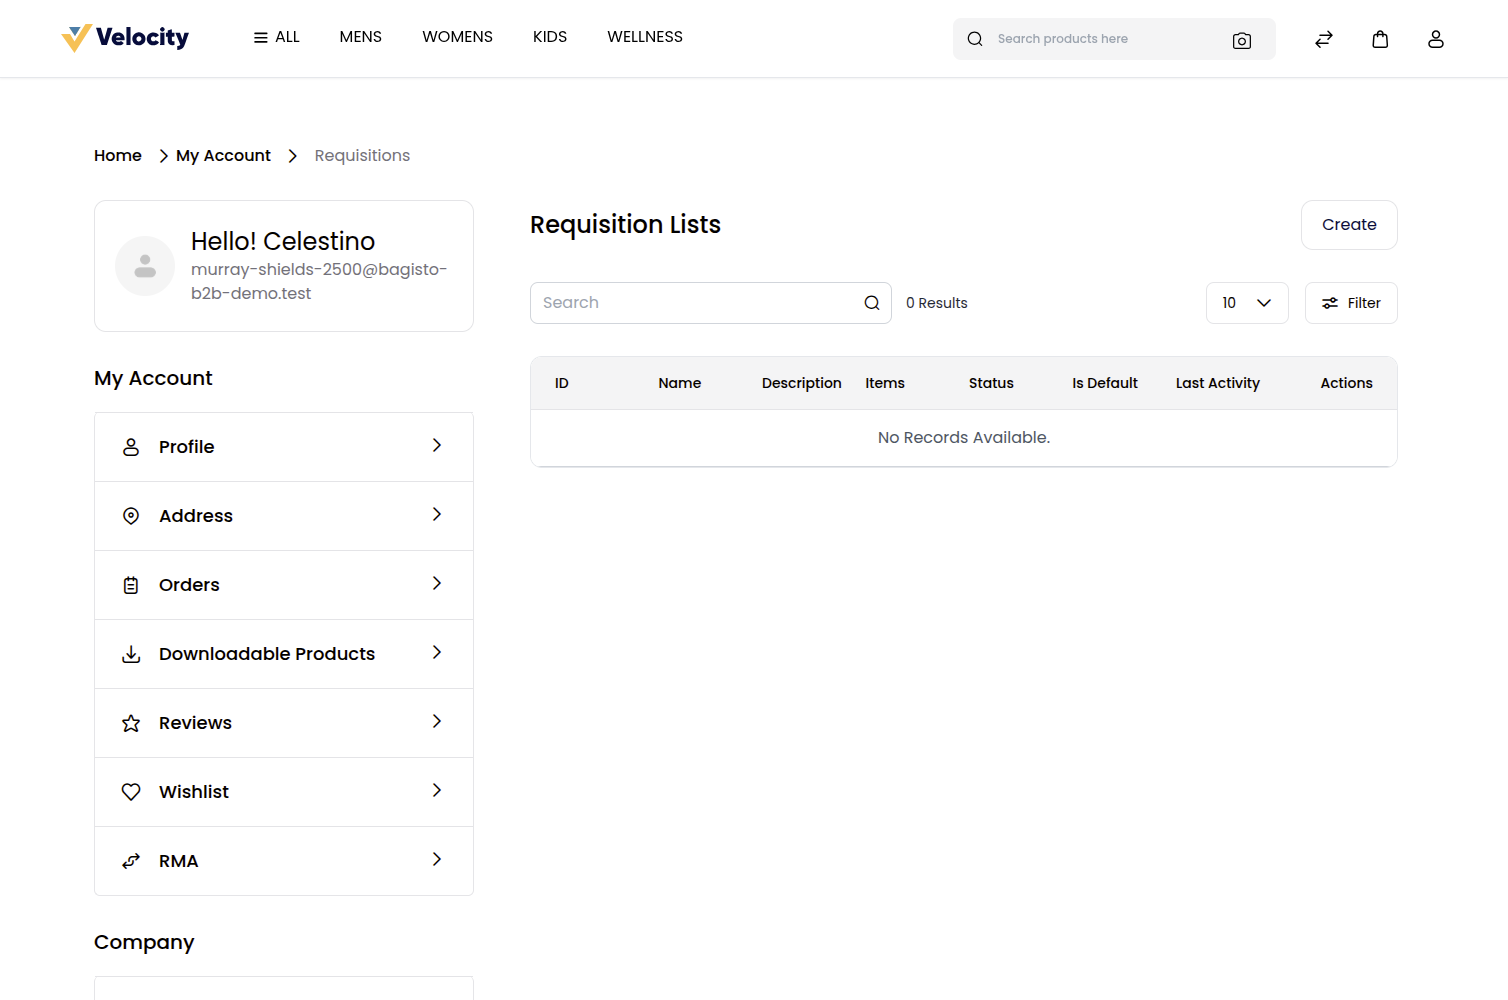
If no requisition lists exist, the message “No Records Available” will appear.
To create a new list, click on Create.
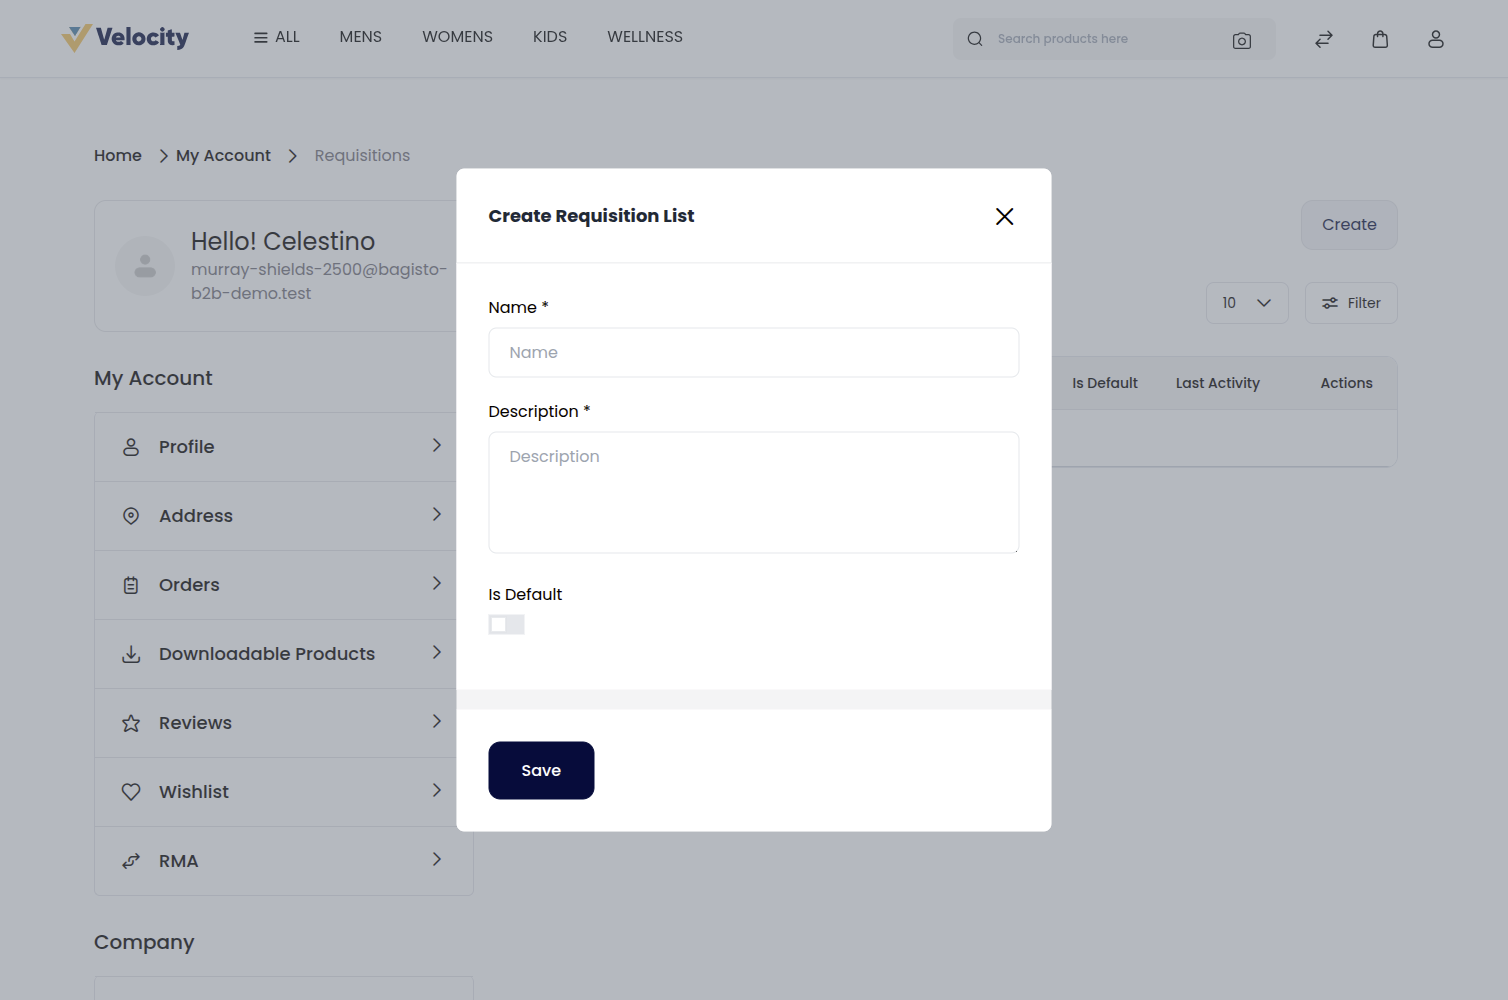
Create Requisition List
This will allow you to create a new requisition list and define its key details.
Fields Include:
1) Name – Enter a name for the requisition list.
2) Description – Add a brief description to identify its purpose.
3) Is Default – Enable this option to make it your default list.
After filling in the required fields, click Save to create your requisition list. As shown in the image below.
After Creating a Requisition List
Once a list is created, it will appear on the My Requisition Lists page with full details. As shown in the image below.

Each list can be managed, edited, or removed as needed.
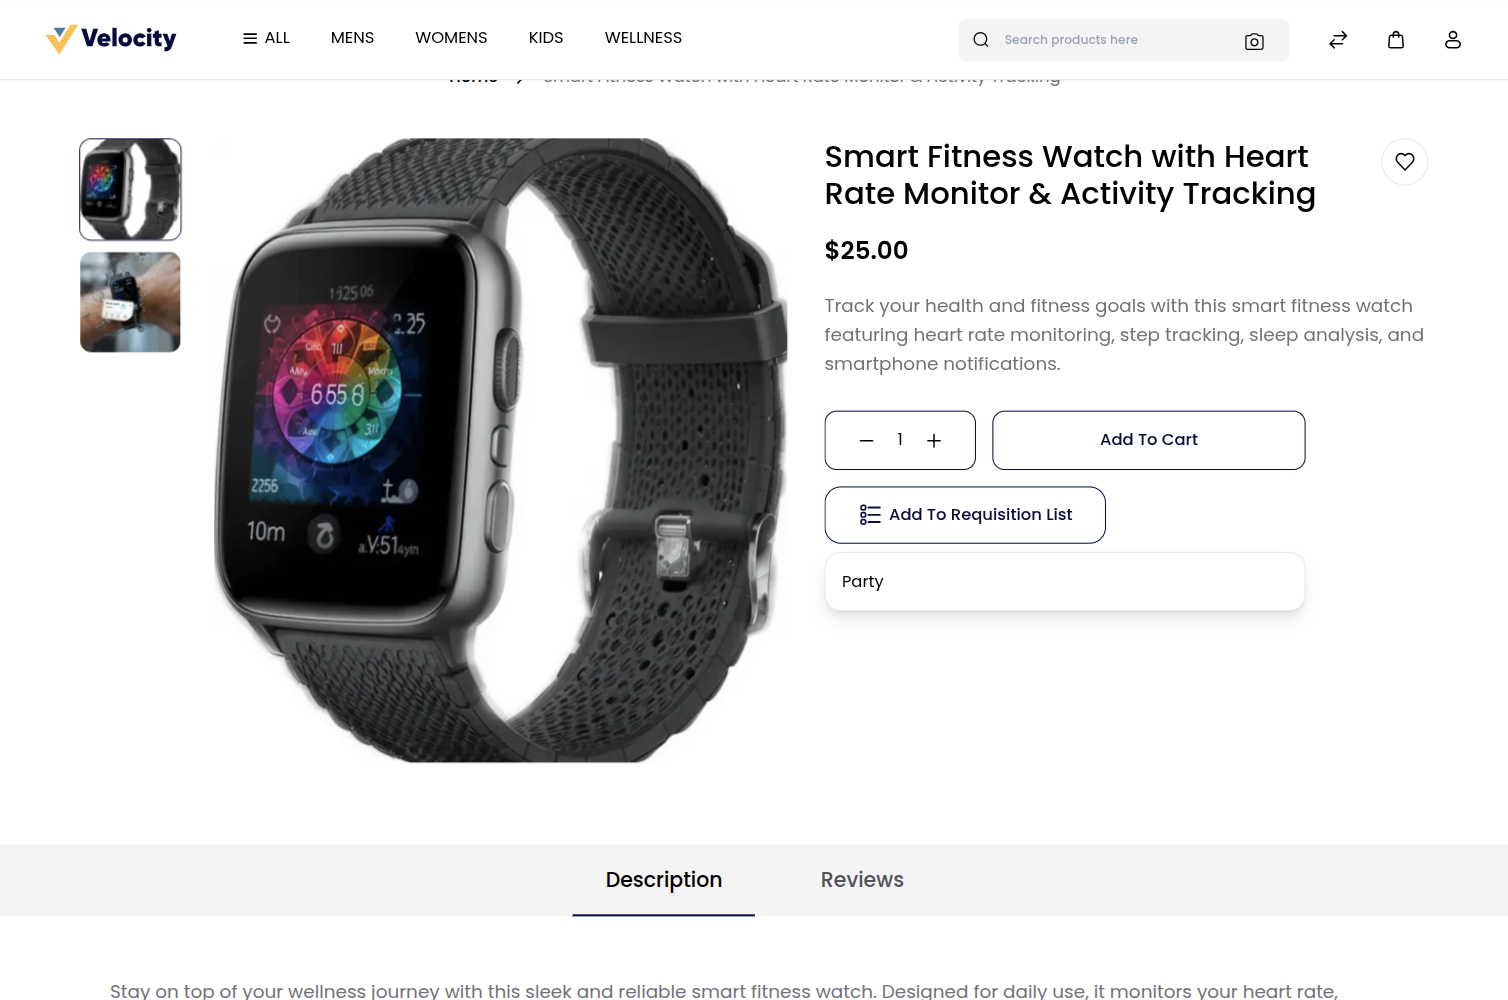
Add Products to Requisition List
This option allows users to add products directly to an existing requisition list from the product page.
From the product page, click Add To Requisition List, then select a list (e.g., Wish) from the dropdown menu to save the product.
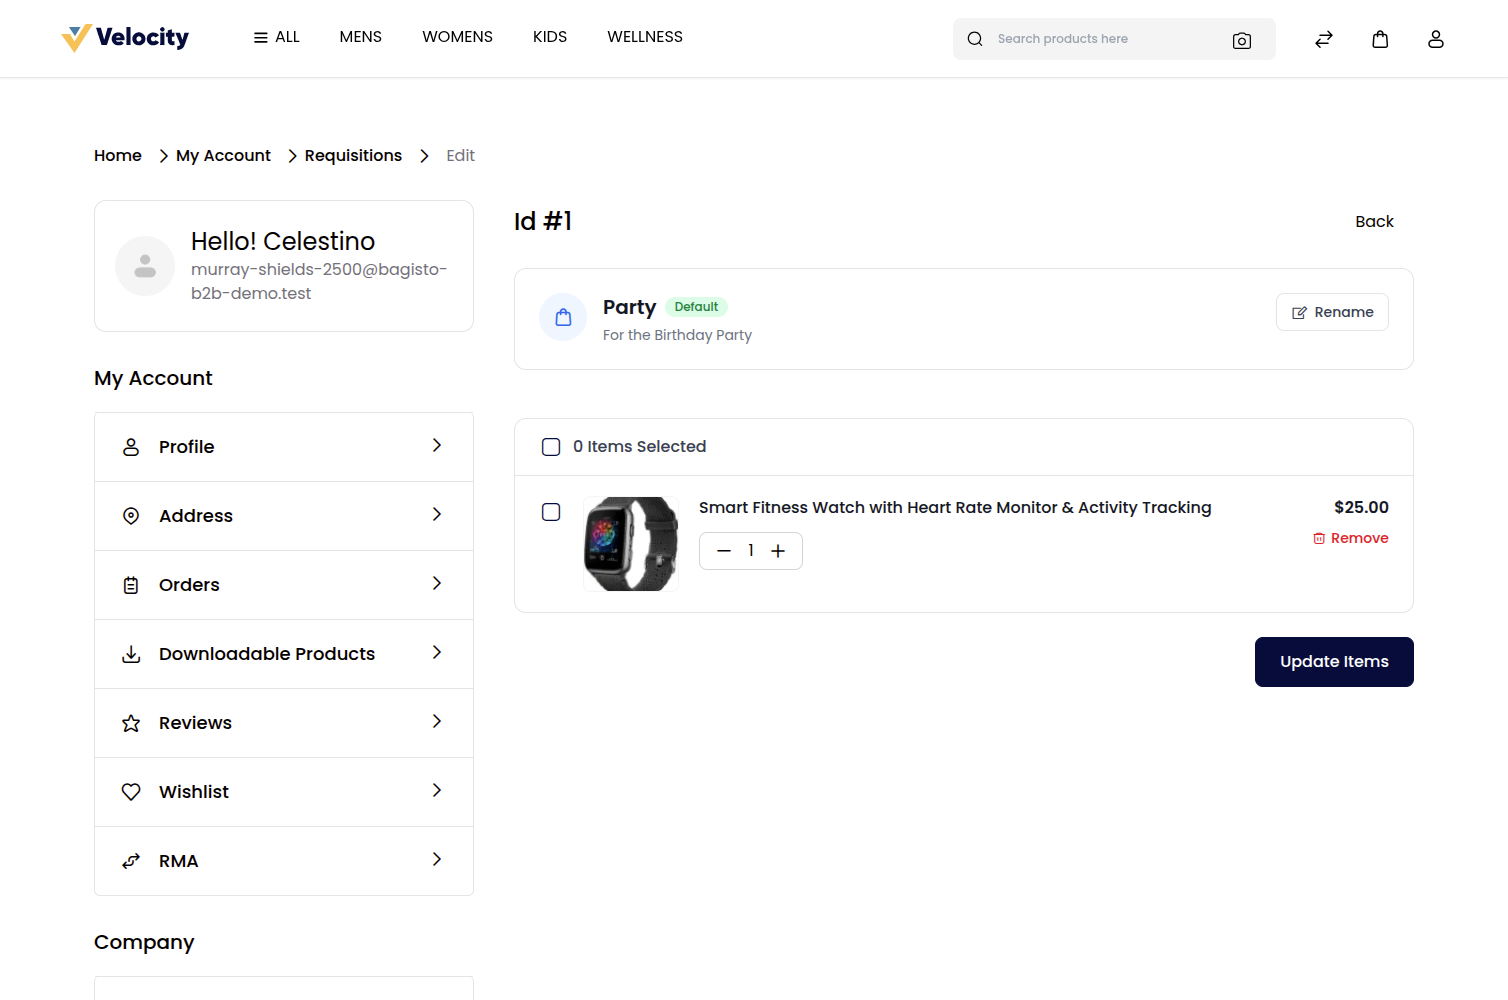
Manage Requisition List
After adding products, users can easily manage their saved items within the requisition list.
This page appears when you click the Edit icon under the Actions column on the My Requisition Lists page.
Available Actions Include:
1) Rename – Update the list name to better reflect its purpose.
2) Remove Selected – Delete specific items that are no longer needed.
3) Move Selected To Cart – Instantly move selected products to the shopping cart for checkout.
4) Update Items – Update product quantities within the list.