Native Mobile App
Bagisto Mobile App is changing the game in shopping with its open-source eCommerce mobile app solution.
This app easily turns your Bagisto store into a strong mobile platform, allowing for real-time updates of products, categories, etc.
With a simple interface, handling orders is super easy, making it a must-have for both tech-savvy people and those just starting with eCommerce.
This Laravel Mobile App is built on the Bagisto eCommerce framework and uses the powerful Laravel stack, providing lots of features for a smooth and effective mobile shopping experience.
The app makes it easy to manage product information and speeds up how quickly you can sell your products, all while giving you full control over your store.
Live Demo
Android: Download the app from Google Play Store:
https://play.google.com/store/apps/details?id=com.webkul.bagisto.mobikul
iOS: Download the app from Apple App Store:
https://apps.apple.com/us/app/mobikul-bagisto-laravel-app/id6447519140
Requirements
Note – To get the Bagisto Laravel Native Mobile App up and running, make sure you have the following.
- Bagisto Version - v2.3.6
- Android Studio Meerkat | 2024.3.2
- Flutter Version - 3.38.9
- Dart - 3.10.8
- Xcode - 26.3
- Swift - 6.1
Bagisto Mobile App Admin Configuration
The admin can control the Bagisto Laravel mobile app from the backend easily by following a few simple steps.
Each configuration step is displayed one at a time in the tabs below.
To set up the Laravel mobile app, the admin should go to Configure -> GraphQL API.
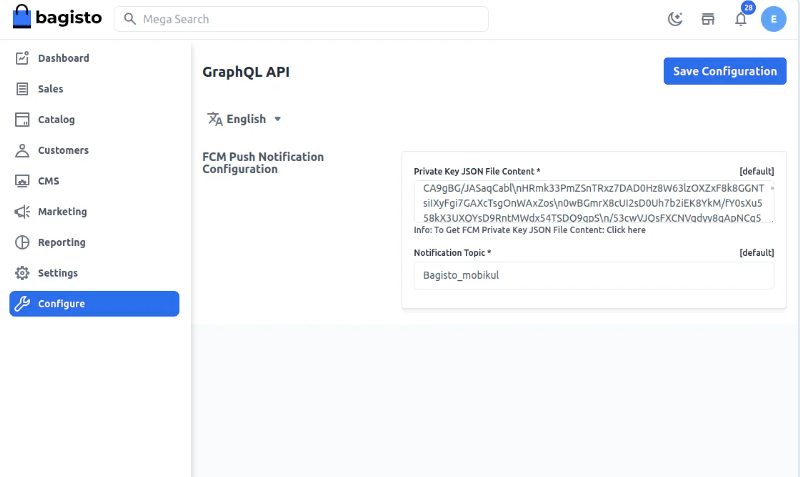
1) Private Key JSON File Content: To access the server key, just click the link located below the input box and set up the project on Firebase.
2) Notification Topic: The administrator has the ability to choose a name for the Bagisto Laravel mobile application.
Push Notifications
The Mobikul mobile app's push notifications can be easily controlled from the backend.
To do this, the admin should go to Settings -> Push Notifications.
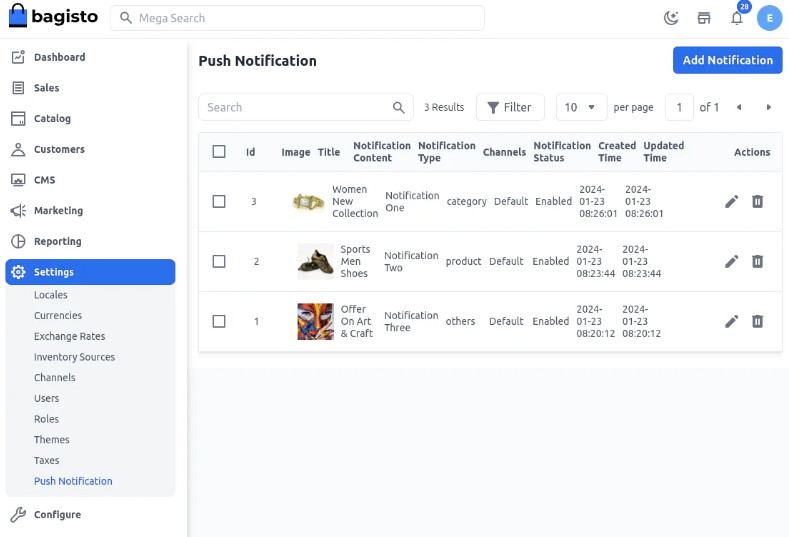
Also, for adding a new notification the admin can click on the Add Notification button.

After this add the below details.
1) Notification Title – The admin is able to put in the title for the notification.
2) Notification Content – The admin can explain the notification in the content section.
3) Image – Include an image for the notification.
4) Notification Type – The admin can choose the type of notification from the drop-down menu, which includes Simple Type, Category Based, or Product Based.
5) Channels - The admin can pick the channels that are either available or have been added by them.
6) Notification Status – Here, the admin can turn the notification on or off.
Additionally, the admin has the option to edit or remove the current notification based on what the business needs.
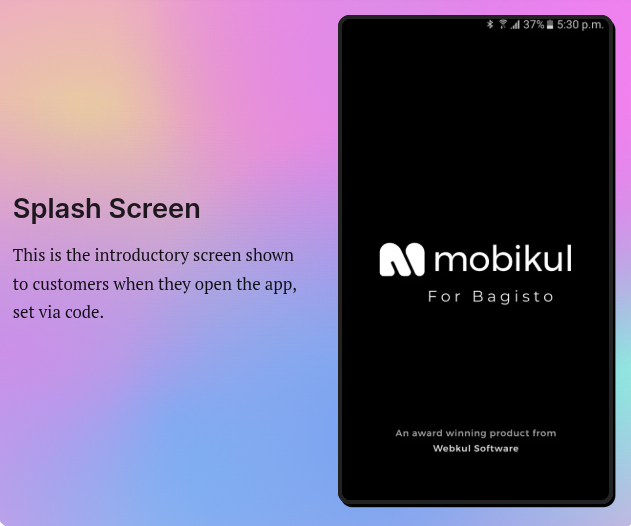
Customer View: Splash Screen
This is the first screen that customers see when they open the app. Also, this screen is included in the app from the coding side.
The business owner will give us this image based on what is needed through a PDF that we get beforehand.
Home Page
The app's homepage is organized into several sections to make it easier to use.
Carousel Sections
The homepage of the Laravel mobile app builder allows you to add various types of carousels in the slider.
1) Image type: You can select the Image type carousel, which lets you create different kinds of images and link products to them.
2) Banner Section: In this section, users of the application will view the banner that the admin has set up. The banners will rotate one after another.
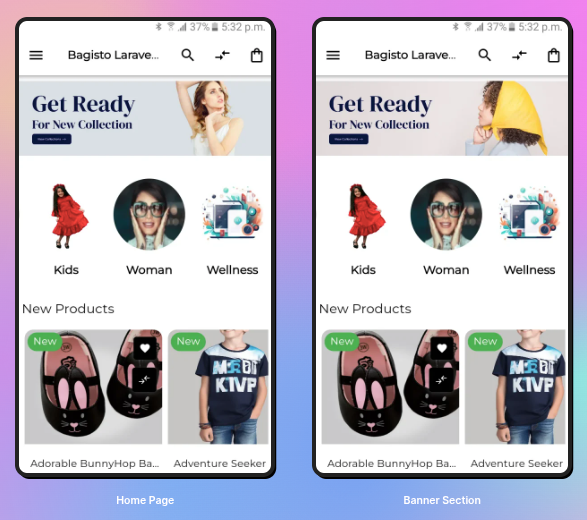
Featured Products
In this section, users of the Laravel Mobile app will find the highlighted items chosen by the app owner.

New Products
In the latest additions area, users can view the products that have just been added by the app owner.
Side Drawer
Also, the app motivates users to sign up through the application. It provides a straightforward form for them to enter their information.
This makes it easy to log in whenever they want to use it.
Sign Up –> Make An Account
The user of the Laravel native mobile app builder can easily register the app by completing the registration form.
This way, the app user can input their basic information to become a customer.

Log In with Your Email
Once a customer finishes signing up, they can log in using the email ID and password they provided during registration.
Forgot your password?
Users can change their password by clicking on the Forgot Password link.

Categories
There are two types of categories in the Laravel mobile application.
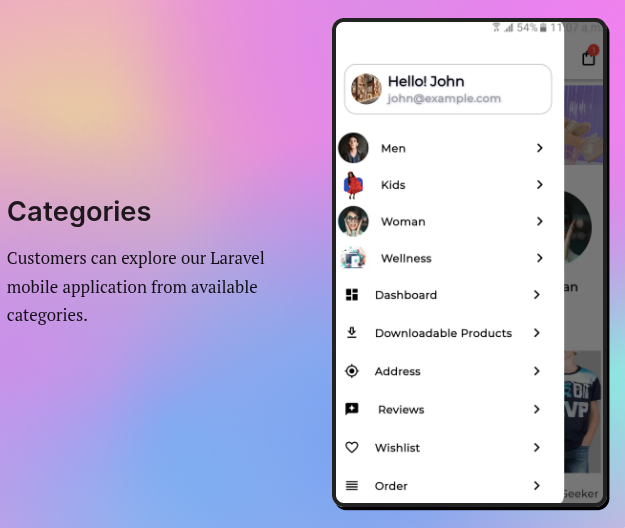
1) Parent category: Users can click on the name of the main category to see it.
2) Child category: Users can click on the subcategory within the main category to view the subcategory.

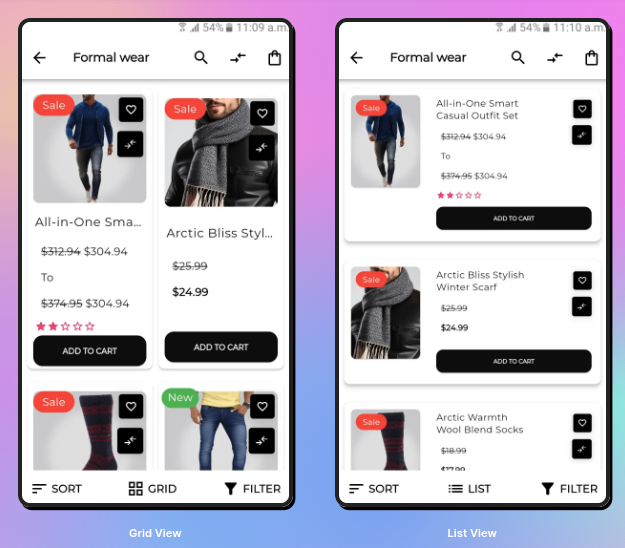
Now after clicking on the child category, all products will show added by the admin. Child category will be listed shown in the Grid and List view.
1) List View: In List view products are added to the list.
2) Grid View: The user can also select the button grid to view the products.
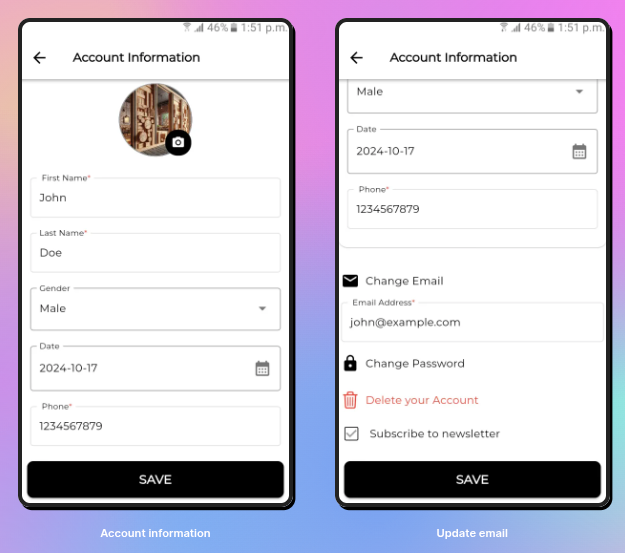
Account Information
Once you log into the mobile app, you can check your account info by going to the side menu and clicking on Dashboard.
In this section, you can quickly look at and go over your account details.
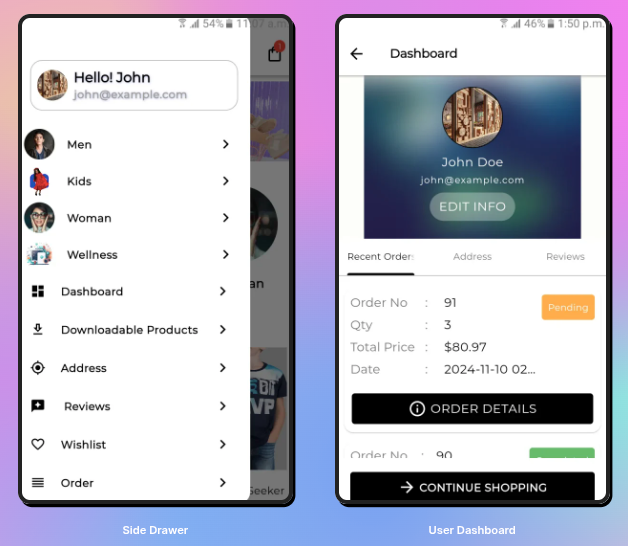
The account section will save the customer’s data, in multiple sub-sections.
Profile
This part is for the app user to keep their personal info about their account. In this section, the app user can update –
Their first name, last name, gender, date of birth, and phone number.
Users can change their email address that they registered with.
They can also change the password that is connected to their account.
Customers have the option to delete their registered account.
Users can also change their Email and Password for the app. They can also delete their account.
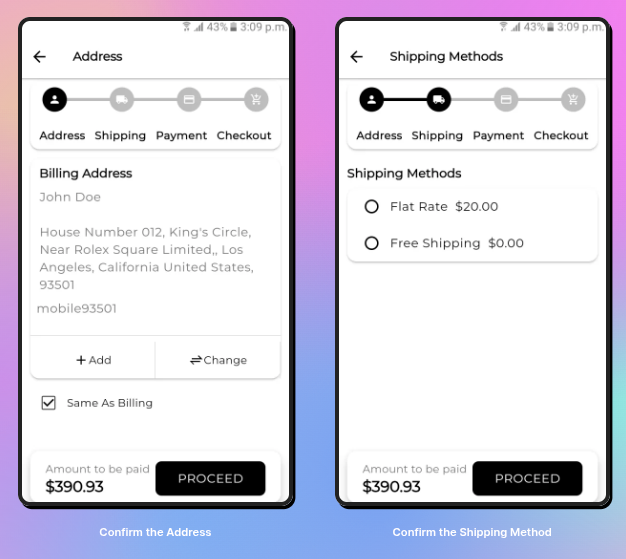
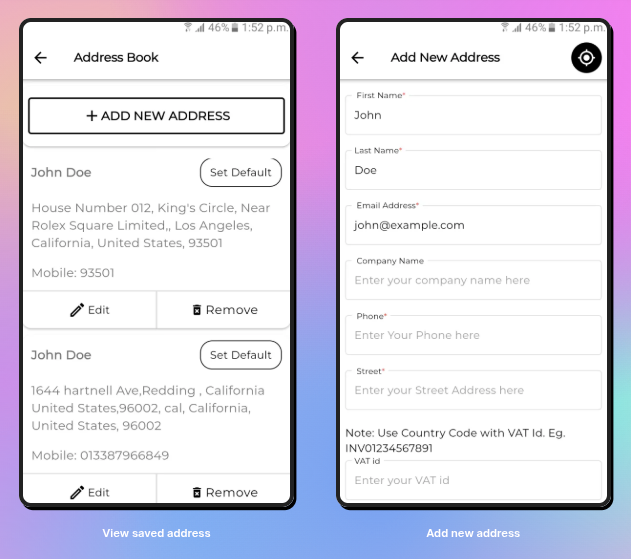
Address
This contains the information about the Default Billing Address, Default Shipping Address, and Manage Other Addresses.
The app user can click on any address to edit the details on the address from the edit button or else can add a new address.
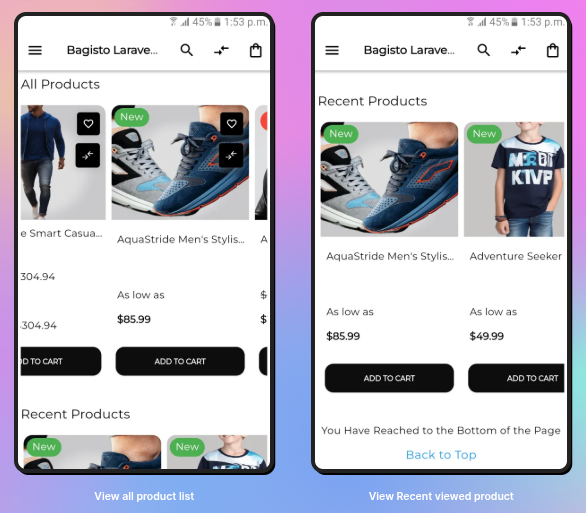
Recent Product: Customers can look at the items they have recently seen in the recent products area, as illustrated in the picture below:
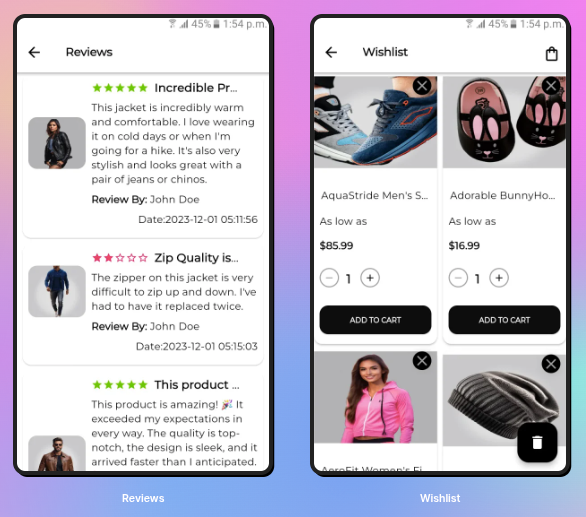
Reviews: The app users can view all their reviews given by them to the products.
Wishlist: The app user can view all the wishlist products from the Wishlist option.
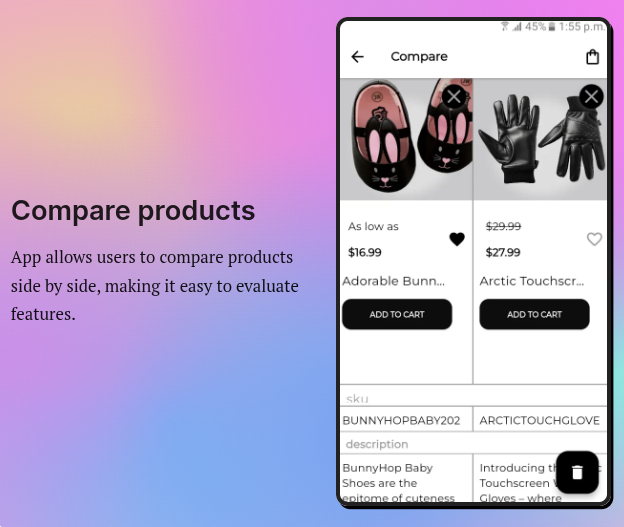
Compare Products
Users can compare products side by side within the app, allowing them to easily view and evaluate differences in features.
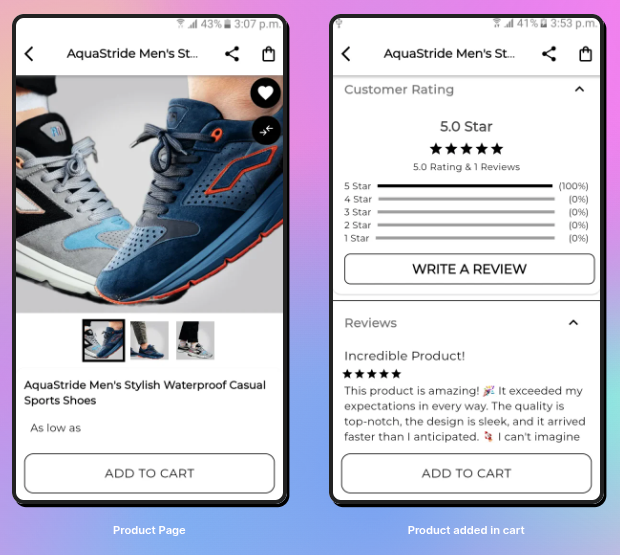
Product View:-
The page shows information about the products that users of the app can look at. So, this page includes the following details-
Add to Cart – Users can click the Add To Cart button to put the product in their cart for later checkout.
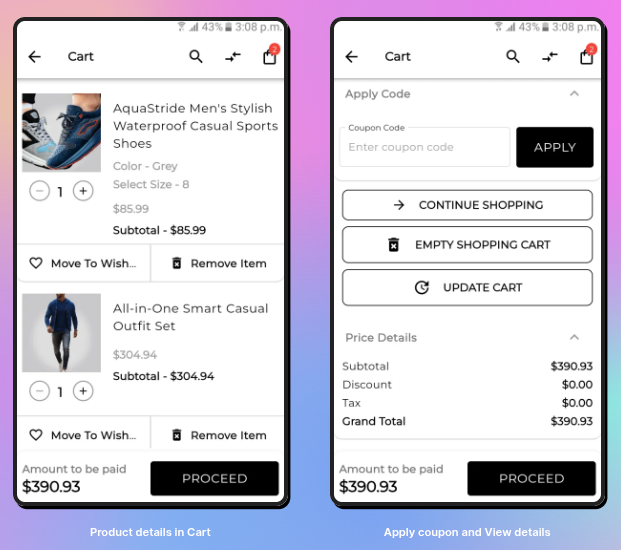
Now, people using the app can go ahead with the product they added to their cart.
Here, app users can use a code for their purchases. They also have the choice to keep shopping, update their cart, or empty the shopping cart before clicking to continue.
In the next step, users have to choose how they want to pay for their order, which can be either Cash On Delivery or Money Transfer.
Here users can check the price details of the order and can place the order. After that, the order has been placed and will get a confirmation with order ID and email.
Dark Theme
The app has a dark theme that users can choose. If you tap on the Change theme button, the app will switch to a dark color theme, like you can see in the picture below.