
Data Transfer
Data transfer imports products, customers and tax rates in bulk from a file, so you don't have to enter a large catalog one record at a time. Once you start an import, Bagisto runs every step on its own, and a progress bar at the top of the page shows the step it has reached.
What you can import
| Type | Each row is matched by | Notes |
|---|---|---|
| Products | SKU | Every product type except downloadable products. |
| Customers | Email address | The customer group code in the file must already exist. |
| Tax Rates | Identifier | A row has a single zip code or a zip range. Without a range, the zip code is required, so use * for every postcode. The rate must be more than 0. See Taxes. |
The sample file for each type shows the columns it expects.
Your imports
Go to Settings >> Data Transfer >> Imports to see every import with its ID, State, Uploaded File, Error File, Started At, Completed At and Summary, which counts the records created, updated and deleted. State shows where each import is as a single word, such as pending, processing or completed. Click a file to download it.
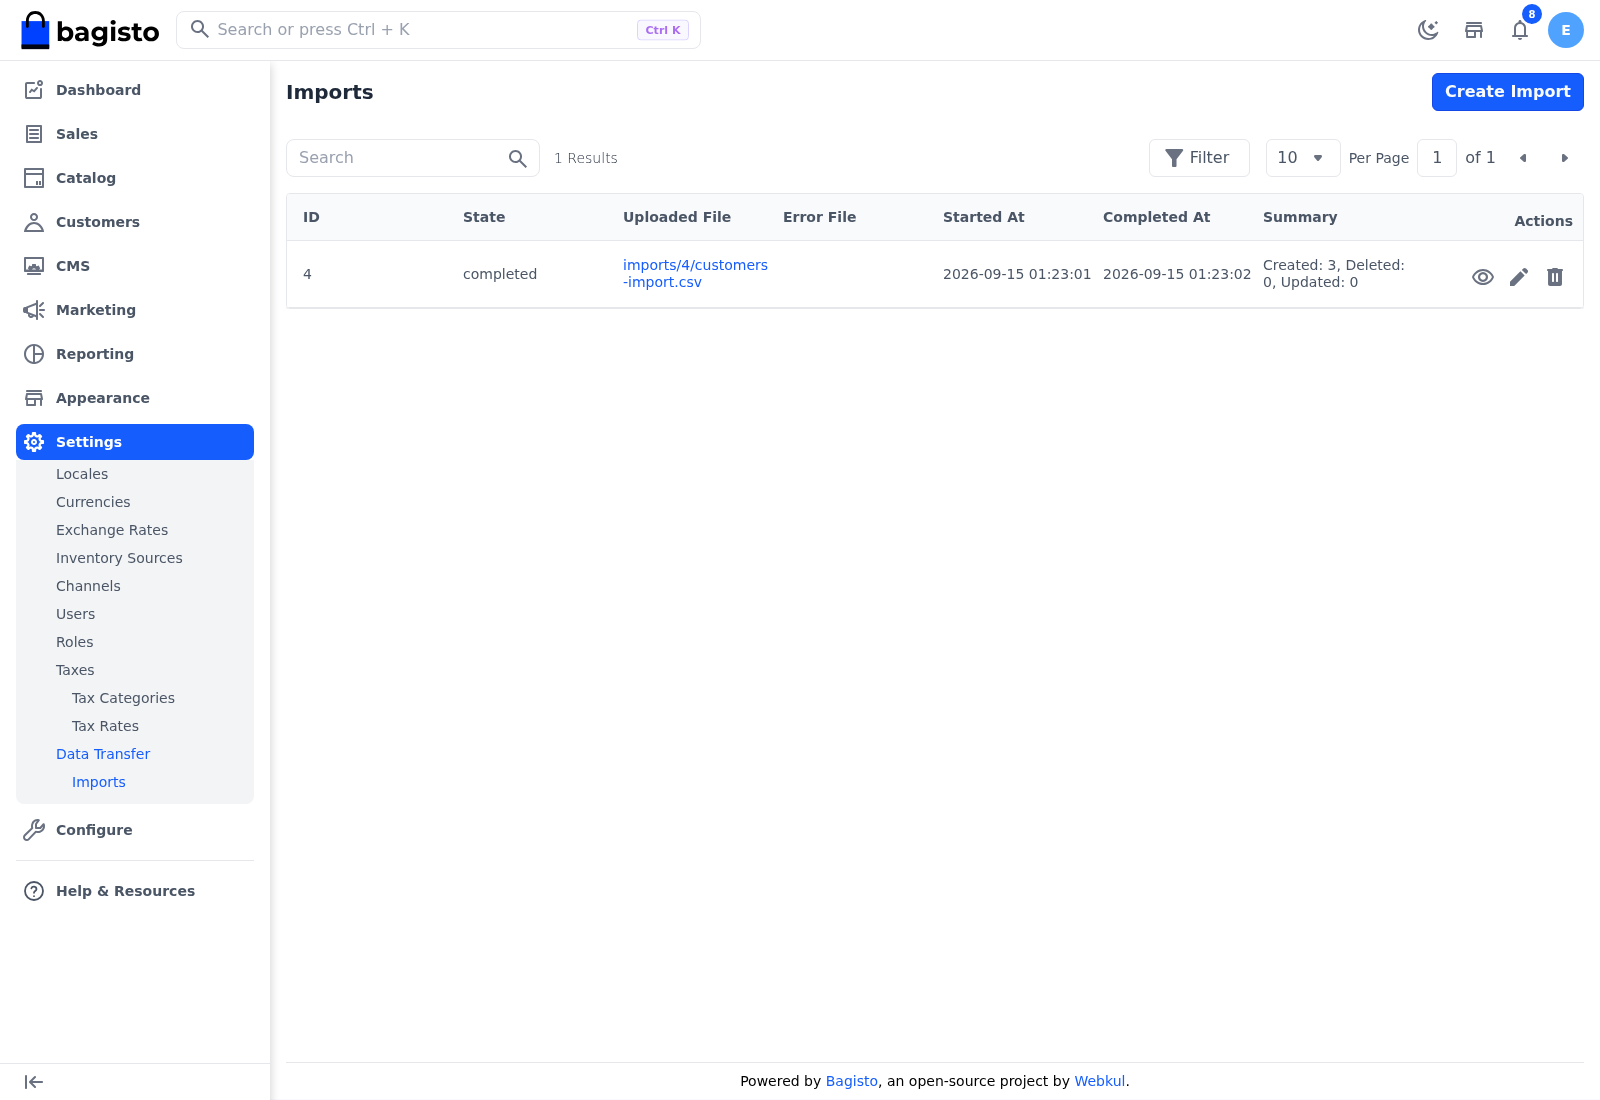
Each row has these actions:
- View Progress or Import: both open the import page.
- Edit to change the import and run it again. See Edit or delete an import.
- Delete to remove the import and its files.
Create an import
Go to Settings >> Data Transfer >> Imports.
Click Create Import.
Choose the Type of records to import: Products, Customers or Tax Rates.
Click the arrow beside Download Sample and choose CSV, XLS, XLSX or XML to get a file with the expected columns. Prepare your file in the same layout.
Choose the File. CSV, XLS, XLSX and XML files are accepted.
For products, choose where the images named in your file are found under Product Images. See Product images.
In Settings, check the Action, Validation Strategy, Allowed Errors, Field Separator and Process In Queue. See Import settings.
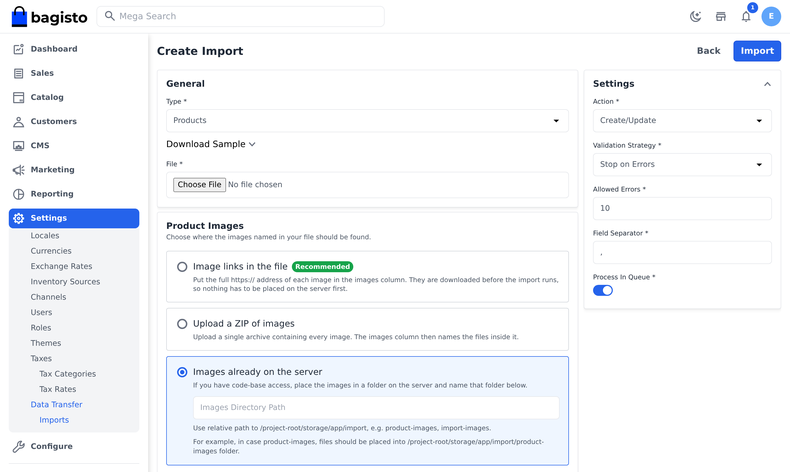
Click Import.
In the message The import will start as soon as this is saved. Do you want to continue?, click Agree.
The message Import created successfully. appears, the import page opens and the import starts.
Import settings
| Field | What it does |
|---|---|
| Action | Create/Update adds new records and updates the ones that already exist. Delete removes the records listed in the file. |
| Validation Strategy | Invalid rows are always left out. Stop on Errors stops the import after validation when the file has more errors than Allowed Errors. Skip Errors imports the valid rows however many errors there are. |
| Allowed Errors | With Stop on Errors, how many errors the file can have before the import stops. The default is 10. |
| Field Separator | The character between columns in a CSV file. The default is a comma. |
| Process In Queue | Runs the import in the background, which suits large files. See below. |
Process in queue
With Process In Queue on, the import runs in the background, and you can leave the page. Switch it on only when a developer has set your store up to run imports in the background. See Work that goes through the queue.
- If that isn't set up, the import stops after validation with the message Please change your queue driver to "database" or "redis" to start the import process.
- If it's set up but not running, the progress bar doesn't move.
In either case, run the import again without the queue:
- Go to Settings >> Data Transfer >> Imports.
- Click Edit on the import.
- Switch Process In Queue off.
- Click Import.
- Click Agree to confirm.
With Process In Queue off, your browser runs the import in short steps. If you close the page, the import pauses, and it continues from the same step when you open the import again.
An import stops at validation, whatever the strategy, if every row is invalid.
Product images
A product file names each product's images in its images column. Under Product Images, choose where Bagisto finds them:
- Image links in the file (recommended): put the full address of each image, starting with
http://orhttps://, in the images column. Separate several images with commas. The images are downloaded before any record is written, so nothing has to be placed on the server first. An image that can't be downloaded is left out, and the product is imported without it. - Upload a ZIP of images: upload one archive that contains every image, and put the file names in the images column. The archive can be up to 100 MB, though your server may allow less. After you choose this option, Download sample images gives you an archive that matches the sample file.
- Images already on the server: if you can place files on the server, put the images in a folder under the store's import directory and enter the folder name in the path field below the option. The hint below the field shows the exact location.
With a ZIP or a server folder, a row whose image file isn't found, or whose images column holds a web address, is reported as an error and left out.
Images already on the server is selected at first, and its path is required while it's selected. If your file has no images, choose Image links in the file.
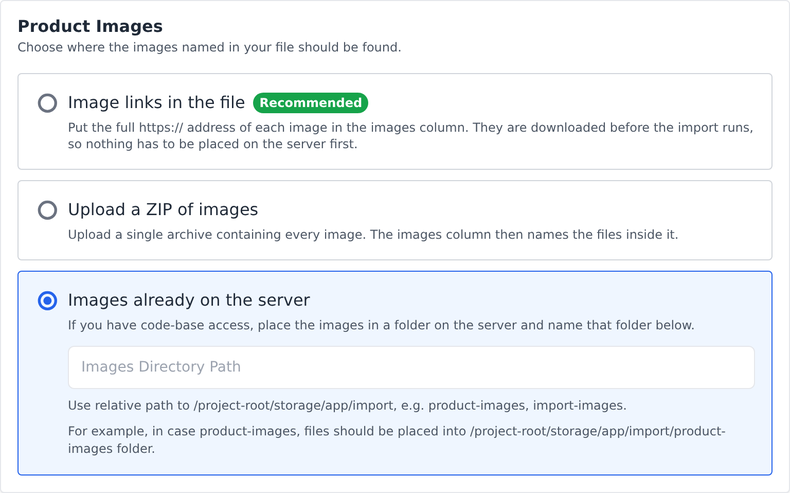
Your choice is saved with the import. When you edit an import that has a ZIP archive, the page shows its name and how many images are ready; choosing a new archive replaces them.
Follow the import
The progress bar on the import page shows these steps:
- Validate – the file is read and each row is checked.
- Images – the image links in the file are downloaded before any record is written. This step appears only for products with Image links in the file.
- Create or Delete – the records are written, or removed when the action is Delete.
- Link – imported products are connected, such as configurable variants, grouped and bundle products, booking details, and related, cross-sell and up-sell products.
- Index – price, inventory and search data are rebuilt.
Images, Link and Index appear only for product imports that create or update. A customer or tax rate import shows Validate and Create, and any import with the Delete action shows Validate and Delete.
When every step is done, the message Congratulations! Your import was successful. appears with the Total Records Created, Total Records Updated and Total Records Deleted.
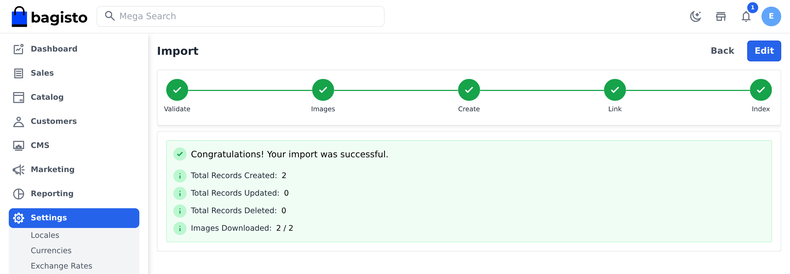
The imported records appear under the matching menu, such as Customers >> Customers for a customer import (see Customers) or Catalog >> Products for a product import (see Products).
If the file has errors
After validation, the page shows the Total Rows Processed, Total Invalid Rows and Total Errors, and lists the first errors.
- Your import can proceed, but some rows will be skipped. Review the errors below or download the full report. means the valid rows are imported and the invalid ones left out. The import continues on its own.
- Your import is invalid. Please fix the following errors and try again. means the import has stopped.
- The import could not be processed. Please check the file and try again. means a step couldn't run.
Click Download Full Report to see every error. If the column headings in the file are wrong, the errors are shown on the page only. To try again, fix your file and edit the import with the new file.
When an import runs in the queue and some batches don't finish, the message says how many didn't. Ask your developer to check the store's error log, then import those rows again.
Come back to a running import
You don't have to wait on the page. On Settings >> Data Transfer >> Imports, click View Progress or Import on the import's row to open its page again.
Edit or delete an import
To run an import again with a corrected file or other settings:
- Go to Settings >> Data Transfer >> Imports.
- Click Edit on the import. The Edit Import page shows the Current Uploaded File.
- Optionally, choose a new File or change the settings.
- Click Import.
- Click Agree to confirm.
The message Import updated successfully. appears and the import starts again from Validate. The results of the previous run are cleared.
The Edit Import page shows Product Images for every type. For a customer or tax rate import, ignore it.
To remove an import and its files:
- Go to Settings >> Data Transfer >> Imports.
- Click Delete on the import's row.
- Click Agree to confirm.
The message Import deleted successfully. appears. The records it already imported are kept.