
Cache Management
Cache Management lets you clear and rebuild the caches your store keeps, and switch the storefront's full page cache on or off. It has two screens, General and Full Page Cache, and both apply to the whole store.
General
- Go to Configure >> Cache Management >> General.
- In Cache Actions, click the button for the action you want.
- Read the result in the Output Console below the buttons.
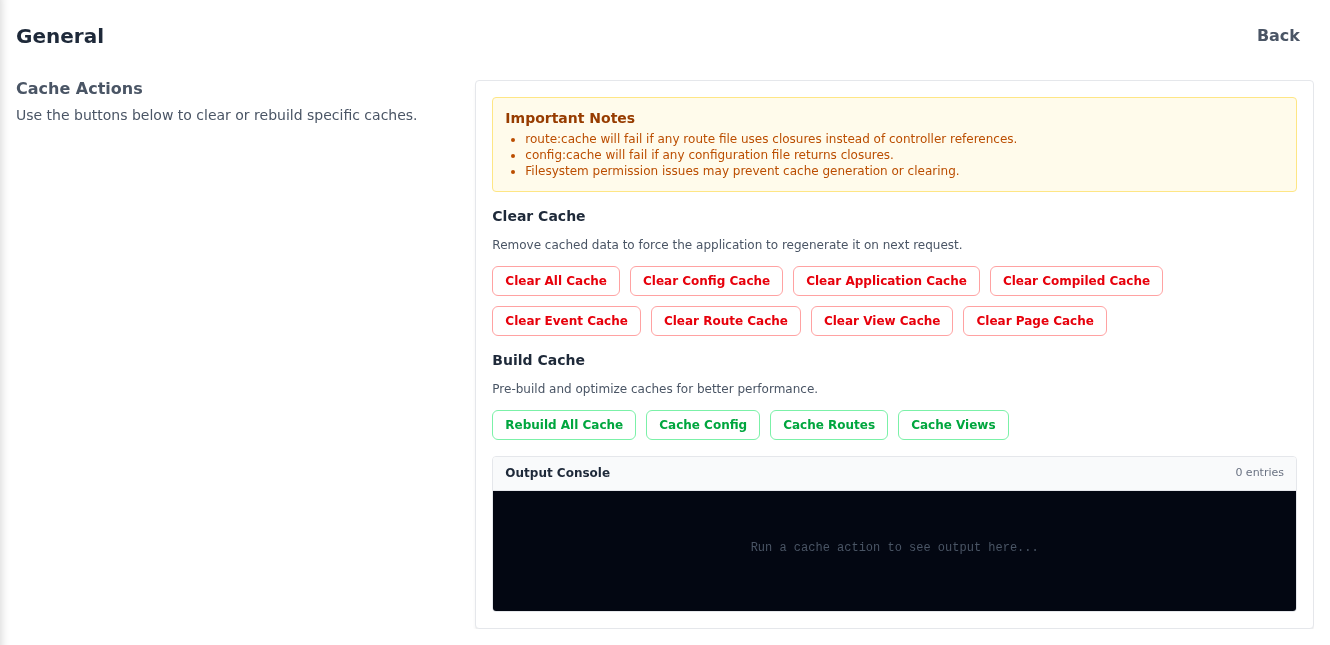
The buttons act straight away, so this screen has no Save Configuration button and no channel or language selector.
Under Clear Cache, each button removes one kind of cached data, so the store builds it again on the next request:
- Clear All Cache – every cache below at once, including the page cache.
- Clear Config Cache – the cached configuration.
- Clear Application Cache – the application cache.
- Clear Compiled Cache – compiled classes and files.
- Clear Event Cache – cached event data.
- Clear Route Cache – cached routes.
- Clear View Cache – compiled page templates.
- Clear Page Cache – the storefront's full page cache, the same as Flush Page Cache on the Full Page Cache screen.
Under Build Cache, each button builds a cache in advance, so the store starts fast after an update:
- Rebuild All Cache – the configuration, event data, routes and page templates at once.
- Cache Config – the configuration.
- Cache Routes – the routes.
- Cache Views – the page templates.
Important notes
- Caching routes can fail when a route is written as a closure rather than pointing to a controller.
- Caching the configuration fails when a configuration file contains a closure.
- A file permission problem on the server stops both clearing and building.
- After you clear a cache, the first few pages load a little more slowly while the store builds it again. Building the caches after an update avoids that.
Full page cache
The full page cache keeps a rendered copy of storefront pages and serves it to the next visitor, instead of building the page again for each one. It decides how quickly your storefront responds under load.
The home page, category and product pages, CMS pages, search results, the compare page and the Contact Us page are cached. The cart, checkout and customer account pages never are, and a signed-in customer is always shown freshly built pages.
- Go to Configure >> Cache Management >> Full Page Cache.
- In Settings, switch Enable Full Page Cache on or off. It is on by default. While it is on, Cache Lifetime (Minutes) and Flush Page Cache appear.
- Enter the Cache Lifetime (Minutes).
- Click Save Configuration.
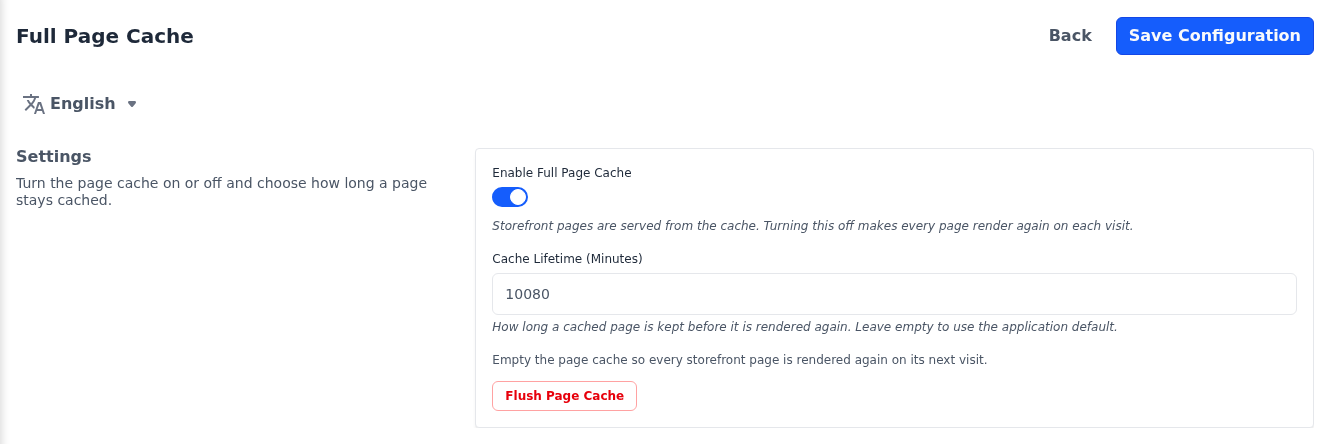
Enable Full Page Cache: Serves storefront pages from the cache. Turning it off renders every page again on each visit, which is slower for shoppers but useful while you check a page that looks out of date.
Cache Lifetime (Minutes): How long a cached page is kept before it is rendered again. The default is 10080, one week, unless the server's environment file sets another lifetime. Leave it empty to use the application default.
Flush Page Cache: Empties the page cache, so every storefront page is rendered again on its next visit. The button acts straight away. Use it after a change the store doesn't pick up on its own, such as a template edited on the server.
You don't have to clear the cache after an edit
A cached page is refreshed automatically when the content behind it changes. Saving a product, category, review, CMS page, URL rewrite, channel or theme section clears the affected pages, and so do orders, refunds and price or catalog rule reindexing. Editing a product also clears your home page and the product's category pages, in every channel, language and currency. Saving any configuration screen clears the whole page cache. Each channel, language and currency has its own copy of every page, so switching between them never shows an out-of-date page.
The lifetime is a backstop rather than the main mechanism, so set it long and let the automatic refresh handle day-to-day edits. A short lifetime doesn't fix a page that looks out of date, it only shortens how long the wrong page is shown. If a change doesn't appear at all, first check that it was saved or published. If it was, click Flush Page Cache.
Differences in Bagisto 2.4
The Full Page Cache screen is available from Bagisto 2.4.10. There, Cache Lifetime (Minutes) has no preset value, there is no Flush Page Cache or Clear Page Cache button, and the page cache also has to be switched on in the server's environment file. Releases before 2.4.10 have no Full Page Cache screen: the page cache is switched on, and its lifetime set, in the server's environment file, where it is off by default.