
Company Registration
Company Registration allows businesses to join the storefront and manage their organization profile easily.
It ensures that companies can quickly become part of your B2B platform.
Once registered, companies can manage their profile, access dashboards, and use features like requisition lists, quick orders, and purchase orders.
Steps to Register a Company
Step: 1 On the storefront, click on Sign Up from the header menu, as shown in the image below.

Step: 2 After clicking Sign Up, the account selection page will be displayed with two options:
- Create Personal Account
- Create Company Account
Select Create Company Account to register your business, as shown in the image below.
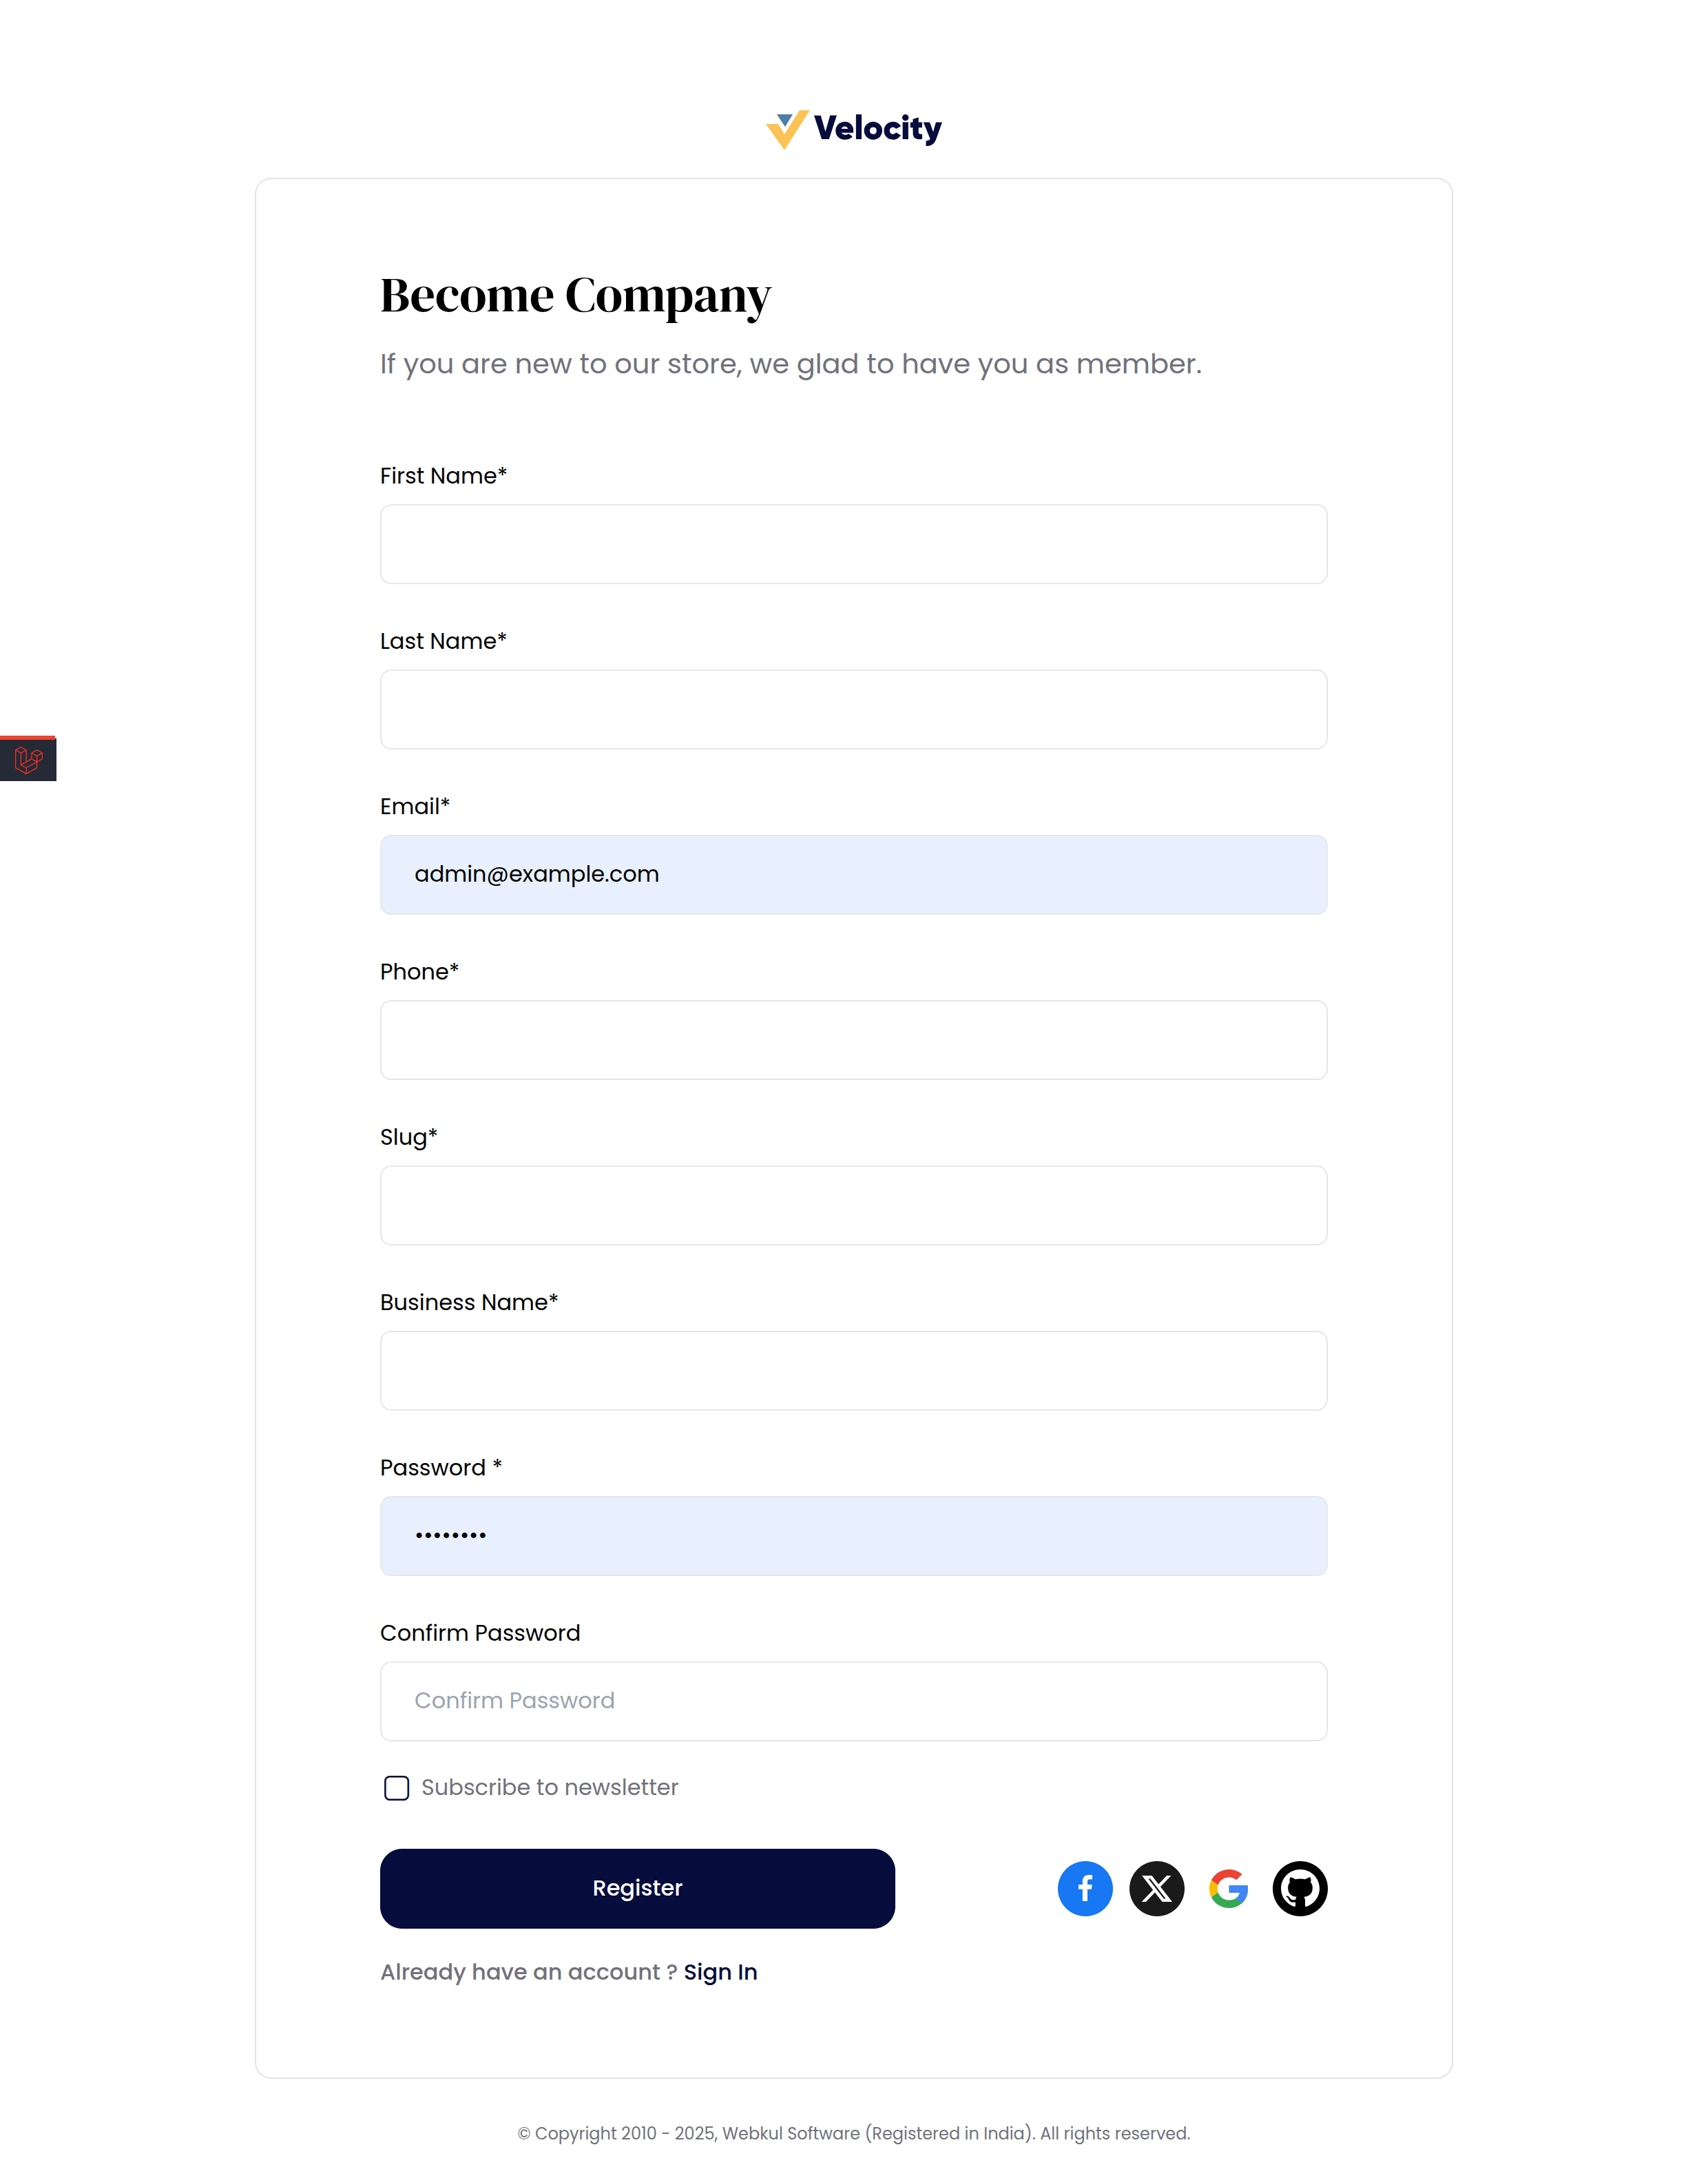
Step: 3 After selecting Create Company Account, the company registration form will open. Fill in the company registration details:
1) First Name – Enter your first name.
2) Last Name – Enter your last name.
3) Email – Enter a valid email address.
4) Phone – Enter your contact number.
5) Slug – Enter a unique identifier for your company.
6) Business Name – Enter your company name.
7) Password – Create a secure password.
8) Confirm Password – Re-enter the password.
9) Subscribe to Newsletter – Enable this option if you want to receive updates and newsletters.
After filling in all the required information, click Register to create your company account.
Note: If the store administrator has configured any Company Attributes to be visible on signup, those custom fields will also appear on this form. See the Company Attributes guide.
Approval Required: When the administrator has enabled Require Company Approval (see the Configuration guide), your company account stays in a Pending state after registration and you cannot sign in until an administrator approves it. You will see the message: "Your company account has been registered and is pending approval. You will be able to sign in once an administrator approves your account." When approval is not required, you can sign in immediately.
Company Sign In
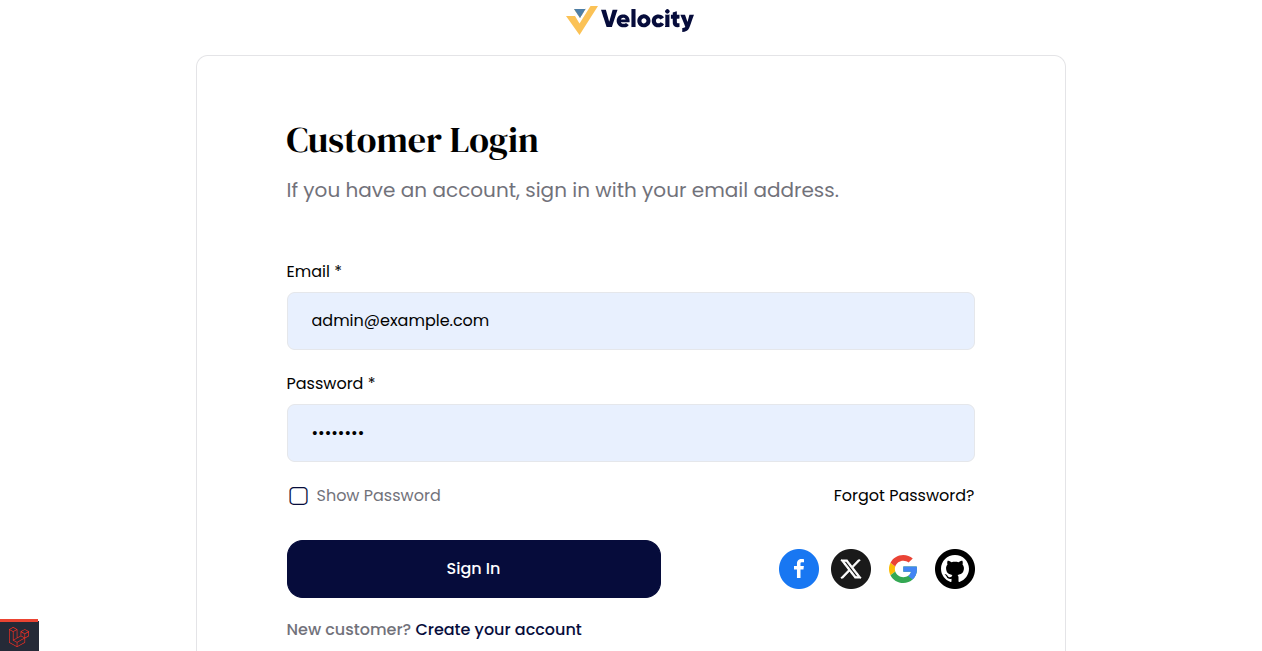
Step: 4 If you already have a company account, click Sign In and log in using your registered email address and password.
If you do not have an account yet, you can also select Create an Account, choose Create Company Account, and complete the registration process.
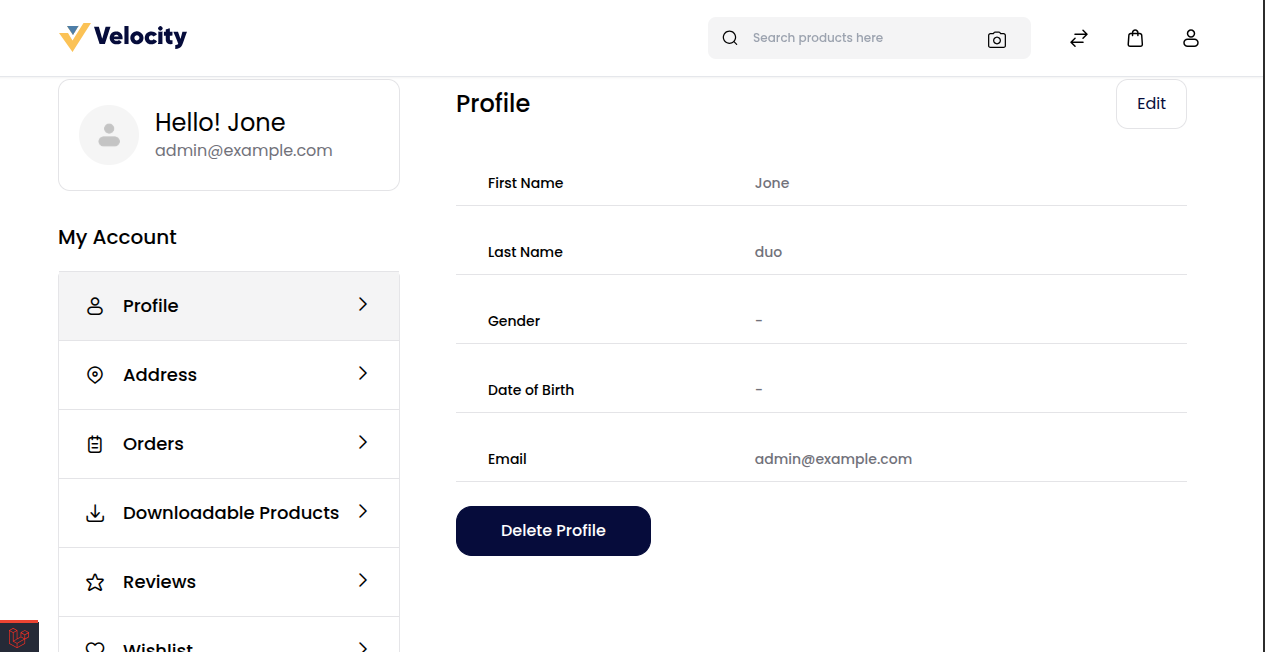
Step: 5 After successfully signing up or signing in, you can view and manage your company details from the Profile section, as shown in the image below.
From here, you can access company information, users, orders, requisition lists, quotations, and other B2B features.
Companies Management (Admin End)
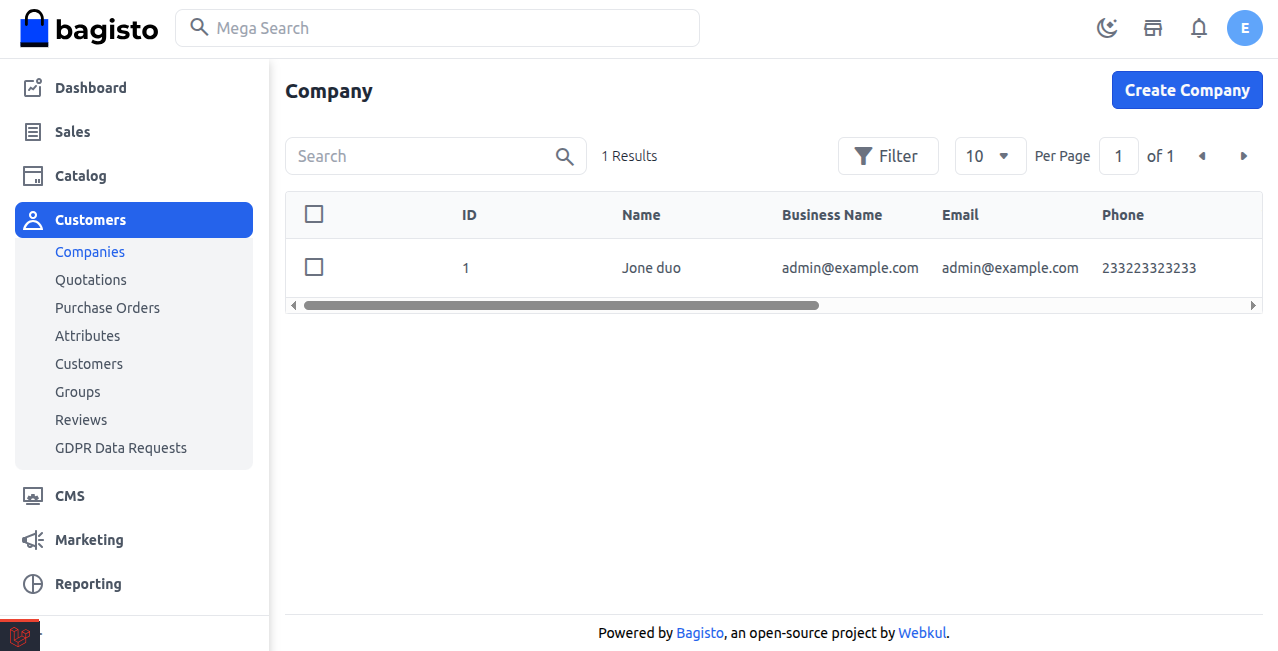
The admin can create and manage companies directly from the admin panel. This feature allows administrators to oversee all registered companies and manage B2B operations efficiently.
Using the Companies menu in the admin panel, you can view all registered companies along with their details such as company name, email address, and contact number.
Steps to Manage Companies
Log in to the Admin Panel and navigate to B2B → Companies. The companies list will be displayed, as shown in the image below.
From the list you can Approve or Disable companies (when approval is required), update their status, Assign a Sales Representative to one or more companies, and edit or delete them.
Note: Newly registered companies appear with a Pending status when approval is required. Use the Approve action to activate a company so its members can sign in. See the Sales Representatives guide for assigning representatives.
Create Company
Admins can create a new company from the backend by filling in all the required details. This allows the company to access B2B features on the storefront.
Steps to Create a Company
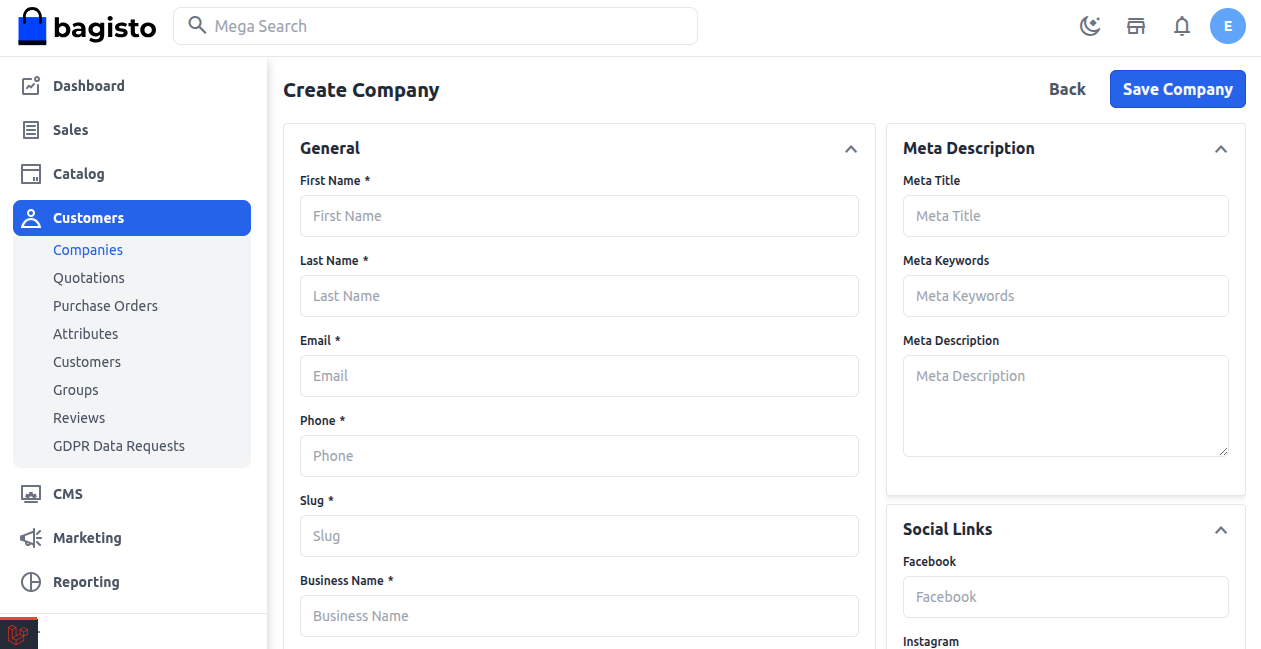
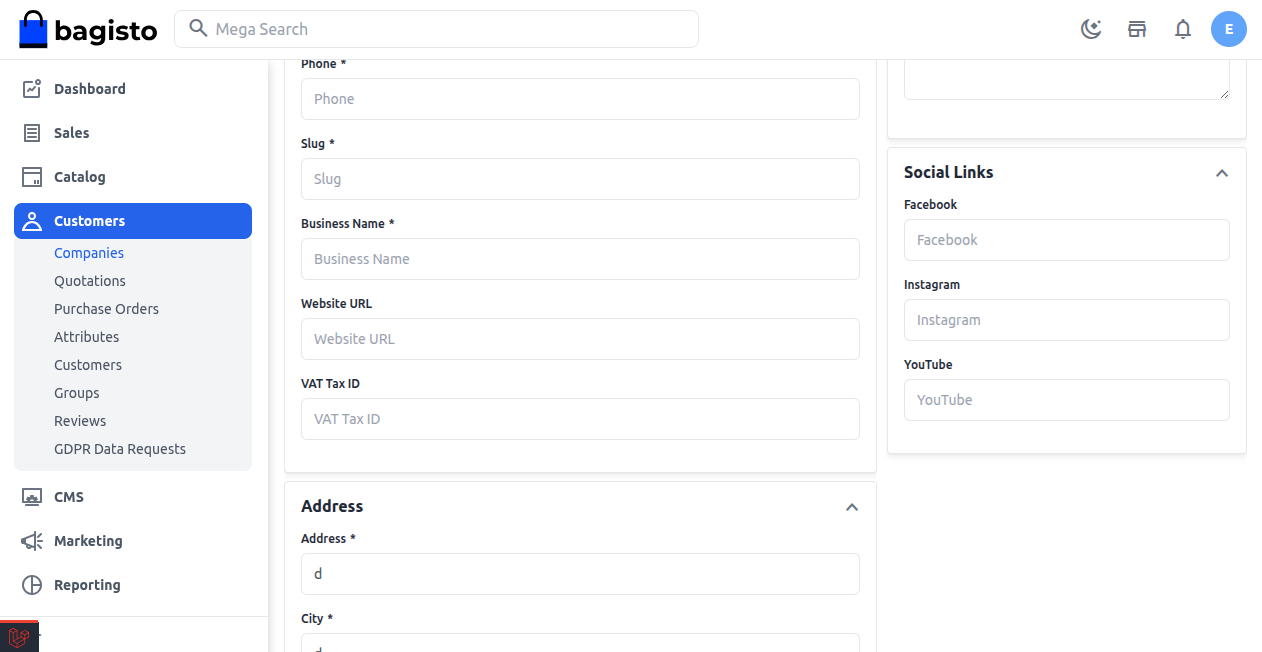
Step: 1 In the Admin Panel, navigate to B2B → Companies and click Create Company. The company creation form will open, as shown in the image below.
Step: 2 Fill in the company details under the General section.
1) First Name – Enter the company contact person's first name.
2) Last Name – Enter the last name.
3) Email – Enter the company's email address.
4) Phone – Enter the contact number.
5) Slug – Enter a unique identifier for the company.
6) Business Name – Enter the company or organization name.
7) Website URL – Enter the company's website (if available).
8) VAT Tax ID – Enter the company's tax identification number.
Meta Information
1) Meta Title – Enter the meta title.
2) Meta Keywords – Enter the meta keywords.
3) Meta Description – Enter the meta description.
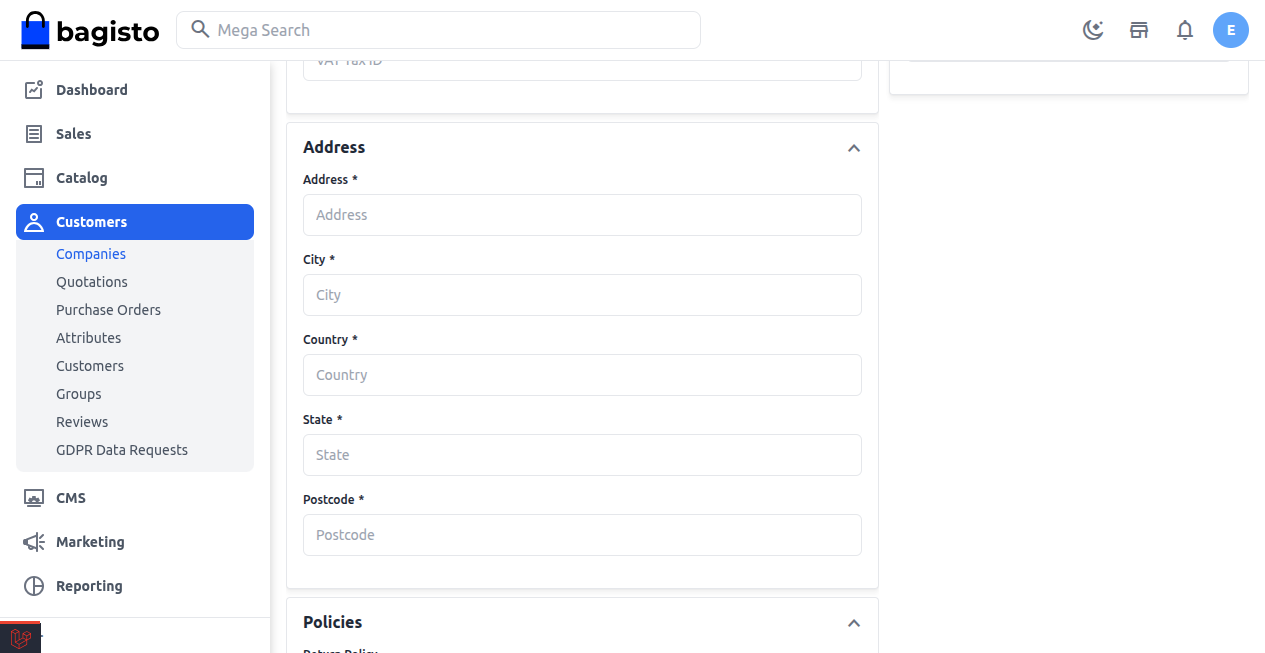
Step: 3 Fill in the Address and Social Links details.
Address
1) Address – Enter the company's street address.
2) City – Enter the city name.
3) Country – Select the country.
4) State – Select the state.
5) Postcode – Enter the postal code.
Social Links
1) Facebook – Enter the company's Facebook page URL.
2) Instagram – Enter the company's Instagram profile URL.
3) YouTube – Enter the company's YouTube channel URL.
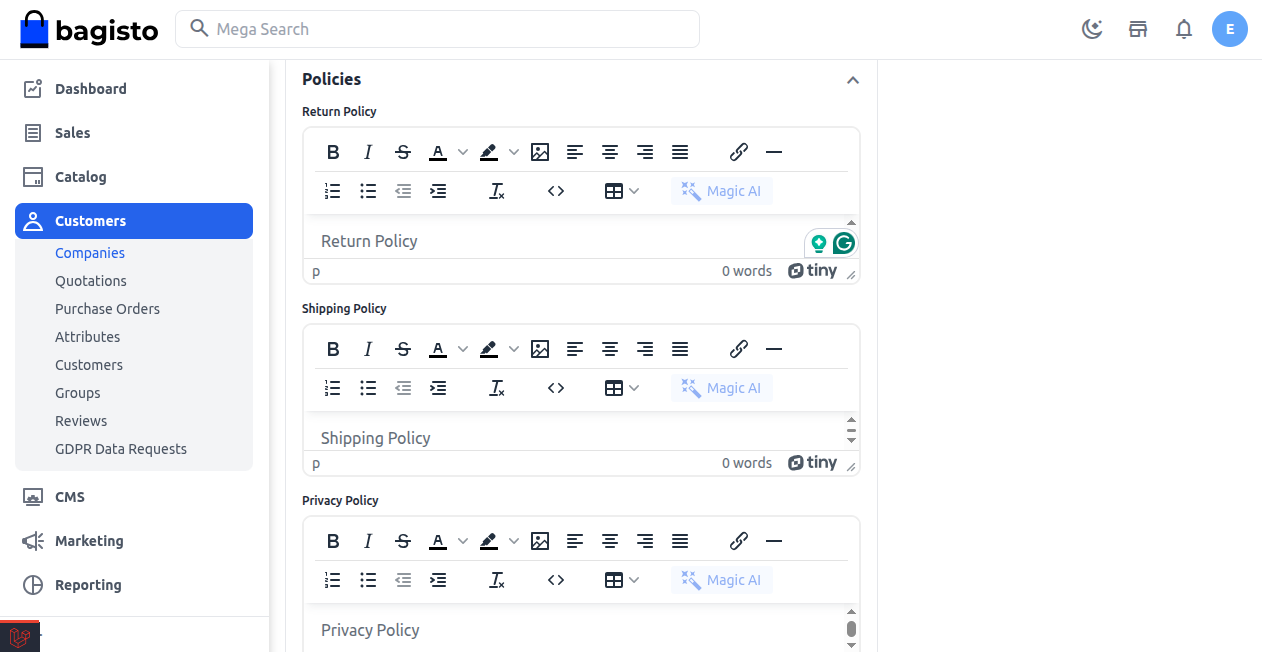
Step: 4 Configure the company Policies.
1) Return Policy – Enter the company's return policy.
2) Shipping Policy – Enter the shipping terms.
3) Privacy Policy – Enter the privacy policy details.
After completing all details, click Save Company to create the company. Use Back to return to the previous screen without saving.
Note: The admin can edit or delete any company later from the companies list using the Actions column.
Custom Attributes
If the administrator has created any Company Attributes, they appear in the Custom Attributes section of the company create/edit form. This lets you capture extra business information beyond the default fields. See the Company Attributes guide for details.
Sales Representative & Approval
When editing a company, the Sales Representative & Approval section lets the admin set the company's Approval Status (Active / Pending) and assign an Assigned Sales Representative who will manage the company. See the Sales Representatives guide for more.